
Turn your home, porch, or yard into a haunted attraction with these creative DIY Halloween prop ideas. From floating ghosts and giant spiders to bubbling cauldrons and eerie graveyard figures, these projects can make an ordinary space feel ready for Halloween night.
You do not need professional equipment or an enormous decorating budget. Many homemade Halloween props can be built with cardboard, foam, fabric, wire, plastic containers, thrift-store finds, and inexpensive craft supplies.
Choose one statement prop for a small display, or combine several projects to create a complete haunted-house scene. Always consider stability, visibility, weather exposure, and electrical safety when placing props outdoors.
Affiliate note: This article may contain affiliate links. If you buy through these links, we may earn a small commission at no extra cost to you.
More Christmas Decorating Inspiration
Quick List: 15 DIY Halloween Prop Ideas
- Life-size packing tape ghost
- Eerie chicken-wire ghost
- Giant yard spider
- Oversized spiderweb
- Bubbling witch cauldron
- Lightweight foam tombstones
- Skeleton climbing the house
- Graveyard groundbreaker
- Haunted well prop
- Floating head illusion
- Giant tentacle monster
- Headless porch figure
- Haunted cemetery gate
- Caged skeleton prop
- Glowing ghost circle
How to Create a Convincing Halloween Prop Display
Begin with one large prop as the focal point of your display. A giant spider, haunted well, bubbling cauldron, or cemetery gate can immediately establish the theme and guide the placement of your smaller decorations.
Add props at different heights to create depth. Place tombstones and groundbreakers near the lawn, skeletons and ghosts around eye level, and lightweight spiders or floating figures above the main display.
Finish the scene with controlled lighting and a few repeated details. Colored spotlights, flameless lanterns, torn fabric, faux moss, dried leaves, and plastic chain can connect separate projects without making the area look overcrowded.
One statement prop + two supporting props + layered lighting + repeated textures + a clear walking path
Choose the Best Props for Your Halloween Style
| Halloween Style | Best Props to Use | Why It Works |
|---|---|---|
| Haunted Graveyard | Foam tombstones, groundbreakers, cemetery gate, and skeletons | Creates a complete outdoor cemetery scene with strong visual depth |
| Ghostly and Eerie | Packing-tape ghost, chicken-wire ghost, floating head, and ghost circle | Uses pale fabric and soft lighting to produce an atmospheric display |
| Witch’s Corner | Glowing cauldron, potion bottles, broom, lanterns, and spell books | Works well in a compact porch corner or indoor party display |
| Monster Invasion | Giant spider, oversized web, tentacle monster, and climbing skeletons | Creates a dramatic display that can be seen clearly from the street |
| Haunted-House Entrance | Headless figure, haunted well, caged skeleton, and cemetery gate | Frames the entrance and gives visitors an immersive first impression |
Creative Halloween Props You Can Make at Home
1
Create a Life-Size Packing Tape Ghost
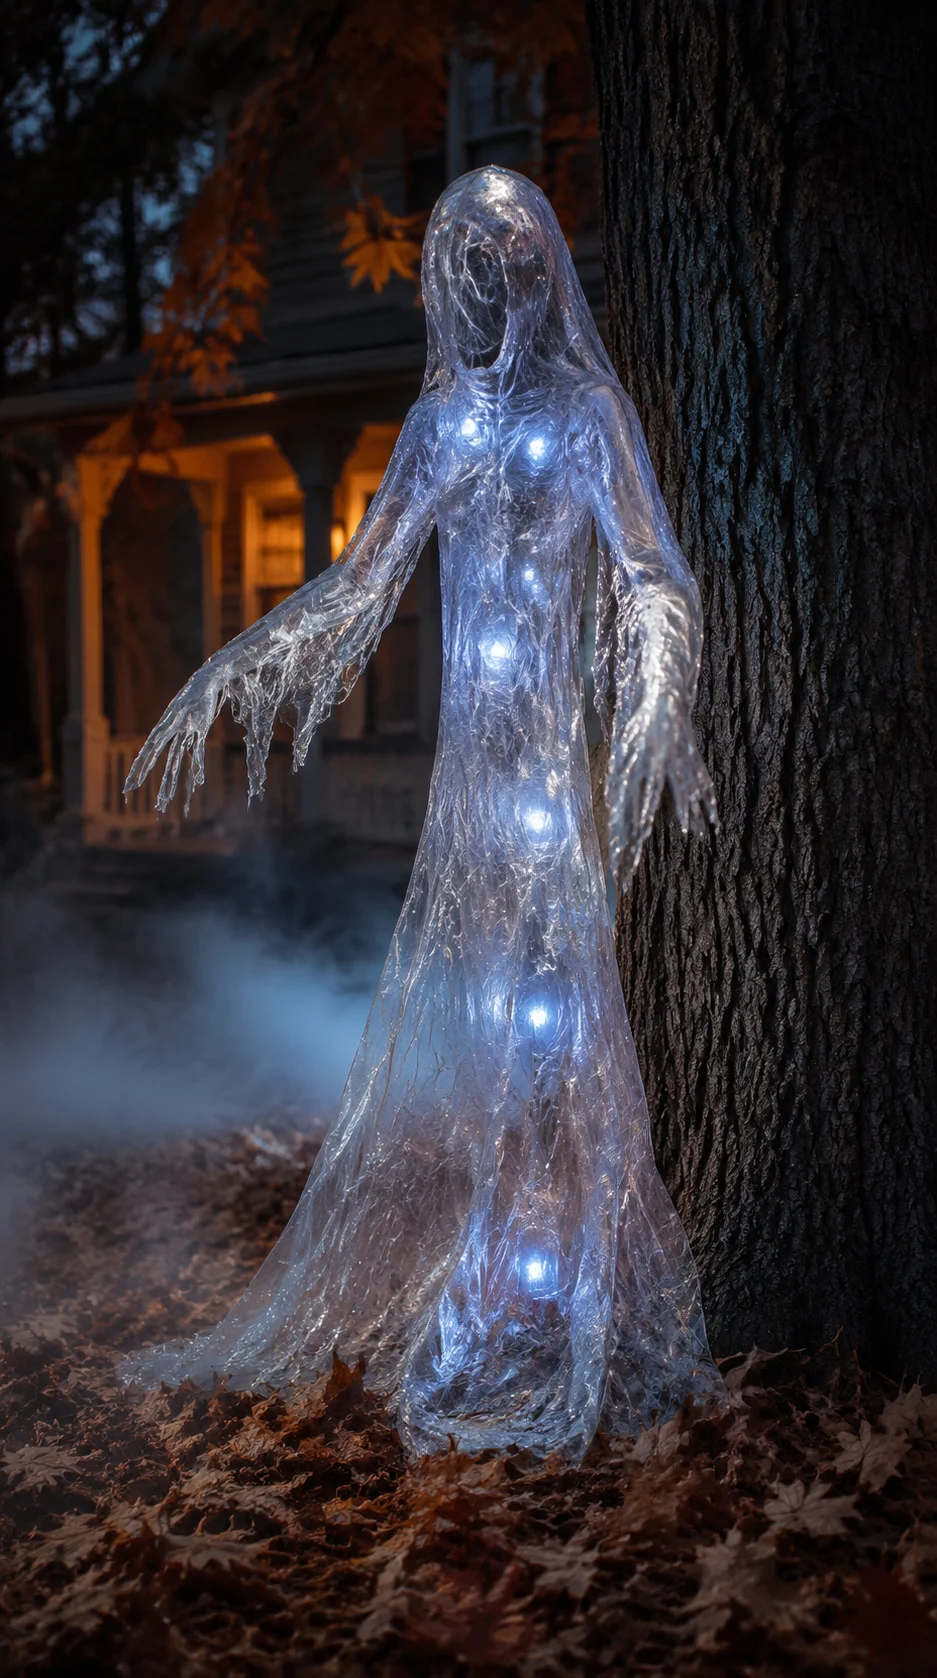 Wrap a dress form or mannequin loosely with plastic wrap, followed by several layers of clear packing tape. Carefully cut along the back, remove the transparent shell, and reconnect the opening with more tape.
Pose the lightweight figure beside a tree, near a staircase, or inside a dimly lit window. Hide white or blue battery lights inside the form to make the transparent ghost glow after dark.
2
Shape an Eerie Chicken-Wire Ghost
 Shape chicken wire around a mannequin, dress form, or large container to create a hollow human figure. Form the shoulders, waist, and skirt separately, and then securely join the sections.
Drape thin cheesecloth over the structure and gently pull at its edges for a weathered look. Pale gray and white materials help the ghost appear almost invisible in daylight and mysteriously solid at night.
Protect your hands:
Cut wire can have sharp edges, so use sturdy work gloves and fold every exposed end inward.
3
Build a Giant Yard Spider
 Use two different-sized plastic bowls, foam balls, or stuffed black bags to form the spider’s body. Create eight legs from flexible tubing, foam pipe insulation, or lightweight PVC pipe.
Cover the body with black fabric or faux fur and add painted foam eyes. Place the spider across a bush, porch railing, roof edge, or oversized web for an attention-grabbing outdoor display.
4
Make an Oversized Spiderweb
 Create the web’s main lines with thick white rope, clothesline, or weather-resistant cord. Tie smaller pieces between the supports, working outward from the center to form a spiral pattern.
Stretch the web across a garage door, fence, porch corner, or between two trees. Add one giant spider and a few smaller spiders without overcrowding the design.
5
Craft a Bubbling Witch Cauldron
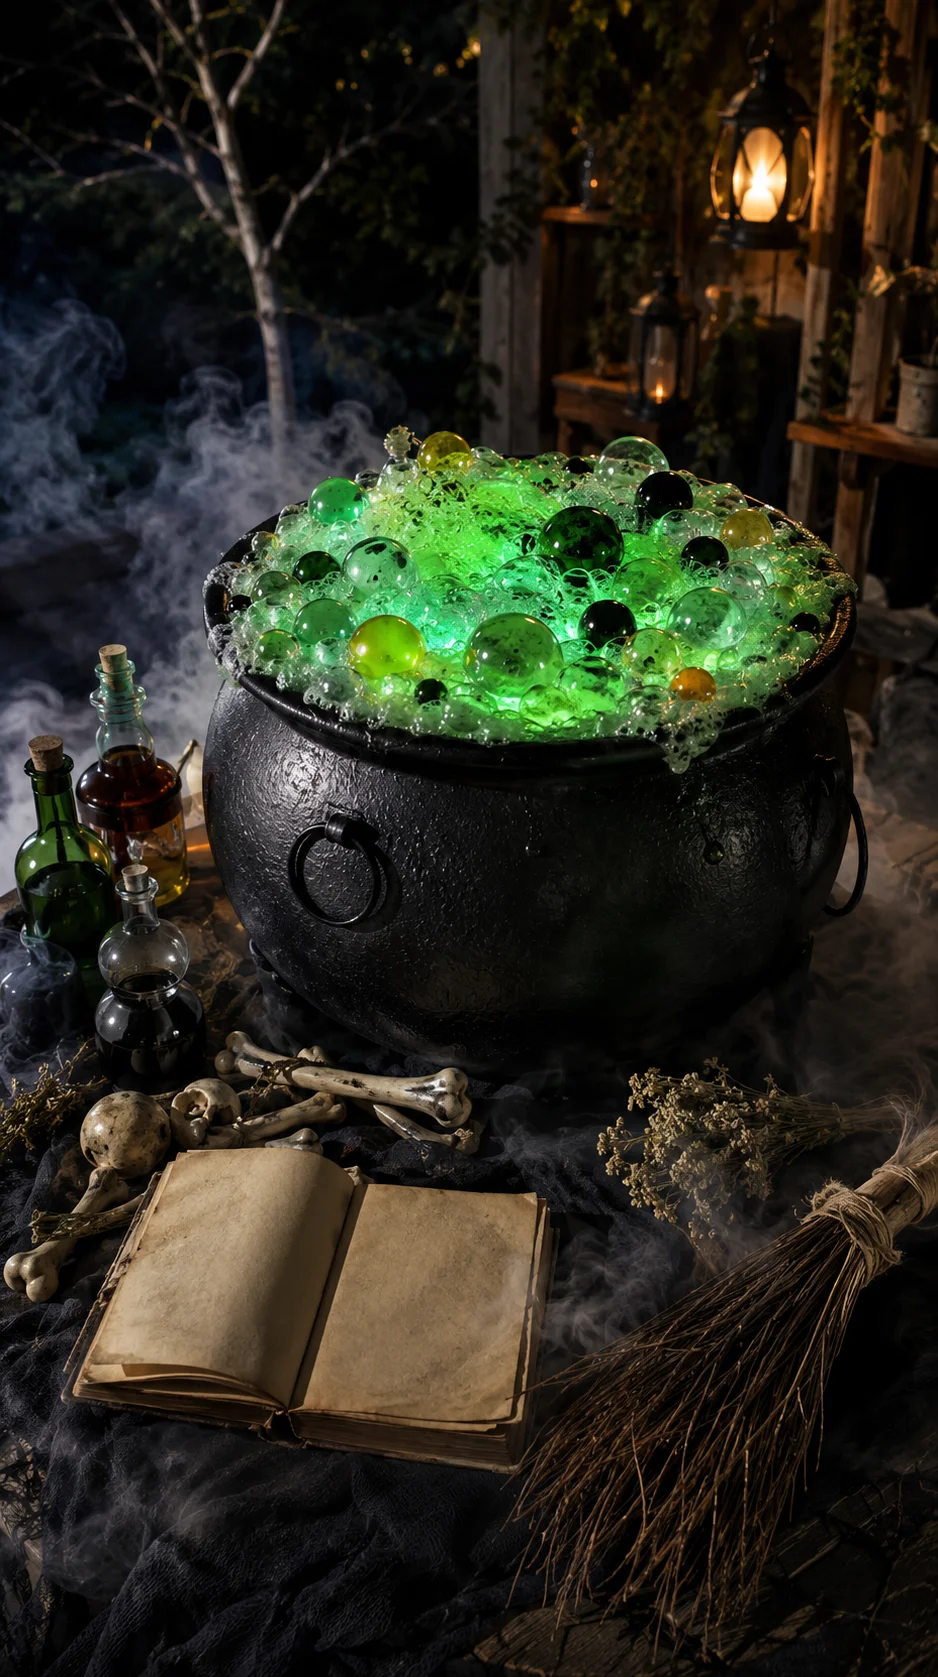 Start with a large plastic cauldron and fill its opening with expanding foam, painted foam balls, or clear ornaments to resemble bubbles. Paint the mixture in shades of green, yellow, and black.
Place waterproof green lights underneath the bubbles to make the potion glow. Surround the cauldron with faux bones, spell books, potion bottles, and a broom to complete the witch’s station.
Add a colorful glow:
Battery-operated waterproof lights can illuminate the cauldron without requiring an open flame.
6
Create Lightweight Foam Tombstones
 Cut tombstone shapes from rigid insulation foam and carve shallow cracks, chipped edges, or decorative borders with suitable foam-safe tools. Add layers of gray, charcoal, and moss-green paint for an aged stone effect.
Arrange the finished tombstones at different angles across the lawn. Partially hide a few behind shrubs or low ground fog so the cemetery looks larger and less uniform.
7
Stage a Skeleton Climbing the House
 Position lightweight plastic skeletons so they appear to climb a porch column, fence, trellis, or exterior wall. Bend their arms and legs into natural climbing positions before securing every major joint.
Use several skeletons to create a playful invasion, or use one figure reaching toward a window. Small spotlights can make the scene visible from the street at night.
8
Build a Graveyard Groundbreaker
 Attach a plastic skull and skeleton hands to short stakes so the figure appears to be crawling out of the ground. Add torn fabric around its shoulders to hide the supports and suggest an old burial outfit.
Surround the figure with loose mulch, dried leaves, lightweight foam rocks, and a nearby tombstone. Aim a dim green or cool white light upward to emphasize the face.
Complete the scene:
Posable skeleton hands can also emerge from planters, window boxes, candy bowls, and wreaths.
9
Make a Haunted Well Prop
 Build a circular well from stacked cardboard boxes, lightweight foam blocks, or painted plastic containers. Use gray and brown paint to create the appearance of old stone or weathered wood.
Add a dark opening, a simple roof, rope, and bucket. A wig draped over a foam head or mannequin can create an eerie figure emerging from the well without requiring a complete body.
10
Design a Floating Head Illusion
 Paint a lightweight foam head in pale gray tones and add dark shadows around the eyes and mouth. Cover its support with shredded cheesecloth so the head appears to float in a dark corner.
Hang it beneath a tree, covered porch, or indoor archway using securely attached transparent line. Gentle air movement will make the fabric shift, creating a simple but effective illusion.
11
Construct a Giant Tentacle Monster
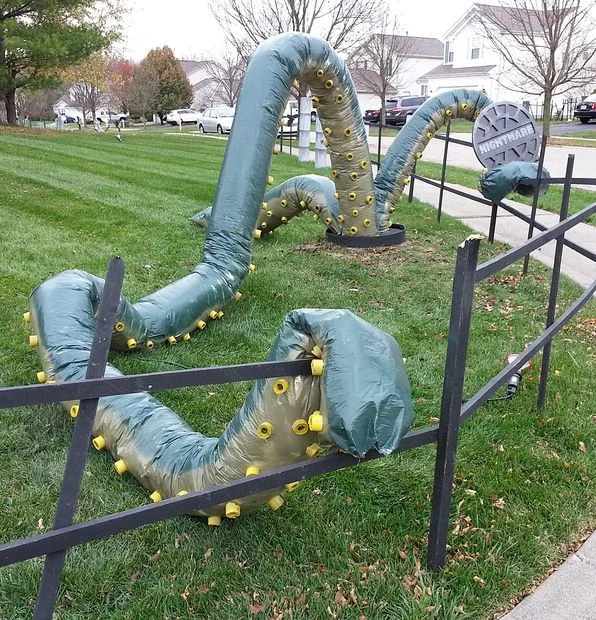 Shape long tentacles from pool noodles, flexible tubing, or foam pipe insulation. Add rounded foam pieces underneath as suction cups before painting the tentacles purple, green, or deep red.
Position the tentacles so they seem to emerge from windows, trash cans, bushes, or beneath a garage door. Showing only parts of the creature lets viewers imagine that something much larger is hiding nearby.
Start with a flexible base:
Foam pool noodles are lightweight and can be cut, curved, painted, and connected for oversized props.
12
Create a Headless Porch Figure
 Build a simple body frame from PVC pipe and dress it in an oversized coat, shirt, cape, or old formal outfit. Stuff the clothing lightly around the shoulders and arms while leaving the collar empty.
Give the figure gloves and place a lightweight faux pumpkin or lantern in its hands. Position it beside the front door as a silent greeter for trick-or-treaters.
13
Build a Haunted Cemetery Gate
 Construct a lightweight gate from PVC pipe, foam board, or thin wood strips. Paint it matte black and dry-brush rust-colored paint around the joints and edges to imitate aged iron.
Add foam finials, plastic chain, faux moss, ravens, or a weathered sign. Use the gate to frame a graveyard display while preserving a wide and completely unobstructed entrance.
14
Make a Caged Skeleton Prop
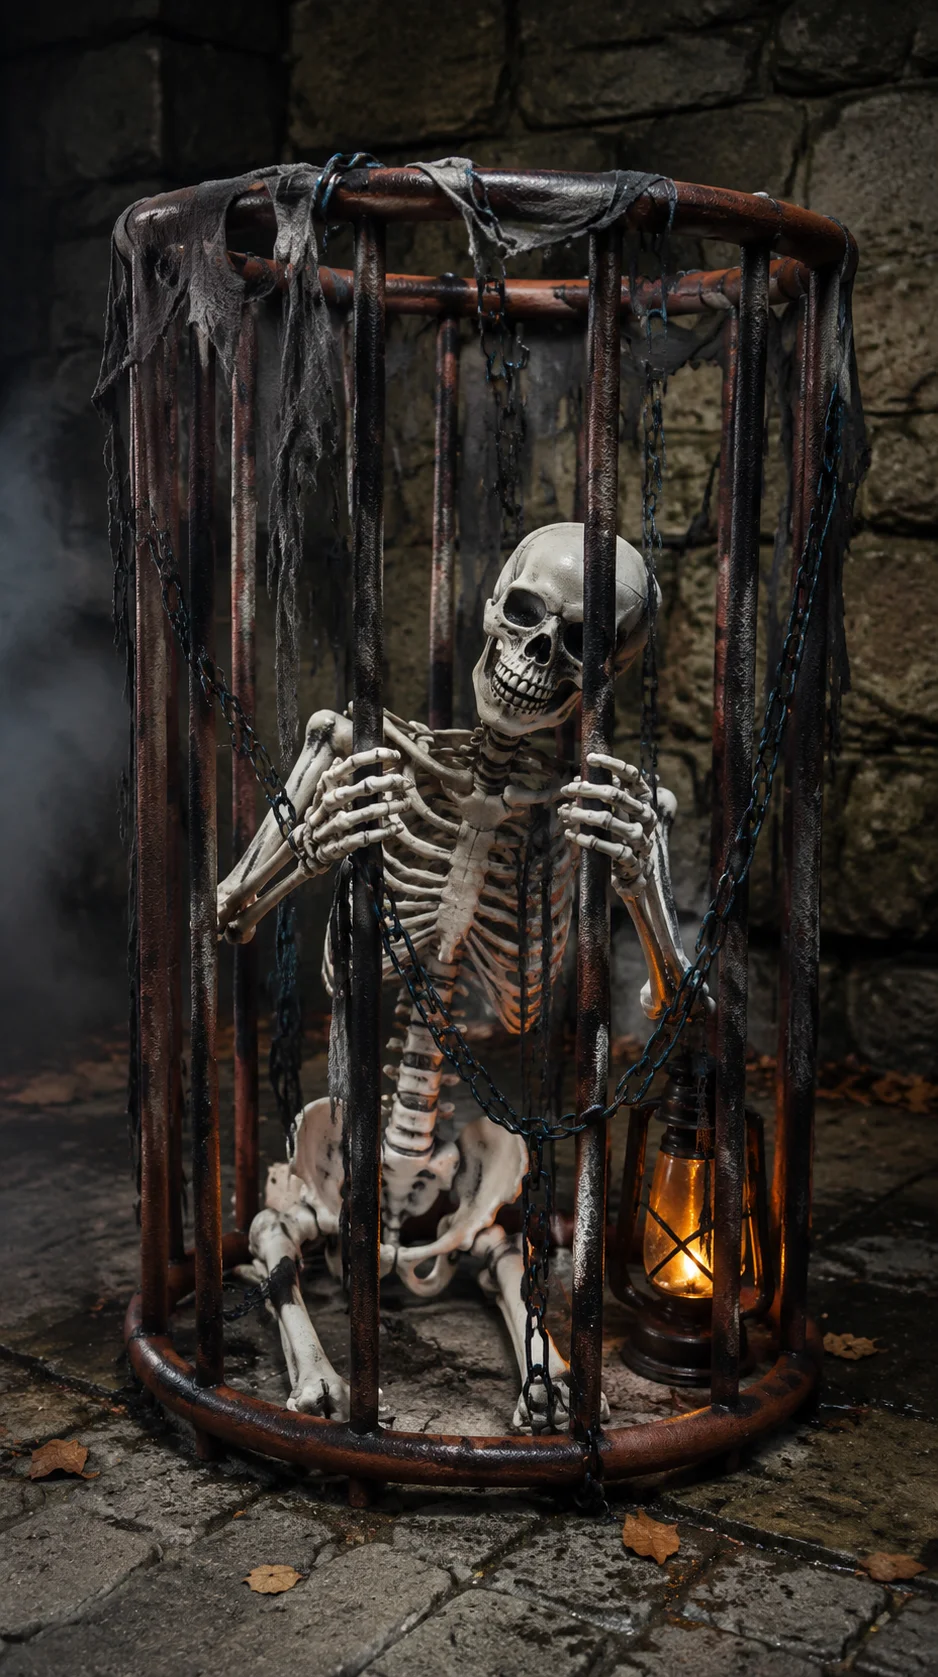 Create a decorative cage from lightweight hoops connected with painted PVC pipe or sturdy foam strips. Place a plastic skeleton inside and pose its hands around the bars.
Add faux chain, torn fabric, and a dim battery light to give the cage an aged dungeon appearance. Keep large versions on the ground unless you have a professionally rated overhead support.
Create an aged appearance:
Lightweight plastic chain can be painted with rust and metallic colors to resemble old iron.
15
Design a Glowing Ghost Circle
 Place foam heads or lightweight balls on garden stakes and cover each one with white outdoor fabric. Arrange the ghosts in a circle with their fabric-covered arms appearing to hold hands.
Position the group around a tree, cauldron, or cluster of flameless lanterns. Illuminating the figures from below can turn this simple lawn project into an atmospheric nighttime display.
Essential Supplies for Homemade Halloween Props
| Supply | Useful For | Shopping Option |
|---|---|---|
| PVC pipe | Frames, figures, arches, and supports | Search on Amazon |
| Cheesecloth | Ghosts, cobwebs, and aged fabric | Search on Amazon |
| Rigid foam board | Tombstones, signs, doors, and structures | Search on Amazon |
| Flameless lights | Cauldrons, ghosts, lanterns, and pumpkins | Search on Amazon |
| Outdoor craft paint | Weather-resistant finishes and aging effects | Search on Amazon |
How to Make DIY Halloween Props Look Realistic
- Use several paint shades: Layer black, gray, brown, green, and cream instead of applying one flat color.
- Hide modern materials: Cover visible tape, plastic, bright foam, wires, and supports with paint, fabric, moss, or leaves.
- Vary the height: Place props at ground level, eye level, and above the display to create depth.
- Create natural poses: Bend skeleton elbows, knees, wrists, and fingers instead of leaving the limbs completely straight.
- Use shadows carefully: Place lights below or beside props so details remain visible without flooding the entire yard.
- Tell one clear story: A coordinated cemetery, witch station, ghost gathering, or monster attack feels more immersive than unrelated props placed together.
Important Halloween Prop Safety Tips
- Keep sidewalks, steps, doors, driveways, and emergency exits completely clear.
- Anchor tall, hanging, and lightweight outdoor props against wind.
- Use outdoor-rated extension cords, lights, and connections in exterior displays.
- Avoid open flames near foam, fabric, paper, plastic, dried leaves, or other flammable materials.
- Cover or fold sharp wire ends and keep small detachable pieces away from children and pets.
- Do not place realistic figures where they could alarm drivers or be mistaken for an actual emergency.
- Inspect outdoor props after wind or rain and remove anything that has become unstable.
Frequently Asked Questions
What materials can I use to make Halloween props?
Common materials include cardboard, rigid foam, PVC pipe, pool noodles, chicken wire, plastic containers, fabric, cheesecloth, rope, craft paint, faux bones, and battery-operated lights.
What is the easiest homemade Halloween prop?
A glowing ghost circle, graveyard groundbreaker, oversized rope spiderweb, or simple cauldron display can be created with basic materials and limited building experience.
How can I weatherproof homemade Halloween props?
Use materials and finishes suitable for outdoor conditions, protect electrical connections, seal compatible painted surfaces, anchor lightweight pieces, and bring delicate props indoors during severe weather.
How do I light Halloween props safely?
Use cool-running LED lights, flameless candles, and outdoor-rated lighting where appropriate. Keep cords protected and never place open flames near fabric, foam, paper, plastic, or dried decorations.
How should I store large DIY Halloween props?
Design large props in detachable sections when possible. Clean and dry every piece, label the components, protect painted surfaces, and store lightweight sections upright in a dry location.
1 thought on “15 DIY Halloween Prop Ideas”