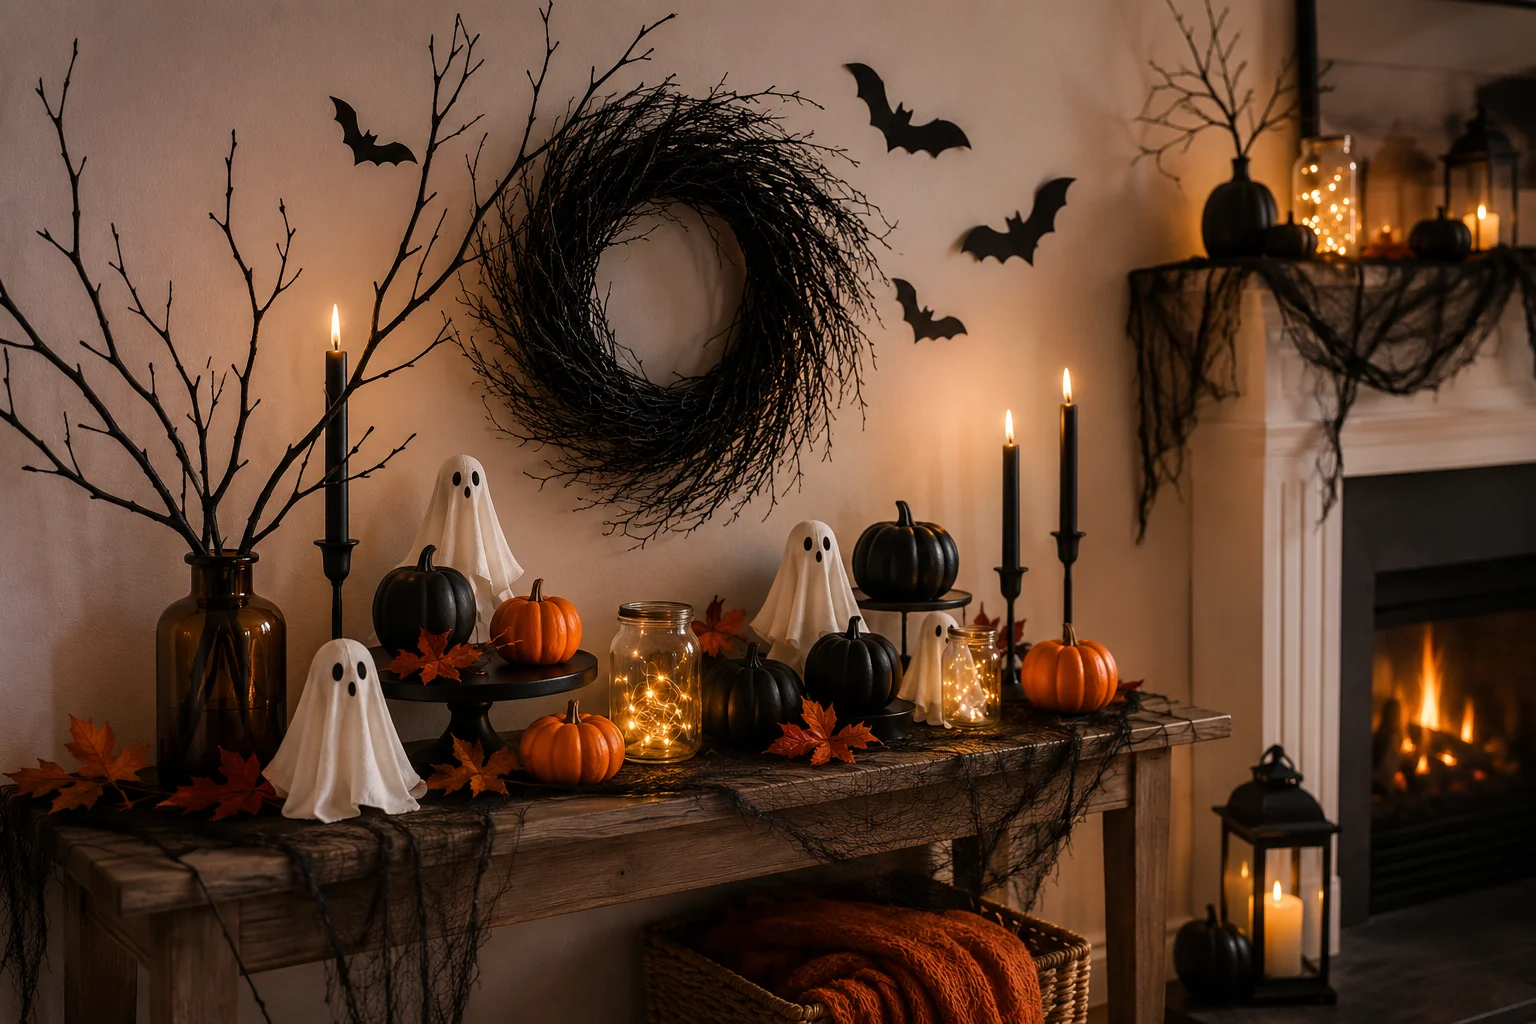
You do not need expensive decorations to give your home a spooky Halloween makeover. With a few dollar-store supplies and simple DIY tricks, ordinary items can become stylish wreaths, glowing ghosts, creepy centerpieces, and memorable porch decorations.
These dollar store Halloween decorations include projects for your mantel, front door, porch, party table, windows, and yard. Most ideas use affordable materials such as plastic skulls, foam pumpkins, planters, picture frames, craft paint, fairy lights, and gauze.
Choose a few projects that share the same colors and theme, then arrange them together for a coordinated Halloween display that looks far more expensive than it really is.
Affiliate note: This article may contain affiliate links. If you buy through these links, we may earn a small commission at no extra cost to you.
More Halloween Decorating Inspiration
Quick List: Dollar Store Halloween Decorations
|
|
How to Make Dollar Store Halloween Decor Look Expensive
Start with a clear color palette. Black, cream, and burnt orange create a classic look, while black, purple, and antique gold feel more dramatic. Repeating the same three or four colors will make separate DIY projects look like one coordinated collection.
Change inexpensive plastic finishes with matte spray paint, textured paint, metallic wax, moss, ribbon, or gauze. Covering bright plastic and visible seams is often the biggest difference between a decoration that looks homemade and one that looks polished.
Finally, display projects in groups rather than scattering them around the house. Place items at different heights and add one natural element, such as branches, dried leaves, pinecones, or moss, to give the arrangement more depth.
Inexpensive base + matte paint + textured detail + coordinated color + warm LED lighting.
Choose the Right DIY for Your Space
| Area or Style | Best Decorations | Why It Works |
|---|---|---|
| Front door | Monster, pumpkin, or skull wreath | Creates one strong focal point |
| Porch | Planters, skeletons, lanterns, and pumpkin towers | Adds height and nighttime impact |
| Mantel | Ghost garland, gnomes, village, and lights | Uses a visible surface without cluttering the floor |
| Party table | Skull candles, lanterns, and vintage boxes | Combines decor with practical serving areas |
| Small apartment | Frames, garlands, wreaths, and mini villages | Provides style without taking much space |
Budget-Friendly Halloween DIYs to Try
1
Build a Mini Halloween Village
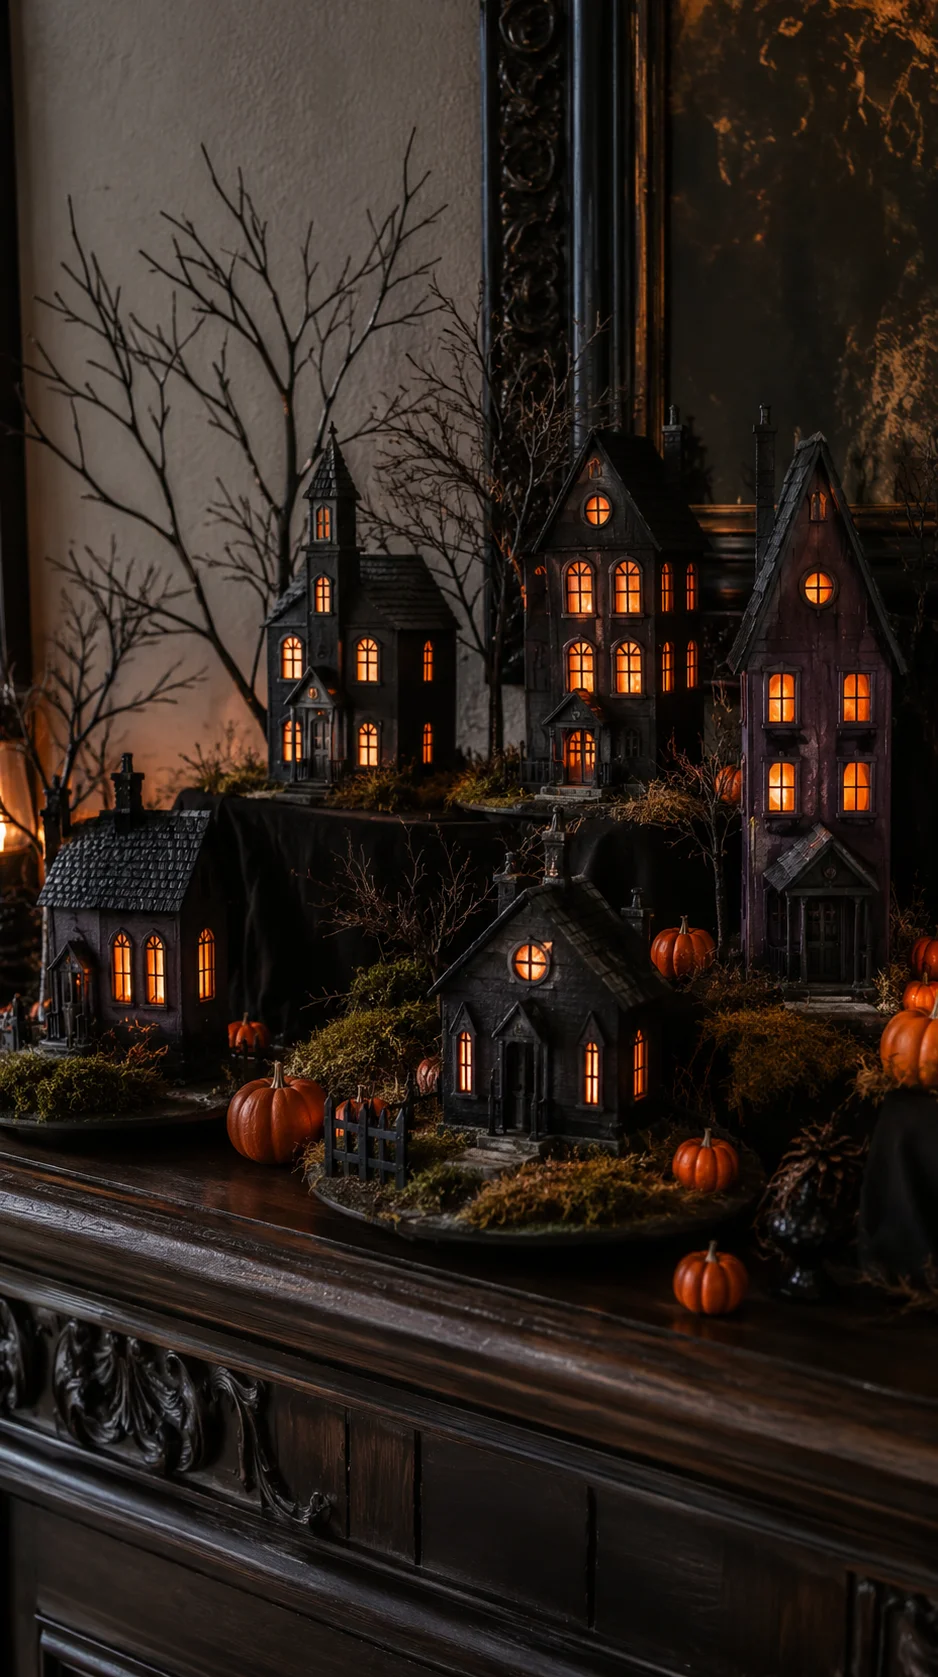 Transform inexpensive miniature houses into a haunted village with matte black, charcoal, and dark purple paint. Dry-brush the edges with gray paint to emphasize windows, roofs, and architectural details.
Arrange the houses on a shelf, mantel, or console table with miniature bare trees, moss, and tiny pumpkins. Place warm orange or purple battery lights behind the windows to make the village glow.
2
Create a Creepy Bug Picture Frame
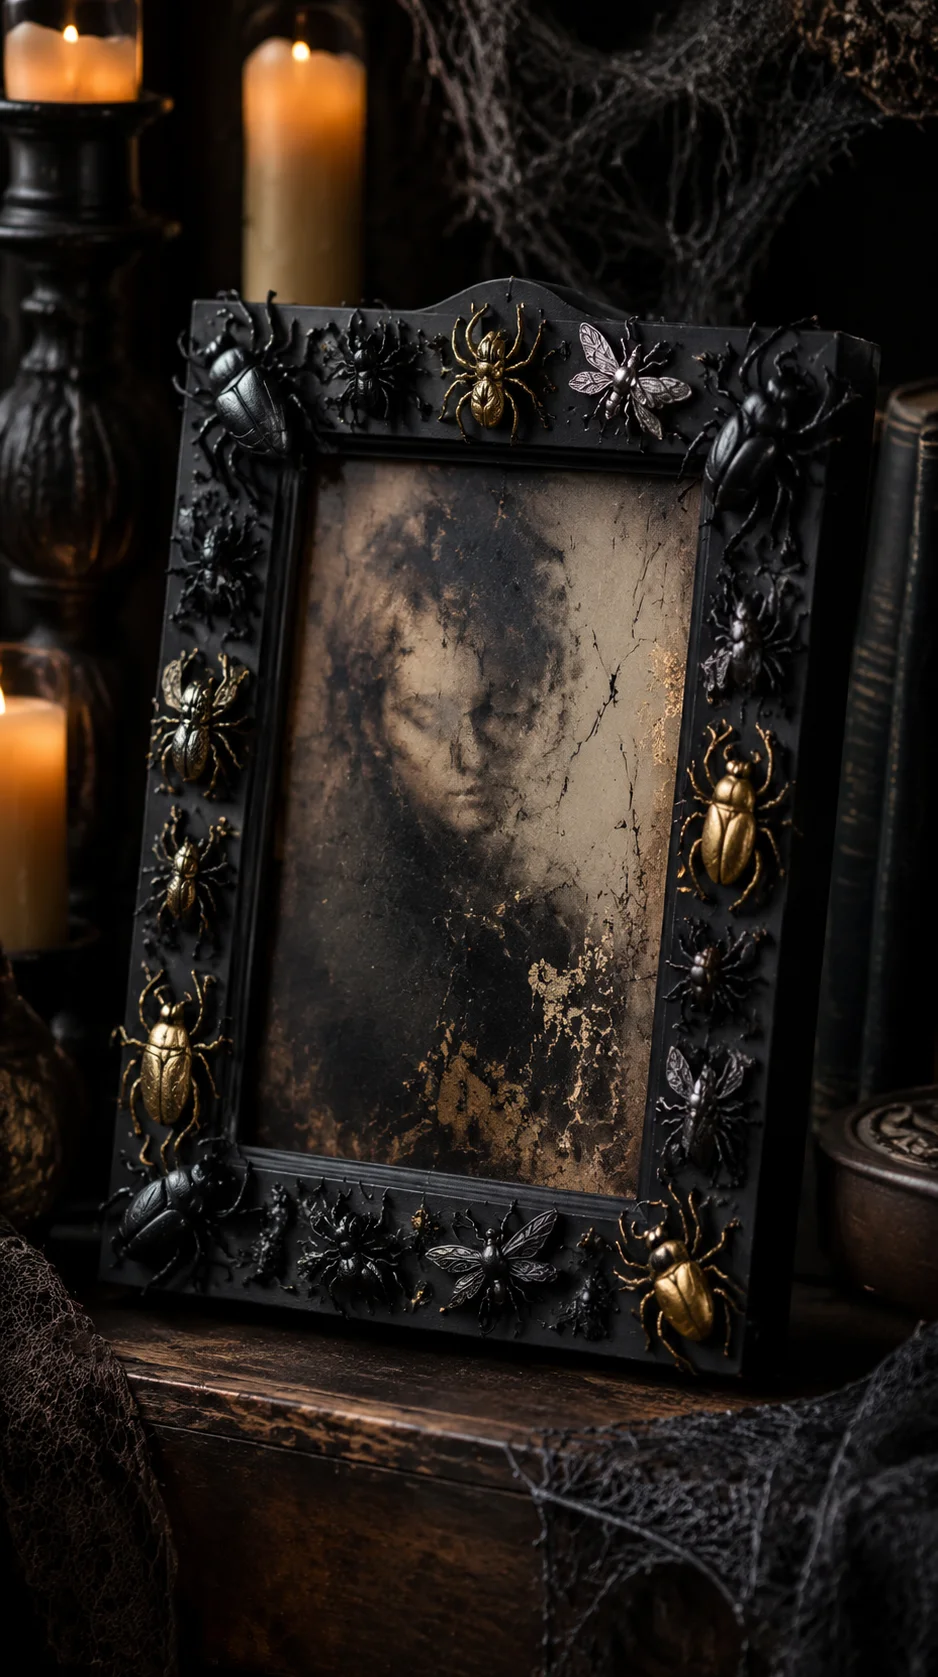 Paint a dollar-store picture frame matte black and attach plastic beetles, spiders, or insects around its edges. Use metallic gold or silver paint on selected bugs to make the design feel more decorative.
Place dark paper, an aged portrait, or a simple spiderweb design inside the frame. Display it on a gallery wall or lean it against books and potion bottles on a mantel.
Crafting supply:
Plastic insects can decorate frames, wreaths, jars, tables, and Halloween party favors.
3
Make Skull Candlesticks
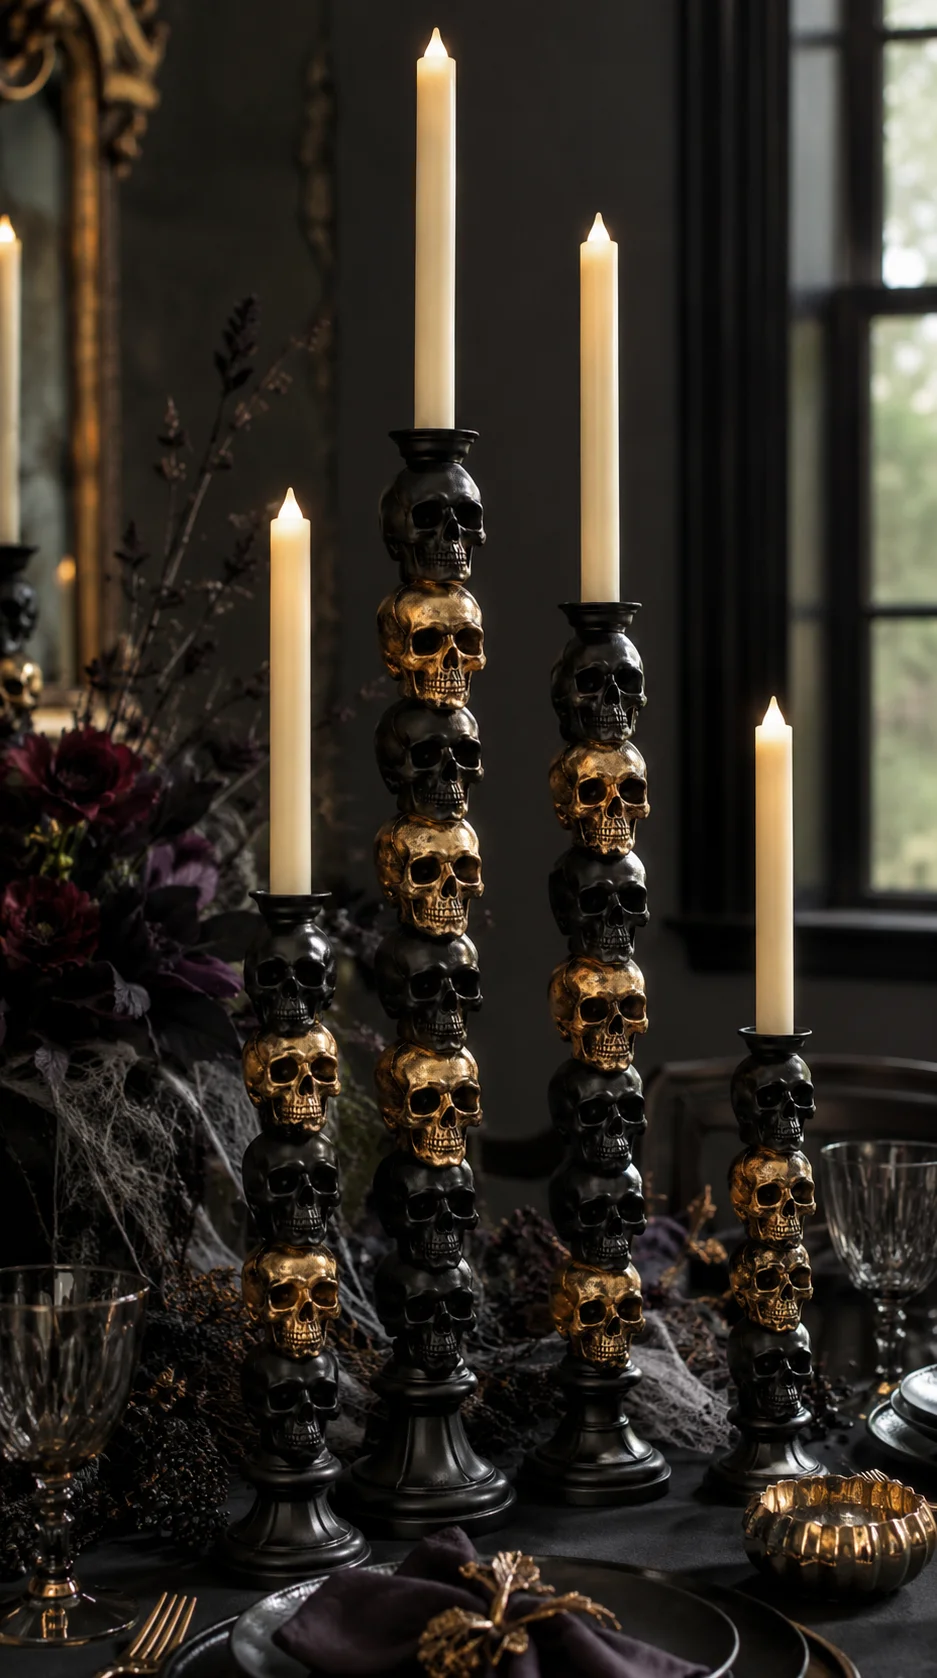 Stack lightweight plastic skulls on sturdy candle bases and secure them with an adhesive suitable for both materials. Paint the complete piece matte black, aged ivory, or antique gold.
Place flameless taper candles in the holders and arrange them at different heights. They make dramatic decorations for a mantel, entry table, or adults-only Halloween table.
4
Craft a Halloween Mummy Gnome
 Make a small gnome body from a stuffed sock, fabric, or a simple foam form. Add a faux-fur beard, wooden bead nose, and pointed hat wrapped loosely in white gauze.
Distress the gauze with a little diluted gray paint and give the gnome a miniature pumpkin or broom. Display it on a tiered tray, bookshelf, mantel, or party table.
5
Design a Monster Door Wreath
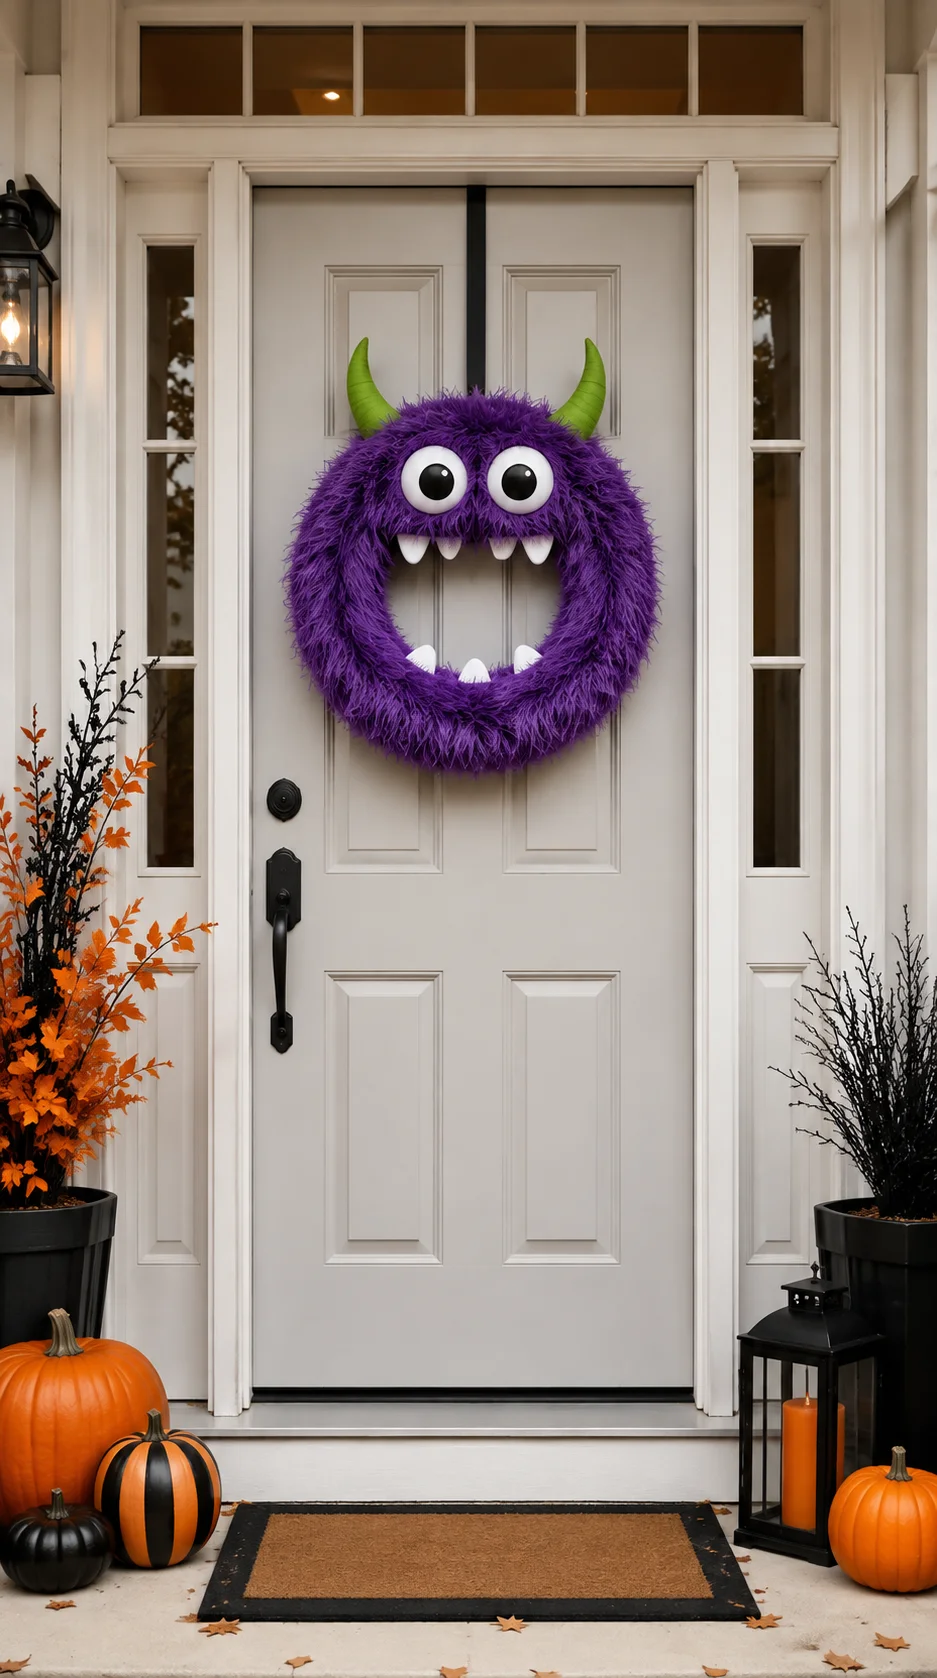 Wrap a foam wreath form with bright yarn, ribbon, or fuzzy fabric. Add oversized eyes, felt horns, and a row of white foam teeth to create a playful monster face.
Choose purple, green, orange, or black as the main color and repeat it in nearby porch decor. Keep all facial features firmly attached so the wreath can handle repeated movement from the door.
Start with a simple base:
Foam wreath forms are lightweight and easy to cover with ribbon, fabric, yarn, or mesh.
6
Style Spooky Halloween Planters
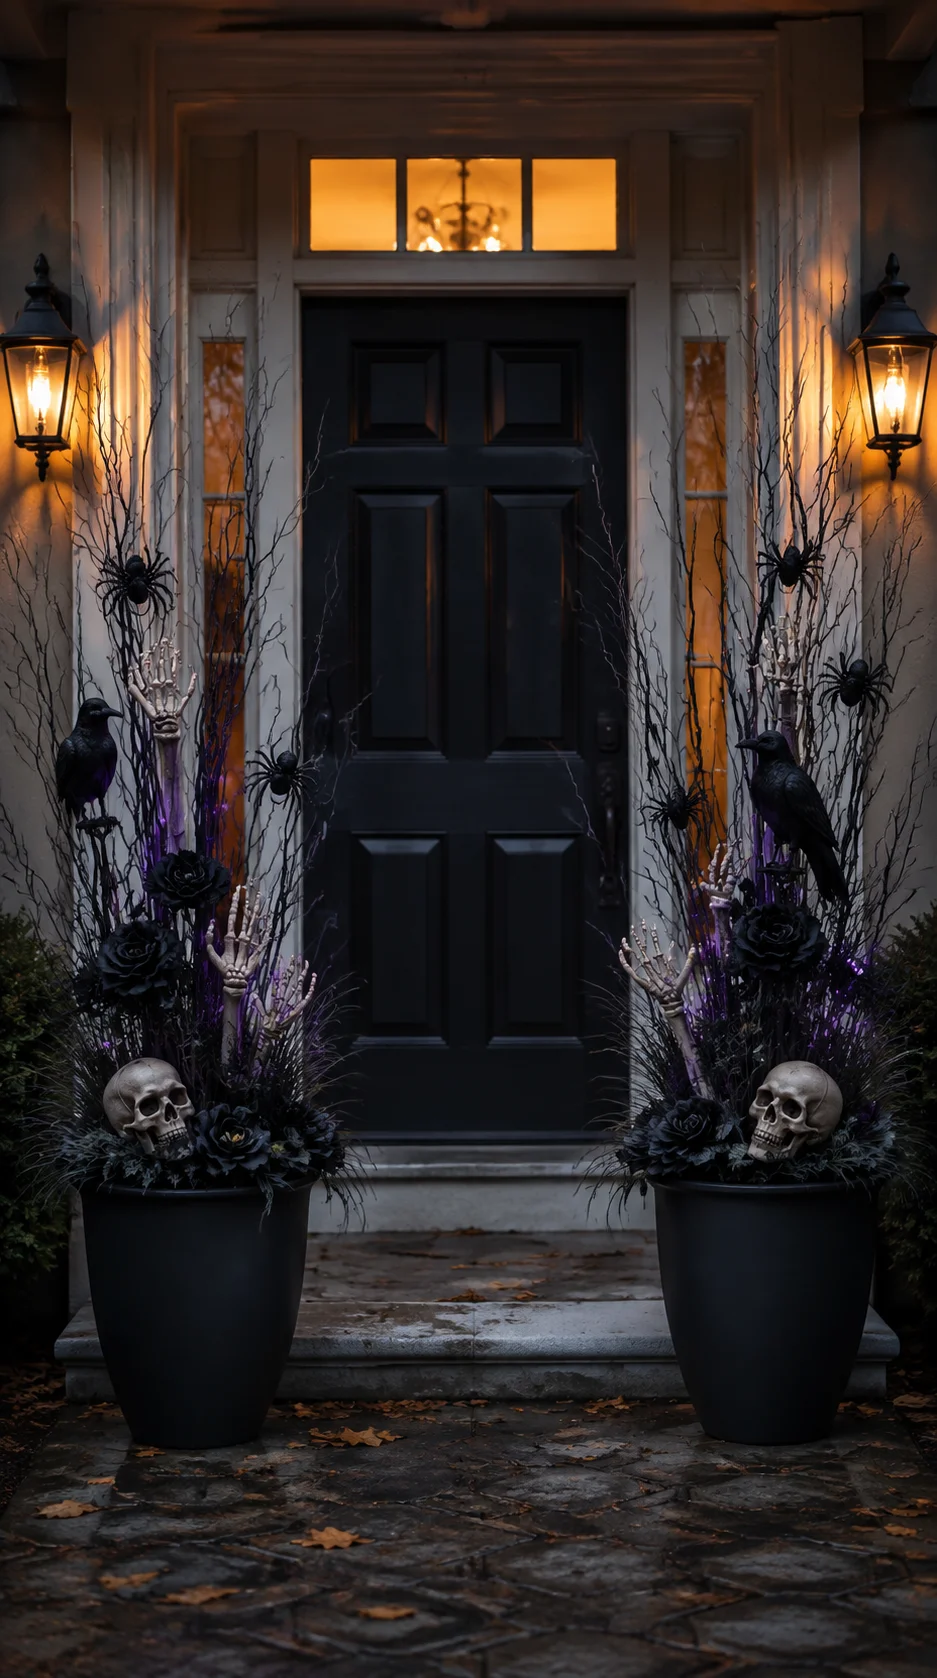 Paint inexpensive planters black and fill them with bare branches, dark artificial flowers, ornamental grass, or seasonal mums. Add plastic ravens, spiders, skulls, or skeleton hands between the stems.
Use one tall branch in the center and arrange shorter pieces around it. A strand of battery fairy lights can make the planter visible beside the front door after dark.
7
Stage a Posable Skeleton Scene
 Give an inexpensive skeleton a humorous activity instead of simply placing it in a chair. Let it read a book, hold a candy bowl, garden beside the porch, or enjoy a pretend cup of coffee.
Build a small story using thrifted accessories and dollar-store props. One clearly staged skeleton often looks more creative than several figures without a shared theme.
8
Hang a Lace Ghost Garland
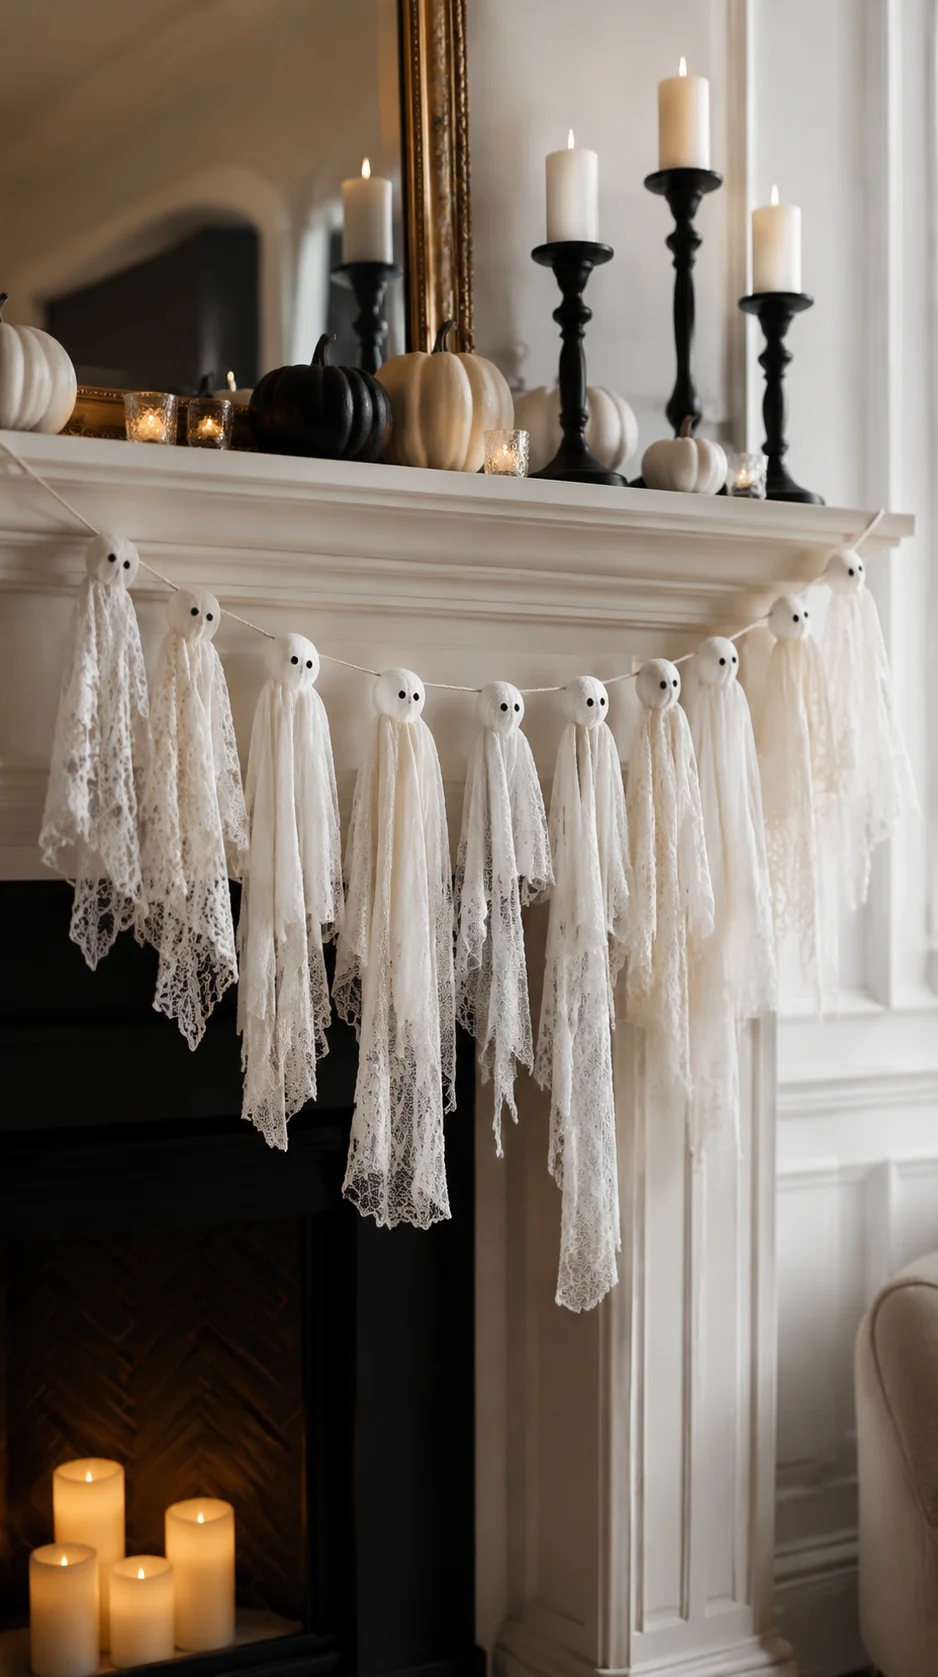 Form small ghost heads from lightweight foam balls and drape lace, cheesecloth, or white fabric over each one. Add tiny black felt eyes and gather the material loosely beneath each head.
Attach the ghosts to twine and hang the garland across a mantel, mirror, doorway, or party backdrop. Vary the ghost lengths slightly to create more movement.
Create a softer ghost:
White cheesecloth creates lightweight, flowing ghosts for indoor garlands and hanging decorations.
9
Make Glowing Halloween Lanterns
 Decorate glass jars or inexpensive plastic lanterns with translucent tissue, vinyl silhouettes, gauze, or painted ghost faces. Place a battery-operated candle or short fairy-light strand inside.
Group lanterns in several heights on a mantel, table, or porch step. Repeat the same face or silhouette style to make separate containers feel like a coordinated set.
10
Sew No-Stitch Felt Witch Gnomes
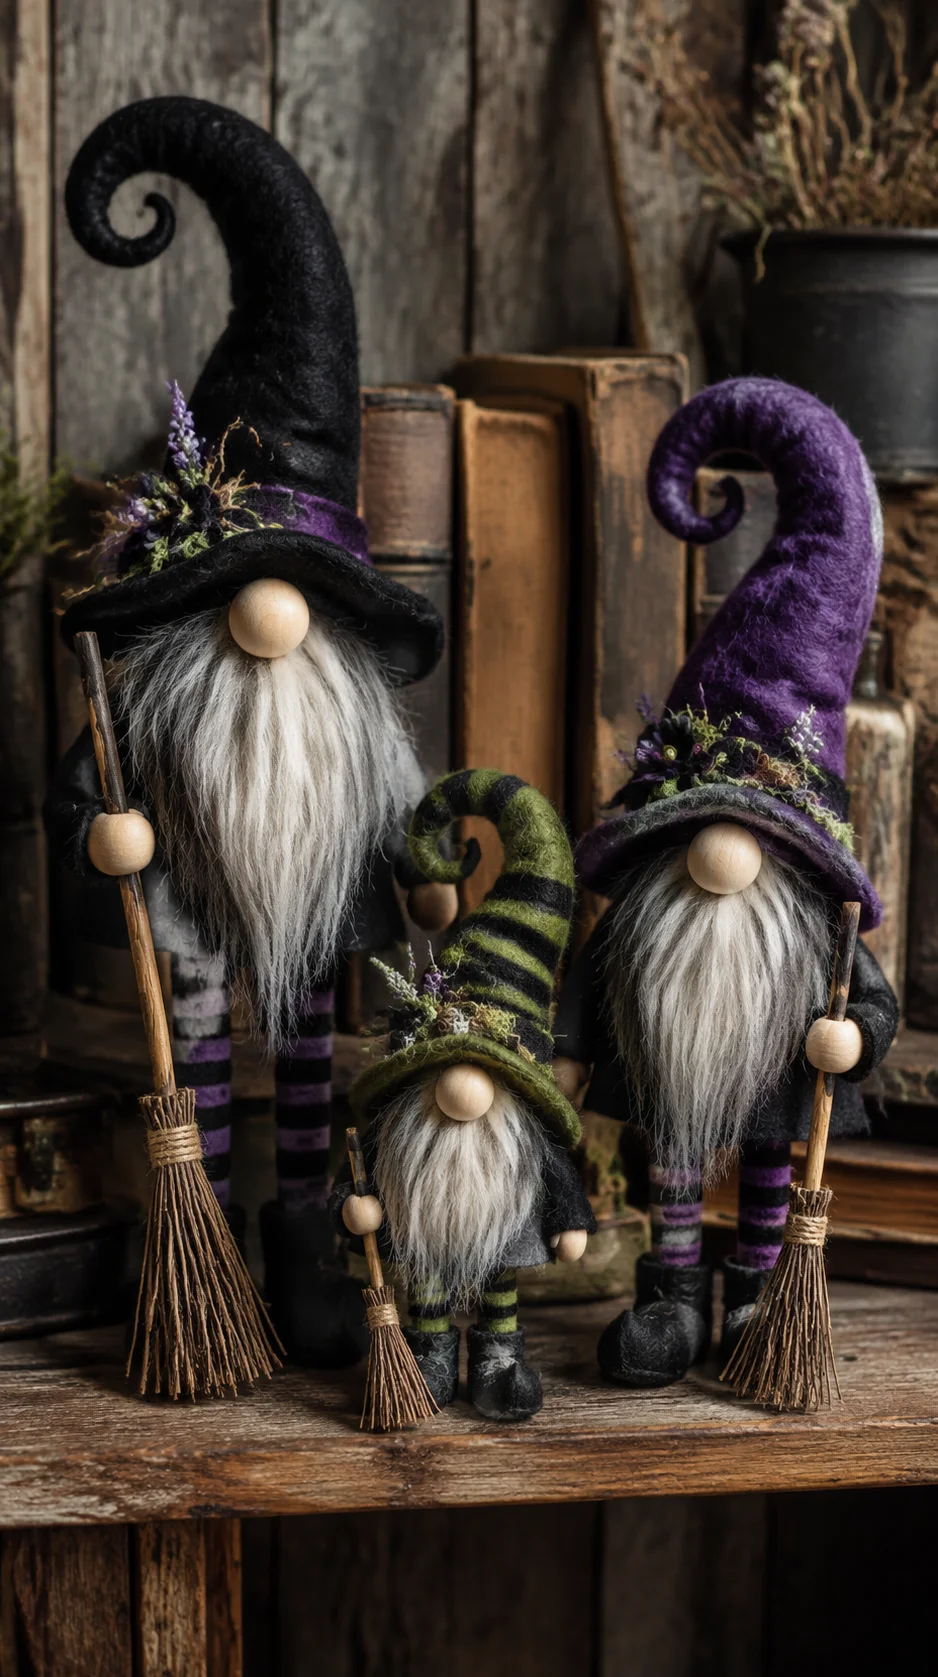 Cut pointed hats from black, purple, or green felt and secure the seams with fabric glue. Add faux-fur beards, wooden noses, striped legs, and miniature broomsticks.
Create two or three gnomes in different sizes and group them on a shelf or tiered tray. Coordinating hats will unite the group while varied accessories give each witch personality.
11
Paint Terracotta-Style Pumpkins
 Give plastic pumpkins a warm, handmade appearance with terracotta-colored craft paint. Mix a little baking soda into the paint if you want a textured, pottery-like finish.
Layer rust, clay, cream, and muted brown shades across several pumpkin shapes. Display them in a wood bowl or beside dried stems for Halloween decor that can remain through Thanksgiving.
Reusable decorating base:
Unfinished faux pumpkins can be painted, textured, stenciled, or covered with fabric.
12
Design a Modern Halloween Hoop Wreath
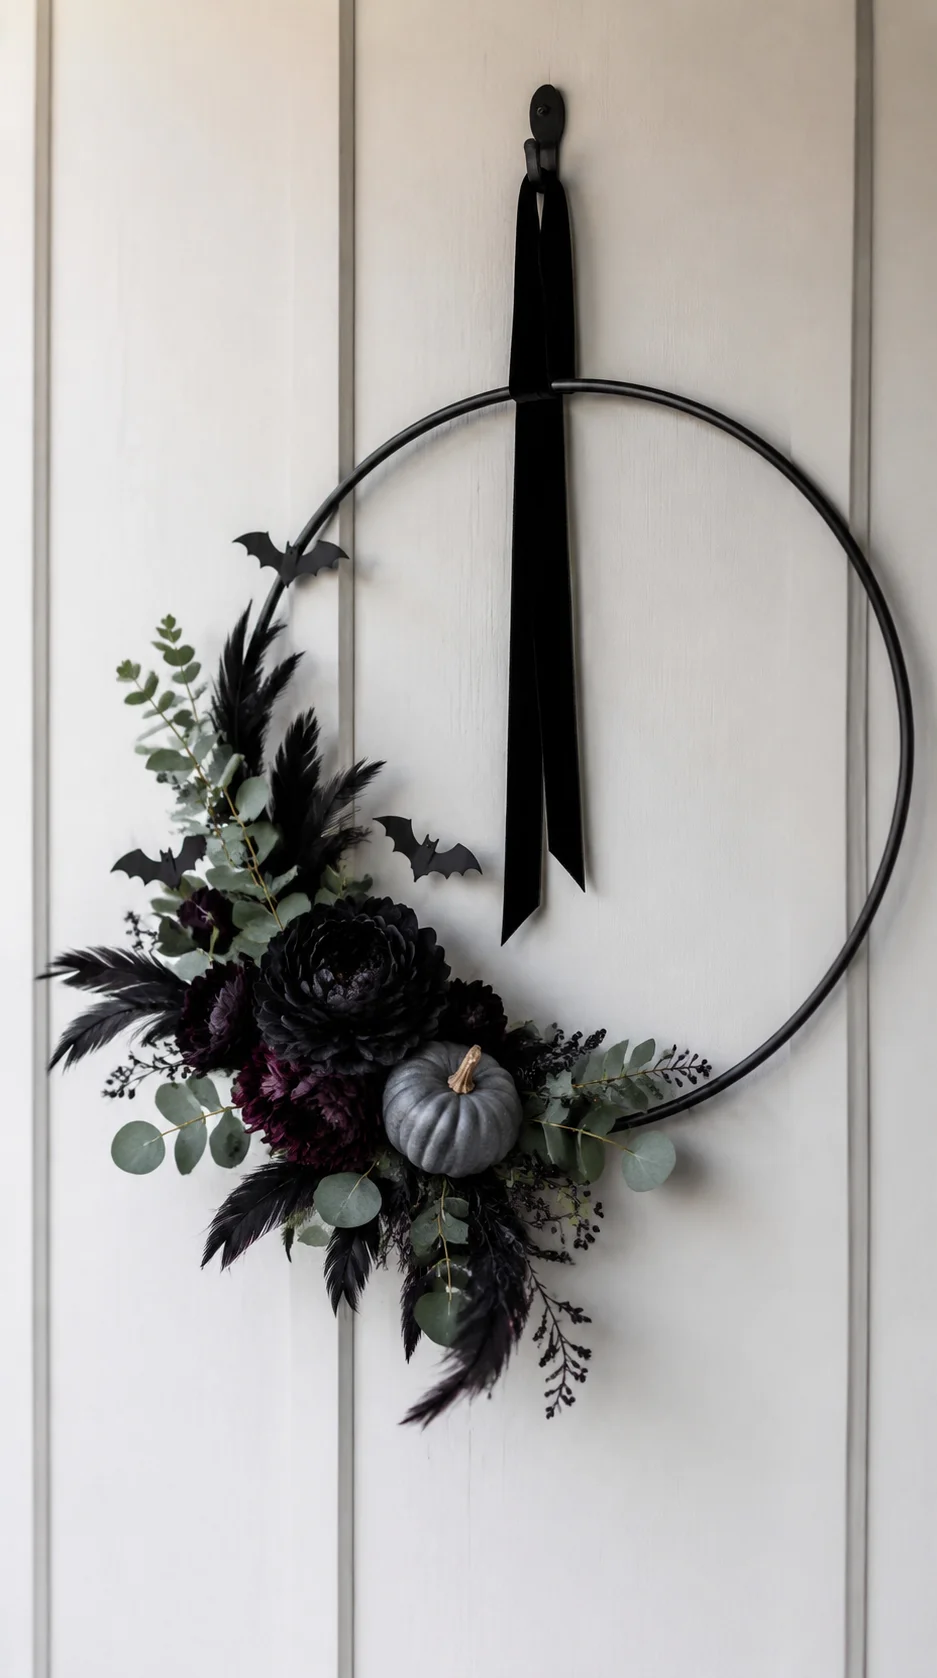 Paint a metal or wood hoop matte black and decorate only one side with dark flowers, eucalyptus, feathers, bats, or miniature pumpkins. Leaving part of the hoop exposed gives the wreath a clean, modern shape.
Finish it with one narrow dark ribbon rather than a large bow. This restrained wreath looks beautiful on a light-colored door, above a mantel, or inside an entryway.
13
Make a Clothespin Pumpkin Wreath
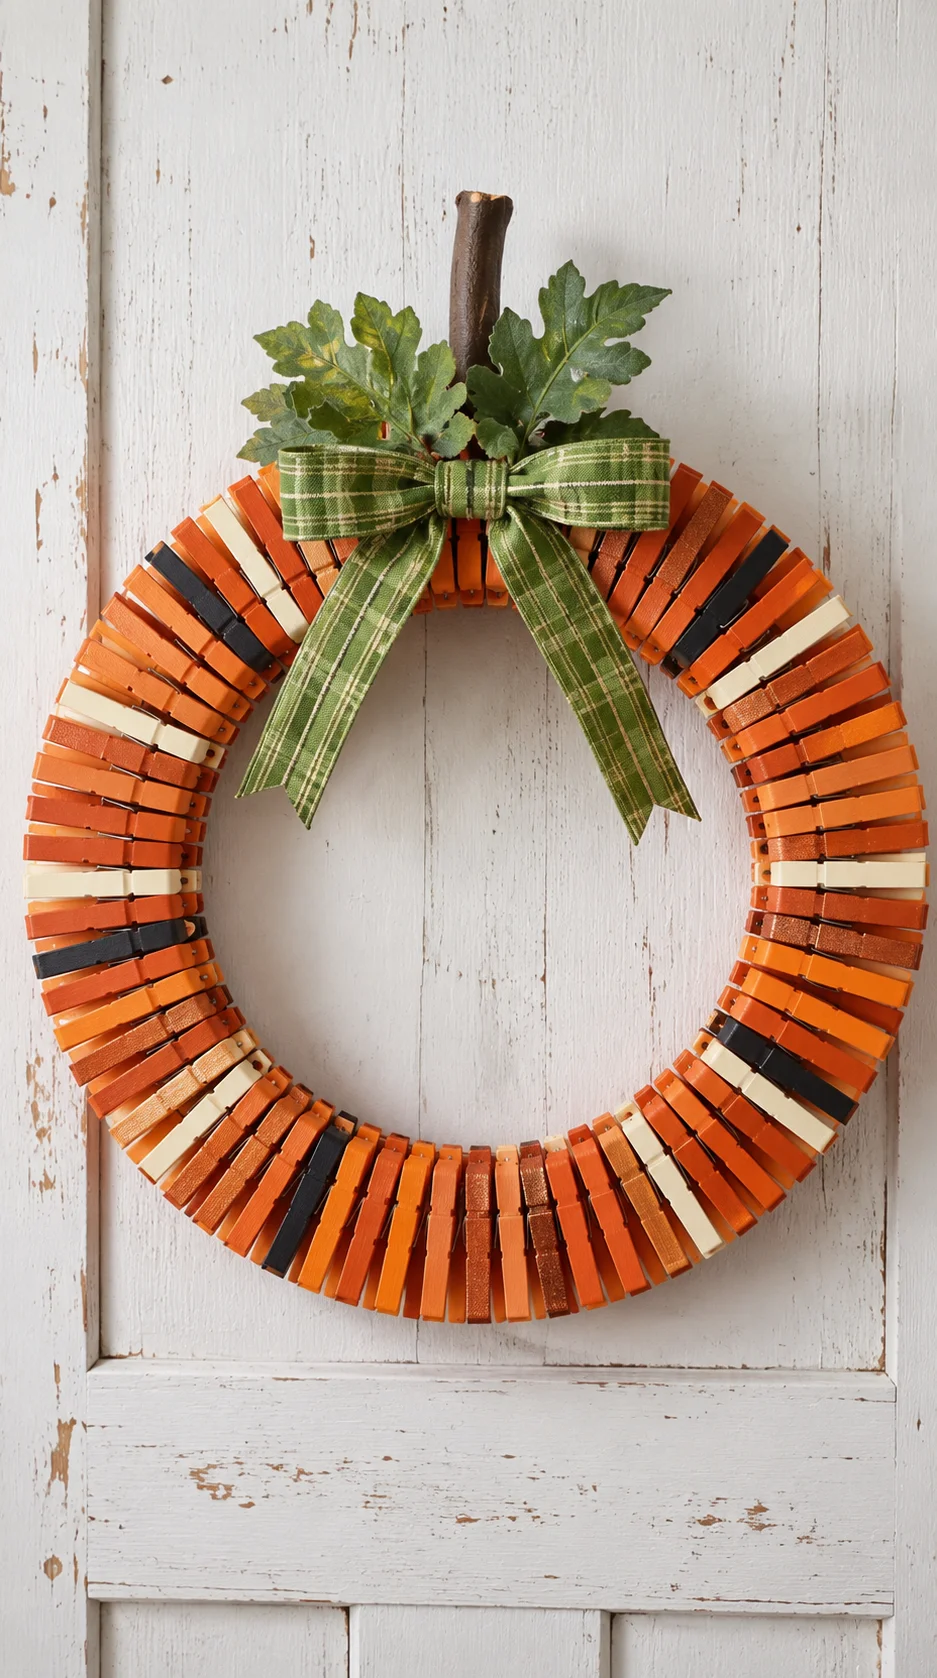 Clip painted wood clothespins around a wire wreath form to create a full circular design. Alternate orange shades and add a few black, cream, or metallic clothespins for extra dimension.
Attach a small stem and faux leaf at the top so the wreath resembles a pumpkin. A green, plaid, or black ribbon can provide the final decorative touch.
14
Create a Metallic Skull Wreath
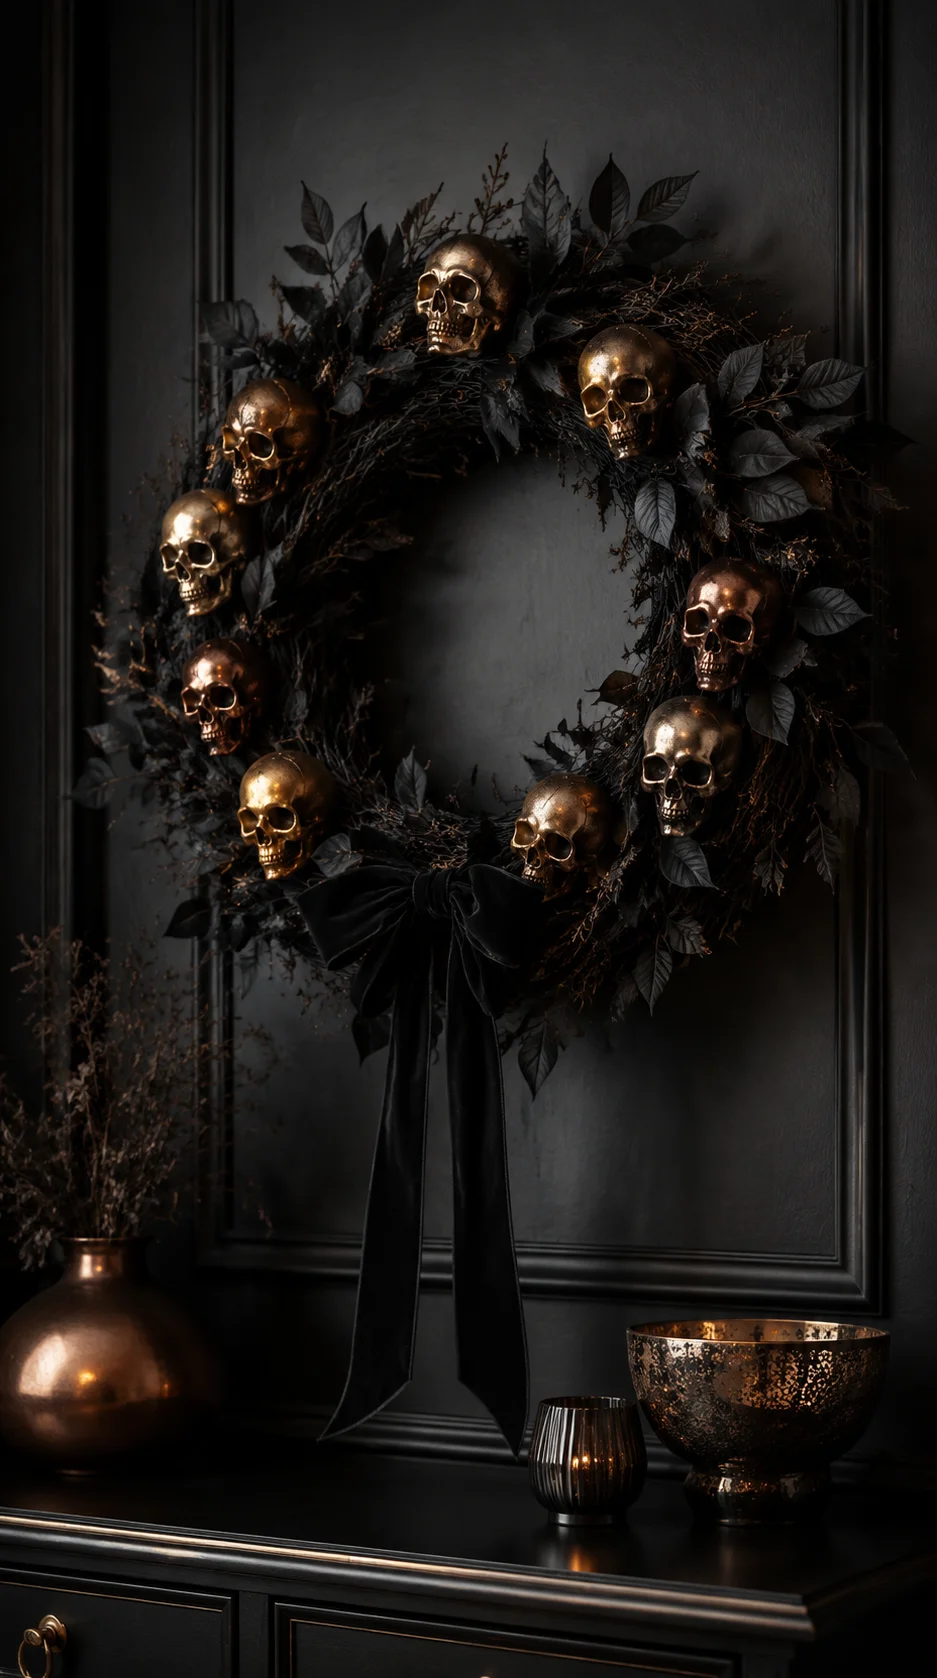 Paint miniature plastic skulls antique gold, brushed silver, copper, or bronze. Attach them to a black grapevine wreath with dark leaves and velvet ribbon.
Mix two metallic finishes rather than using every available color. A little matte black between the reflective skulls will give the wreath contrast and keep it sophisticated.
Add an aged finish:
Metallic craft paint can transform inexpensive skulls, insects, frames, candleholders, and pumpkins.
15
Customize Purple Halloween Lights
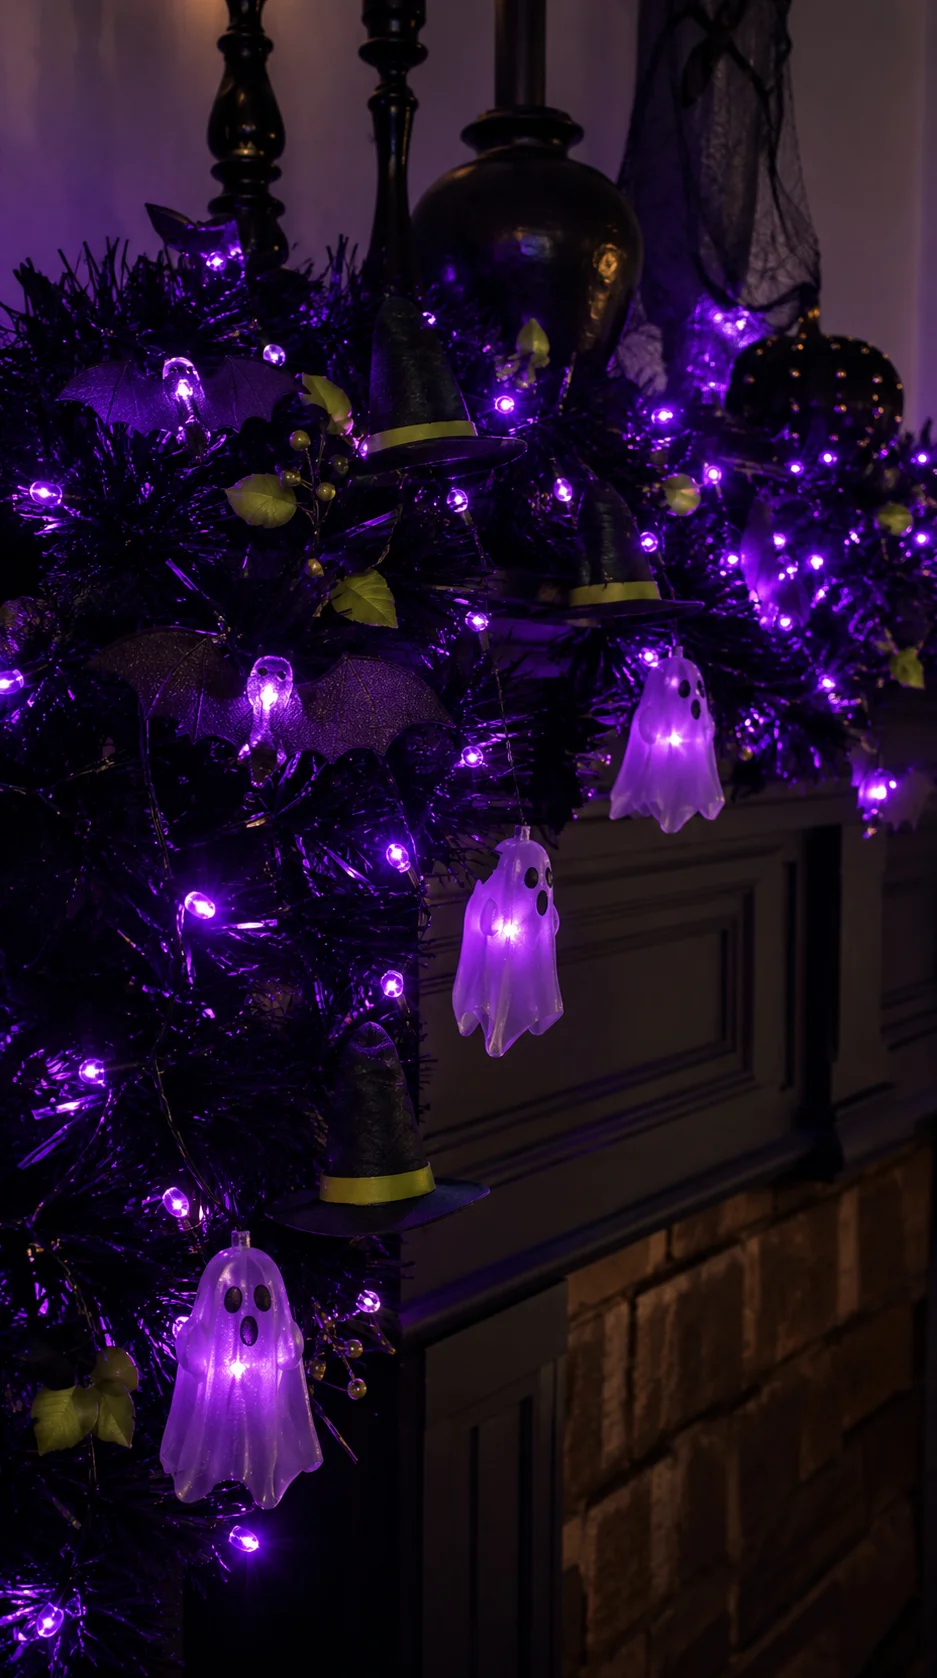 Give inexpensive string lights a Halloween makeover with small paper bat shades, translucent plastic ghosts, or miniature witch hats. Keep every decorative cover away from the bulb surface.
Wrap the lights around a mantel garland, mirror, porch railing, or party backdrop. Purple lights look especially striking with black decorations and small touches of lime green.
16
Stack a Glowing Pumpkin Totem
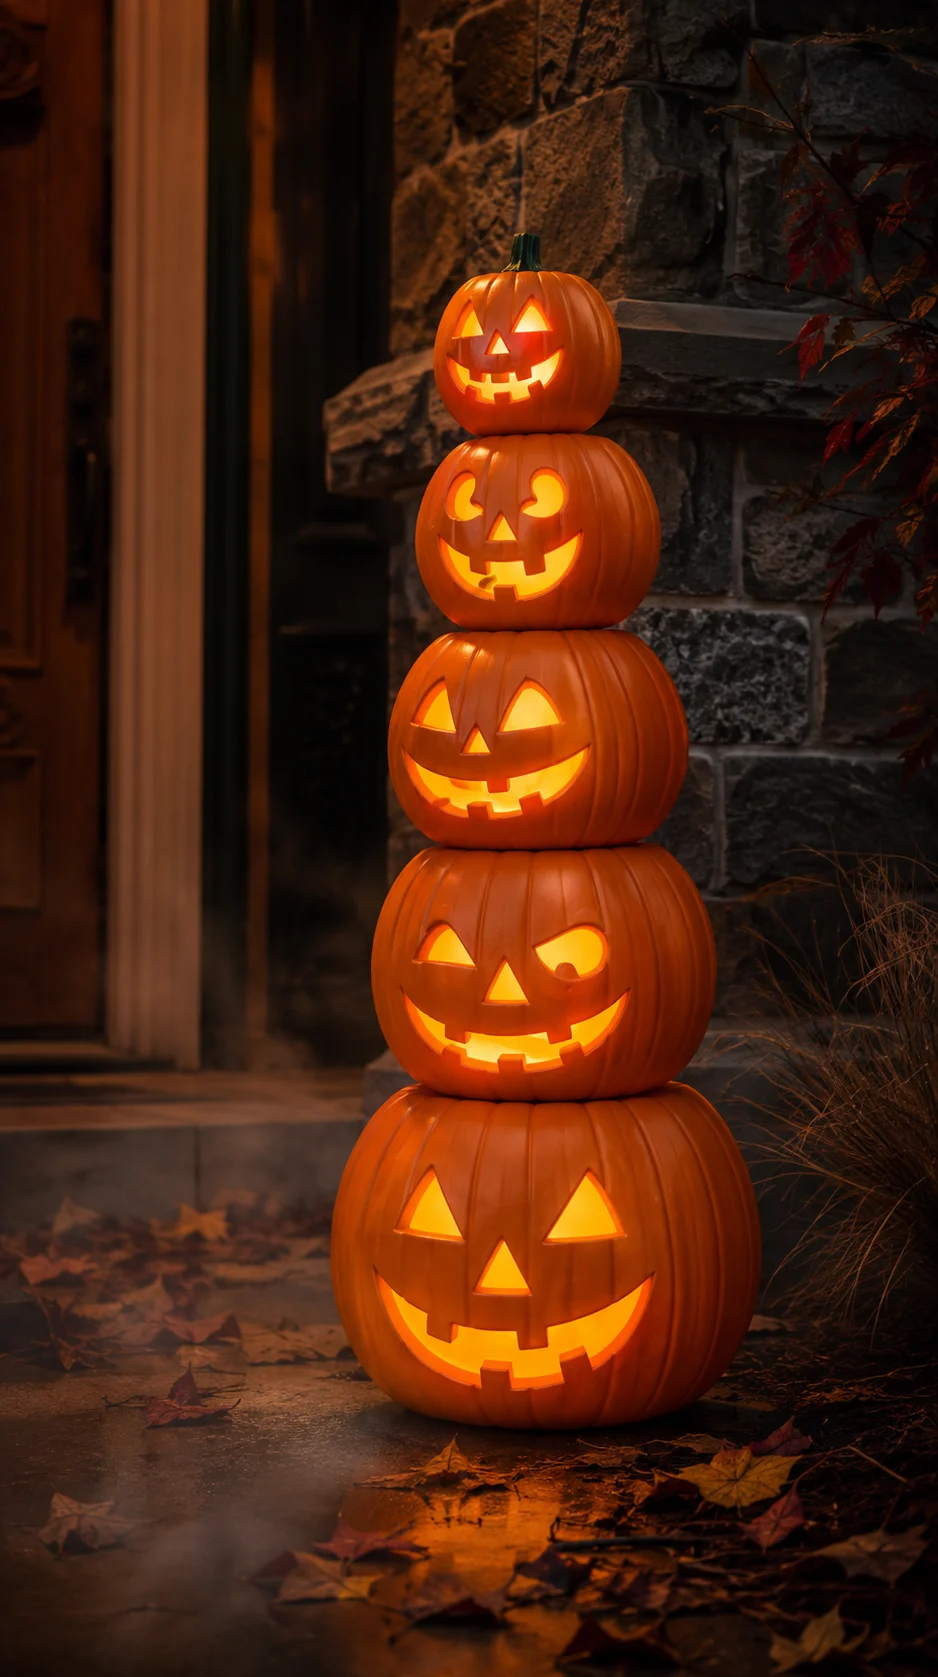 Stack lightweight plastic jack-o’-lantern buckets from largest to smallest. Cut discreet openings where needed and secure the tower around a central support so it cannot separate.
Place battery-operated lights inside the pumpkins and turn each face in a slightly different direction. Display the finished totem beside the front door or at the end of a covered walkway.
17
Turn Toy Spirals Into Pumpkins
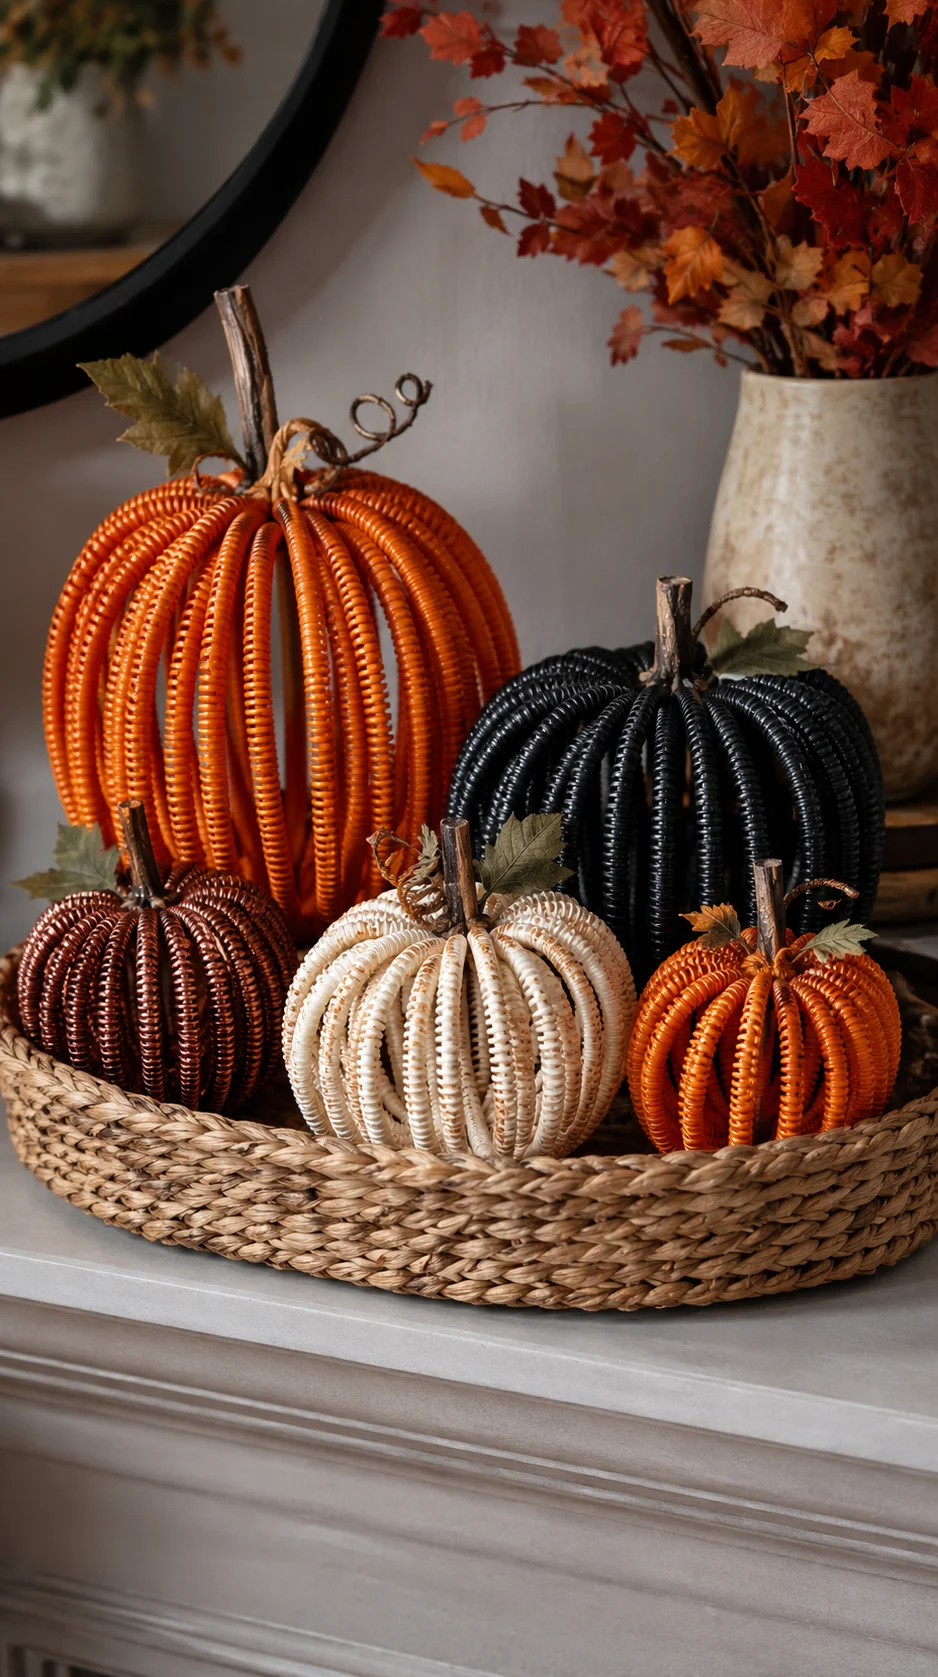 Curve inexpensive plastic toy spirals into round pumpkin forms and connect the ends securely. Paint them orange, black, white, or metallic copper before adding a stem and leaves.
Create several sizes and display them inside a basket, on a mantel, or along a party table. Their open spiral texture gives the pumpkins a playful modern appearance.
Useful finishing supply:
Craft wire can secure lightweight pumpkin forms, wreath accents, garlands, and floral arrangements.
18
Build a Pumpkin Porch Archway
 Attach lightweight plastic pumpkins, leaf garlands, and black branches to a sturdy outdoor arch frame. Place larger pumpkins near the base and gradually use smaller pieces toward the top.
Weave orange or purple outdoor lights through the display for nighttime visibility. Leave the center completely clear and confirm that every decoration is attached at multiple points.
19
Make Light-Up Mop Ghosts
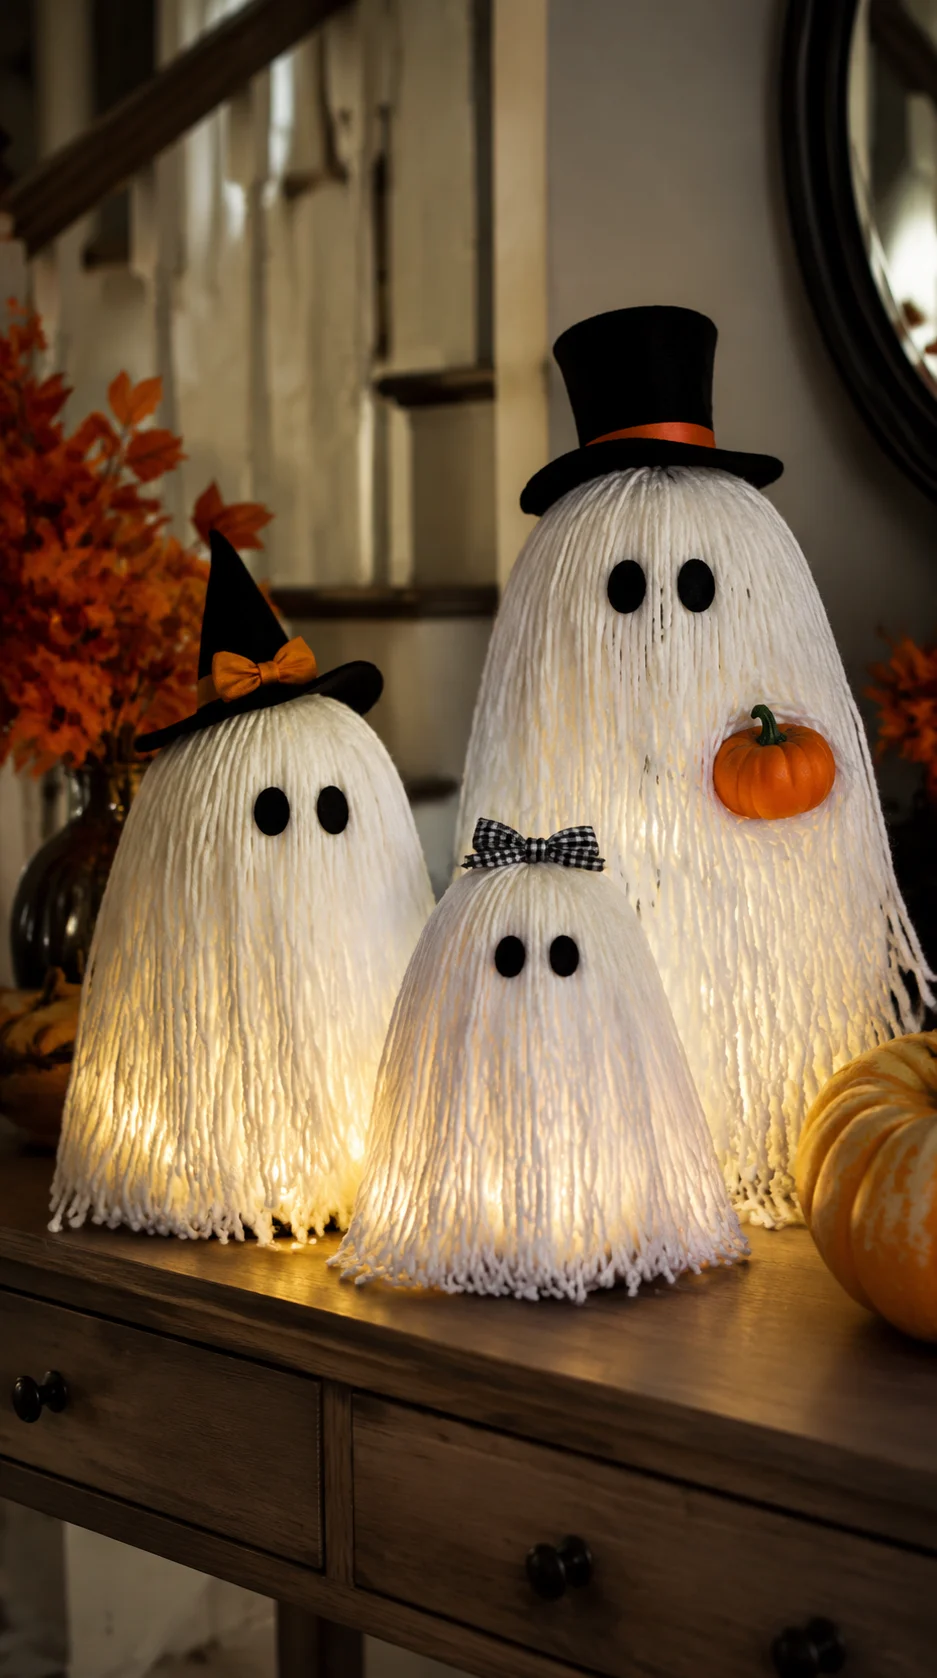 Drape clean white mop heads over lightweight forms to create fluffy tabletop ghosts. Add black felt eyes, small hats, bows, or miniature pumpkins to give each ghost personality.
Place cool-running battery lights beneath the mop strands for a soft glow. Display two or three different-sized ghosts together on a mantel or entry table.
20
Decorate a Vintage Halloween Box
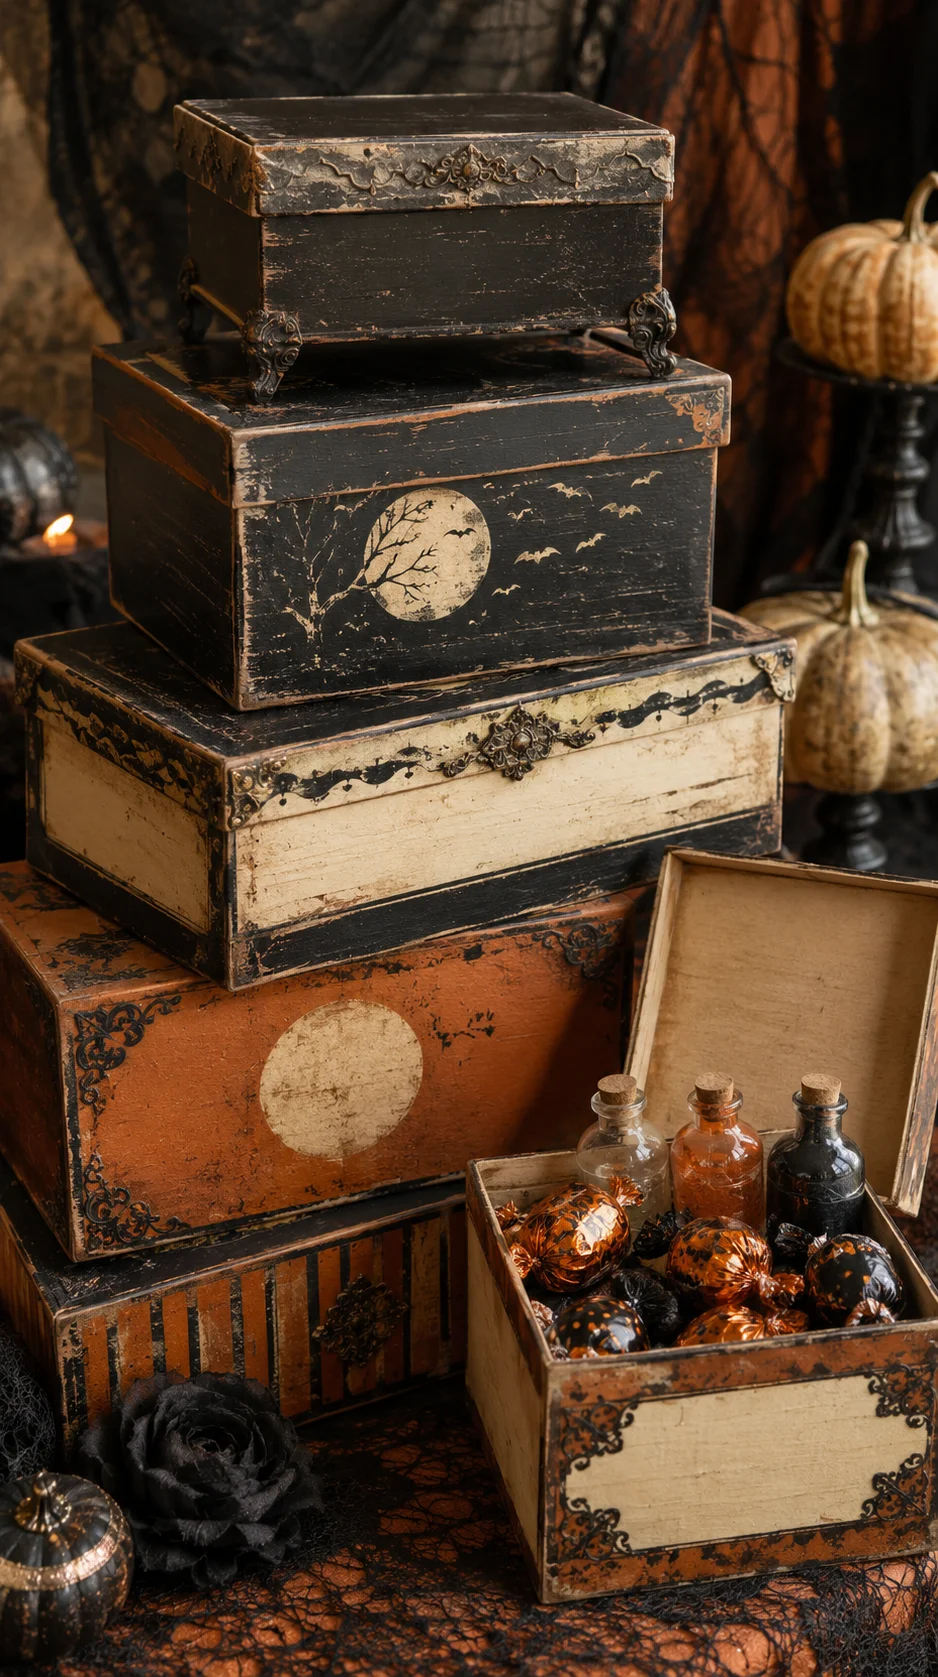 Paint a small wood or cardboard box black, deep orange, or faded cream. Distress the edges and add vintage-inspired paper images, decorative trim, or aged labels.
Use the box to hold wrapped candy, miniature potion bottles, cards, or seasonal accessories. Stack several boxes at different angles to create height in a mantel or party-table display.
Age the surface:
Antique-style wax can add depth to painted boxes, frames, signs, candleholders, and small furniture.
21
Create a Hanging Skeleton Cage
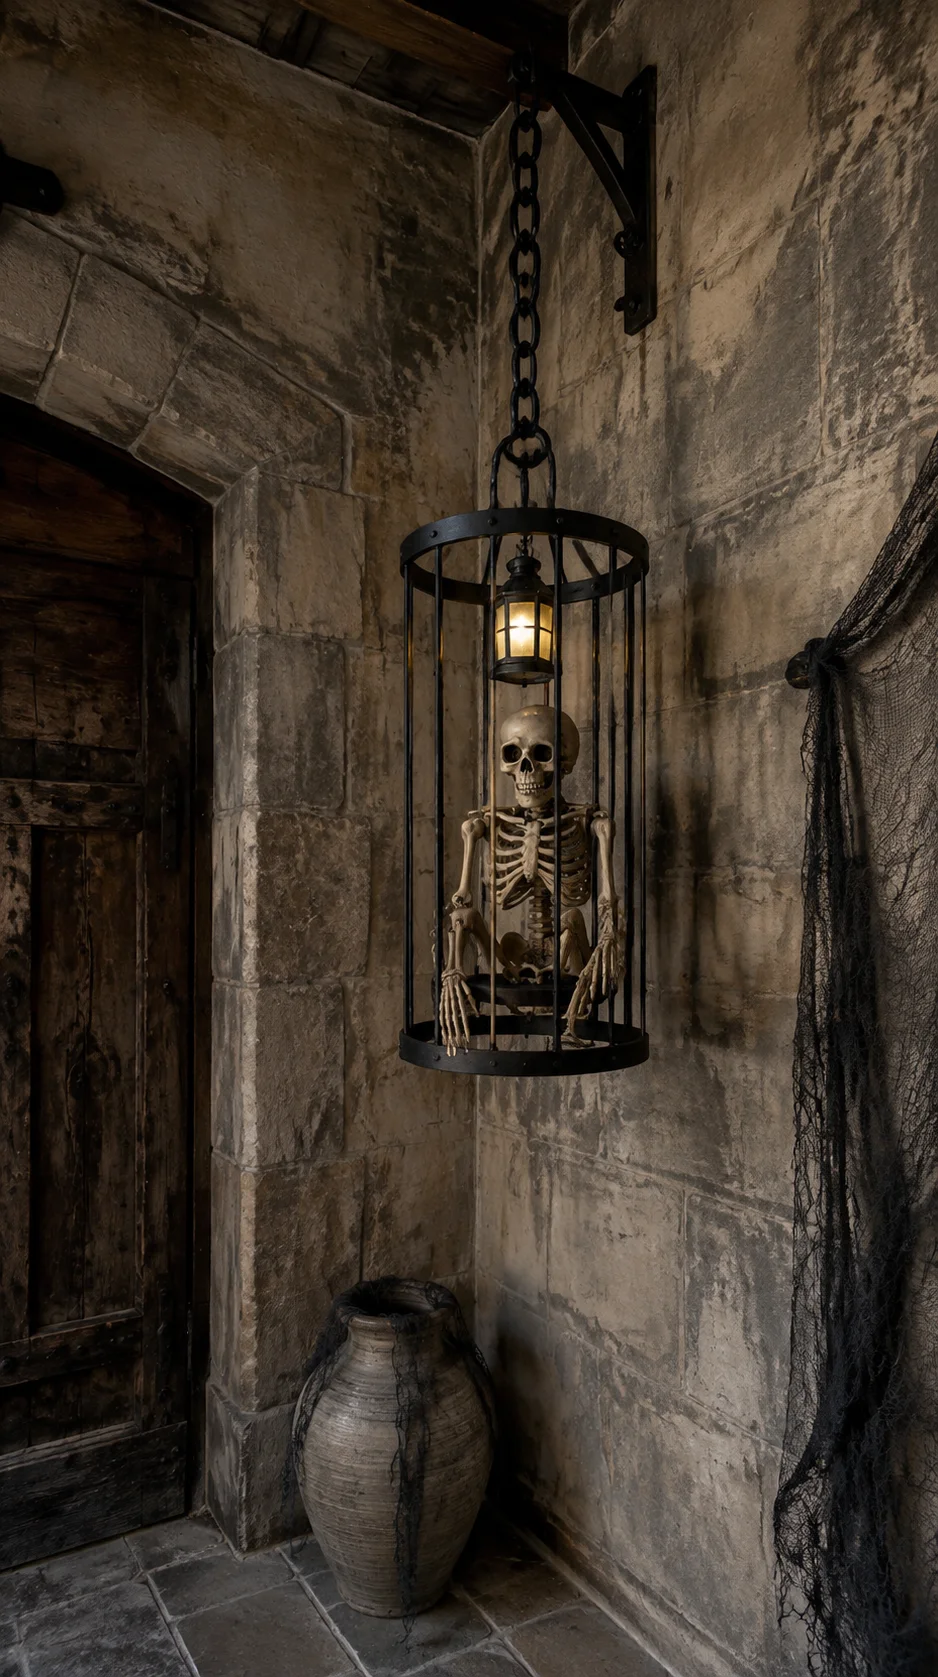 Make a lightweight decorative cage from two painted hoops connected with vertical cardboard or foam strips. Place a miniature plastic skeleton or skull securely inside before closing the structure.
Hang the cage from a properly rated hook above normal reach, or display it as a stationary tabletop prop. Add faux chain and a small battery light for an aged haunted-dungeon effect.
Dollar Store Halloween Craft Checklist
| Item | Best For | Amazon Search |
|---|---|---|
| Faux pumpkins | Painting, wreaths, towers, and archways | Shop on Amazon |
| Mini plastic skulls | Wreaths, frames, candles, and planters | Shop on Amazon |
| Matte craft paint | Updating bright plastic and wood pieces | Shop on Amazon |
| Hot glue gun | Indoor wreaths, garlands, and figures | Shop on Amazon |
| Flameless lights | Lanterns, ghosts, villages, and pumpkins | Shop on Amazon |
| Black velvet ribbon | Wreaths, lanterns, boxes, and planters | Shop on Amazon |
Best Color Palettes for Dollar Store Halloween Decor
Classic Halloween
Black, pumpkin orange, cream, and small touches of purple.
Witchy Jewel Tones
Deep purple, emerald green, matte black, and antique gold.
Haunted Neutral
Aged ivory, charcoal, weathered brown, gray, and faded black.
Vintage Halloween
Burnt orange, mustard, muted red, black, and antique cream.
Elegant Gothic
Matte black, burgundy, forest green, silver, and brushed gold.
Common Budget Decorating Mistakes and Safety Tips
- Using too many themes: Choose one main style and repeat a limited selection of colors and materials.
- Skipping surface preparation: Clean plastic, glass, metal, and wood before applying paint or adhesive.
- Leaving bright plastic exposed: A matte or textured finish can make inexpensive pieces look more polished.
- Rushing drying time: Allow paint, glue, and sealer to cure according to the instructions before assembling or displaying projects.
- Using indoor materials outside: Select weather-resistant paint, lights, adhesive, and supports for outdoor projects.
- Using open flames: Choose cool-running flameless LEDs around plastic, paper, fabric, gauze, and dried materials.
- Forgetting stability: Anchor tall porch decorations, hanging props, arches, planters, and pumpkin towers securely.
Frequently Asked Questions
What Halloween decorations can I make with dollar-store supplies?
You can make wreaths, ghosts, lanterns, pumpkin towers, haunted villages, planters, garlands, framed art, candleholders, gnomes, and tabletop decorations with affordable supplies.
How do I make cheap Halloween decorations look better?
Use matte paint, cover visible seams, add natural texture, limit the color palette, and group finished projects at different heights. Warm or colored LED lighting can also improve simple decorations.
What are the easiest dollar-store Halloween DIYs?
Painted pumpkins, bug frames, jar lanterns, felt gnomes, lace ghost garlands, and modern hoop wreaths are beginner-friendly projects requiring only basic craft supplies.
Can dollar-store decorations be used outdoors?
Yes, when the materials are suitable for outdoor use and properly secured. Apply compatible exterior sealer when needed and bring delicate projects inside during severe weather.
How should I store homemade Halloween decorations?
Clean and dry every item, wrap fragile pieces individually, and store them inside labeled containers. Keep fabric, paper, felt, and painted decorations away from moisture and extreme heat.
Final Thoughts
Dollar-store Halloween decorations can look stylish and creative when you begin with a clear theme. Paint, texture, coordinated ribbon, and thoughtful lighting can completely transform inexpensive supplies.
Start with a beginner-friendly project such as a bug frame, ghost garland, lantern, or painted pumpkin. Once you feel inspired, try a larger statement piece such as a glowing pumpkin tower, porch archway, or skeleton scene.
Reuse leftover materials across several projects and store finished decorations carefully. This will help you build an affordable Halloween collection that becomes better every year.