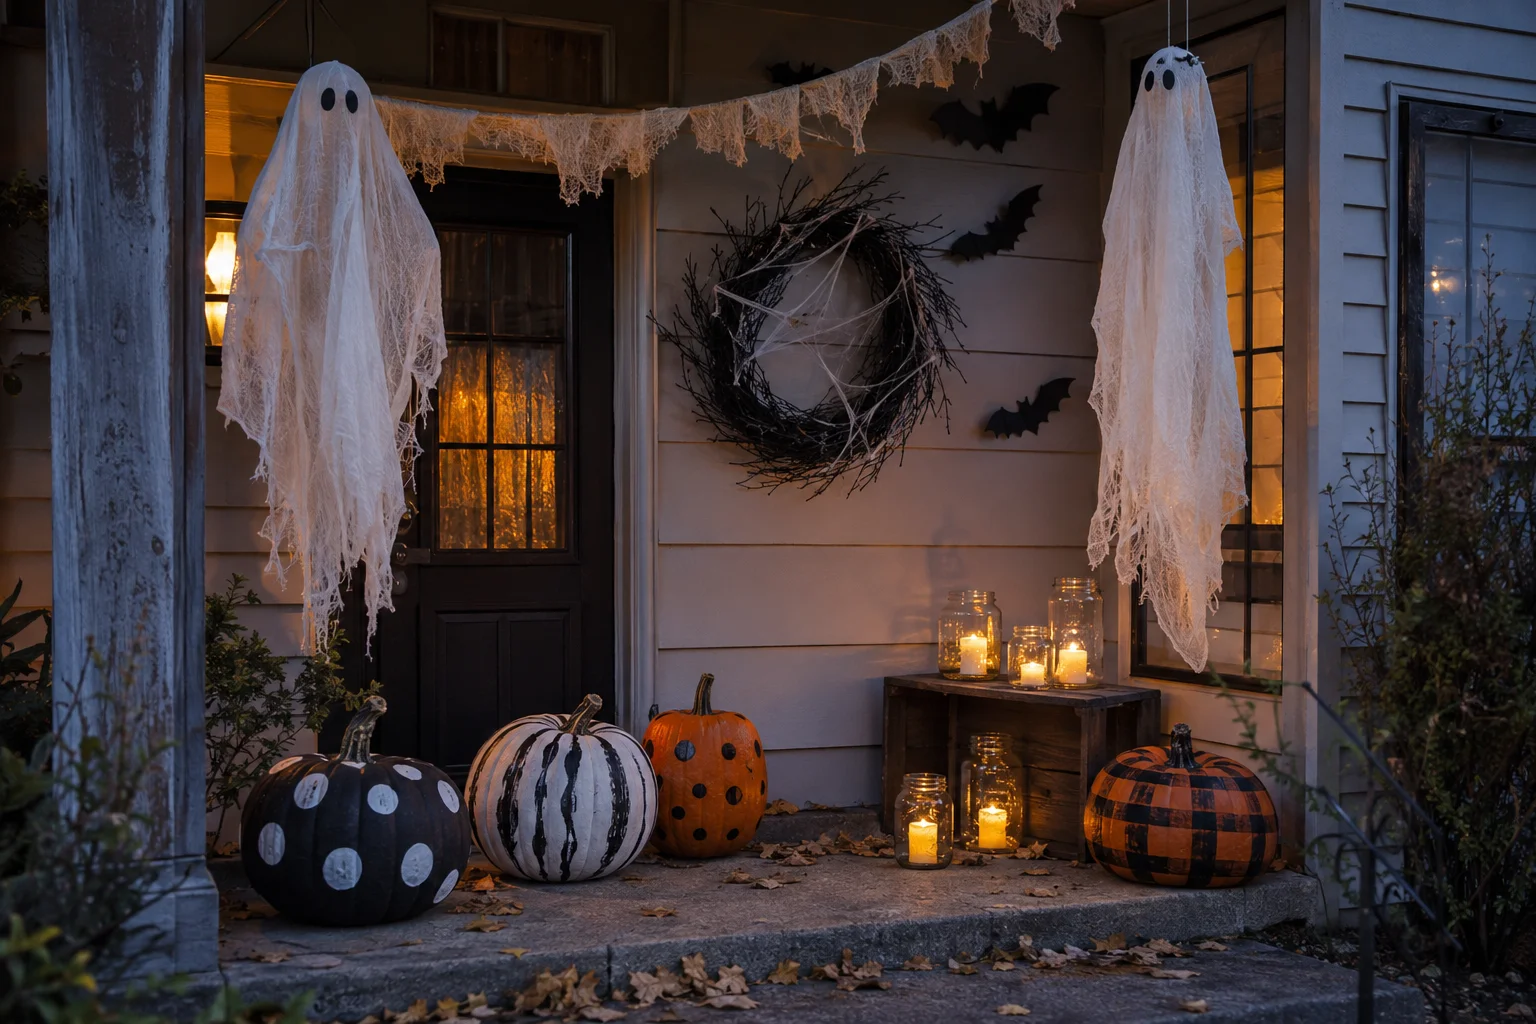
You do not need expensive decorations to make your home feel festive for Halloween. With a few affordable supplies, basic craft tools, and creative finishing touches, simple dollar-store items can become stylish decorations for your mantel, porch, table, or entryway.
The secret is to look beyond the original color and finish of each item. Craft paint, fabric, twine, moss, and warm lighting can make inexpensive plastic and foam pieces look more detailed and thoughtfully styled.
Below, you will find 12 easy DIY Dollar Tree Halloween decorations, plus helpful supply suggestions, decorating formulas, color palettes, shopping tips, and practical safety advice.
Affiliate note: This article may contain affiliate links. If you buy through these links, we may earn a small commission at no extra cost to you.
More Budget Halloween Inspiration
Quick List of Dollar Tree Halloween DIYs
- Pumpkin wreath form ghost
- Stacked jack-o’-lantern topiary
- Creepy specimen frames
- Floating candle display
- Black rose Halloween wreath
- Light-up crystal ball
- Potion bottle collection
- Mop-head ghosts
- Skeleton hand candleholder
- Haunted mirror makeover
- Spooky village houses
- Halloween cloche scene
How to Make Dollar Tree Halloween Decor Look Expensive
Start by selecting a clear theme and limited color palette. Instead of combining every bright Halloween color, choose two main colors and one metallic or neutral accent. Matte black, aged gold, cream, dark green, and burnt orange work especially well together.
Cover shiny plastic with matte craft paint or spray paint that is suitable for the material. Layering dark brown, gray, or metallic paint over raised details can create an aged finish and make inexpensive pieces appear more realistic.
Finally, group related decorations instead of scattering them randomly. A set of three potion bottles or a small tray containing one pumpkin, a candle, and a branch will look more intentional than many unrelated pieces placed around the room.
Simple Halloween craft formula: Dollar-store base + matte paint + aged texture + one natural material + warm battery lighting.
Choosing the Right Dollar-Store Supplies
| Style, Area, or Item | Best Pieces to Use | Why It Works |
|---|---|---|
| Mantel Display | Frames, candles, skulls, mini pumpkins | Small decorations are easy to layer at different heights |
| Front Door | Wreath forms, mesh, ribbon, faux flowers | Creates a visible seasonal focal point without using floor space |
| Halloween Table | Trays, glassware, candles, moss, miniatures | Allows inexpensive pieces to look like one coordinated display |
| Covered Porch | Plastic pumpkins, lanterns, signs, faux chains | Lightweight pieces can be secured and reused outdoors |
| Small Apartment | Mini frames, bottle displays, shelf villages | Adds Halloween character without taking up much storage space |
Frightfully Affordable Dollar Tree Halloween Crafts
1Turn a Pumpkin Wreath Form Into a Ghost
Rotate a wire pumpkin wreath form so the wider section becomes the ghost’s flowing body. Cover the form with white fabric, cheesecloth, or an inexpensive pillowcase, gathering the material loosely around the curved edges.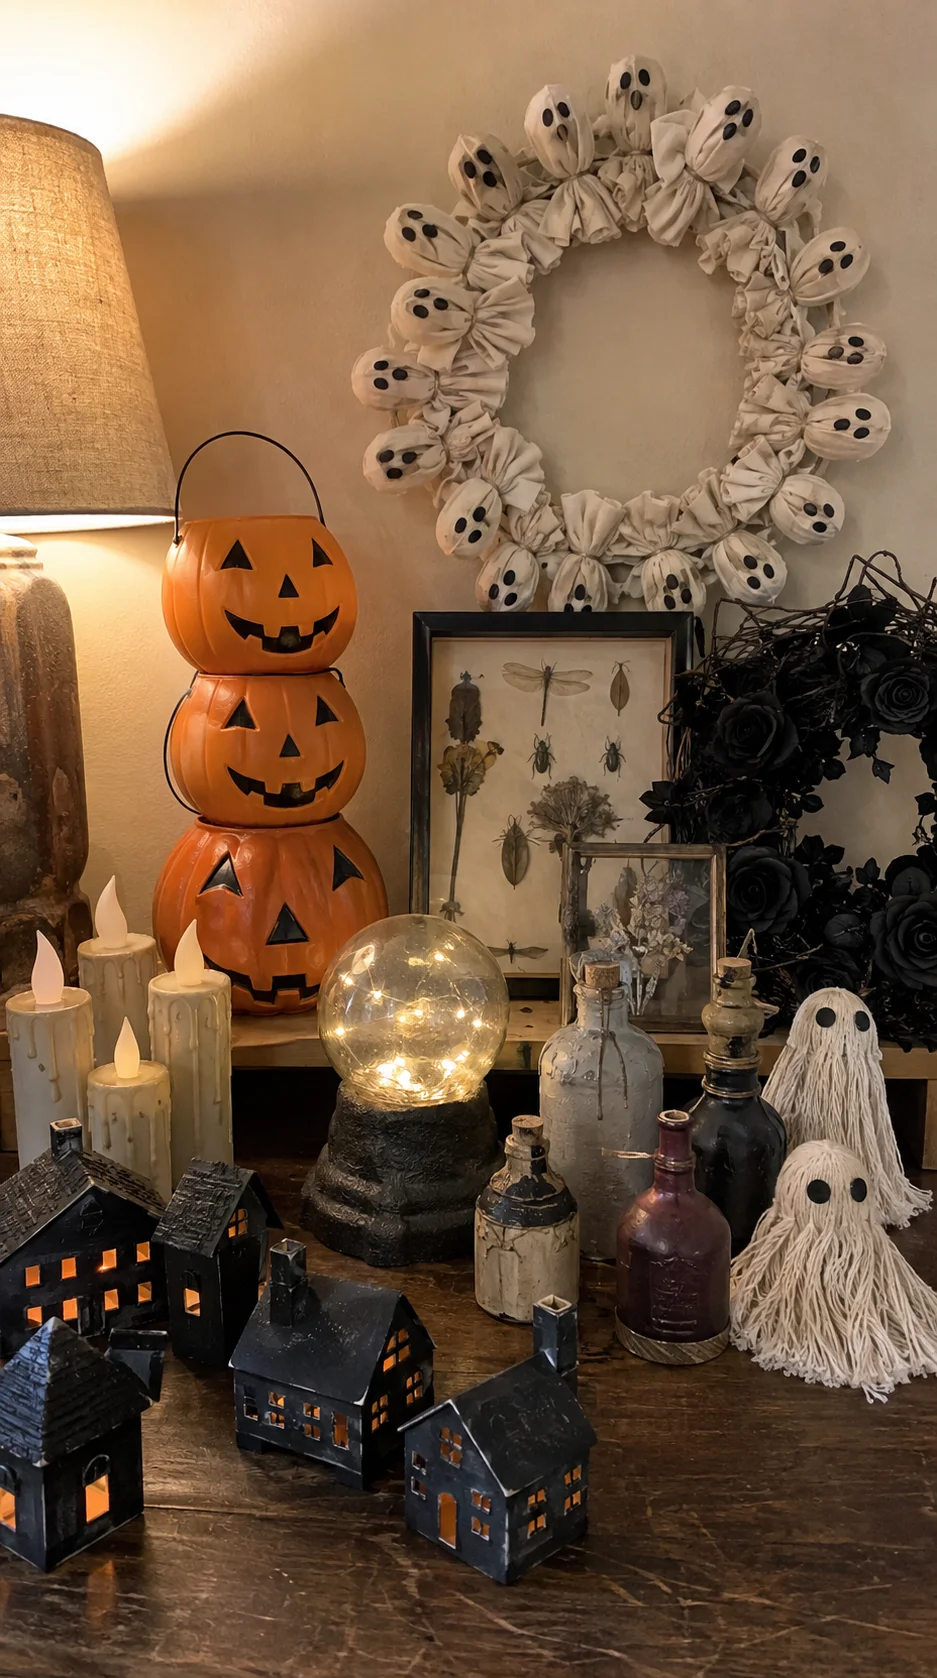
Cut two oval eyes from black felt and glue them to the front. Add a ribbon loop for hanging and trim the lower fabric into soft uneven points. Use outdoor-friendly fabric and secure every edge if the ghost will hang on a covered porch.
Crafting tip: Place the eyes slightly lower than the center of the form. This creates a longer rounded head and makes the complete ghost look more balanced.
2Make a Stacked Jack-o’-Lantern Topiary
Stack three lightweight plastic pumpkin buckets from largest to smallest. Remove or hide the handles, then secure the pumpkins together with strong adhesive suitable for plastic. Turn the faces in slightly different directions for a playful look.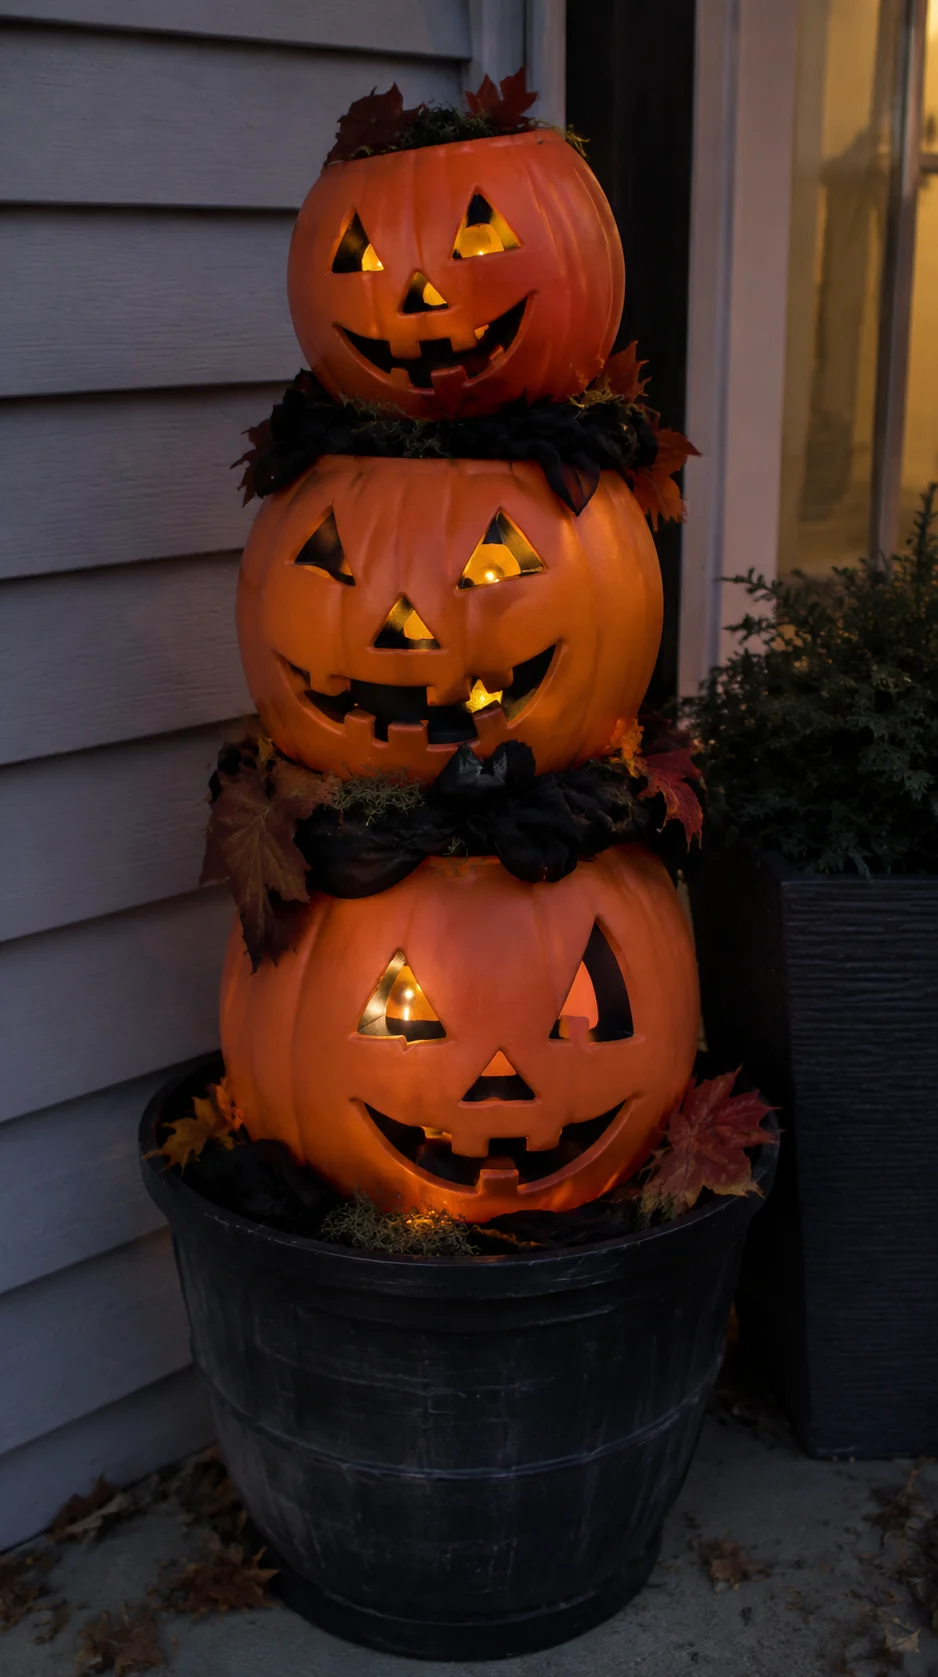
Place the stack inside a weighted planter and fill the visible gaps with black fabric, faux leaves, or moss. Add battery-operated lights inside the pumpkins before joining them if you want the faces to glow after dark.
Amazon find: Battery-operated mini lights
Compact battery lights can illuminate plastic pumpkins without requiring an extension cord across the porch or entryway.
3Create Creepy Specimen Frames
Paint inexpensive picture frames matte black, dark brown, or aged gold. Remove the glass and glue a plastic spider, beetle, snake, or moth to lace or crochet doilies inside to resemble spiderwebs.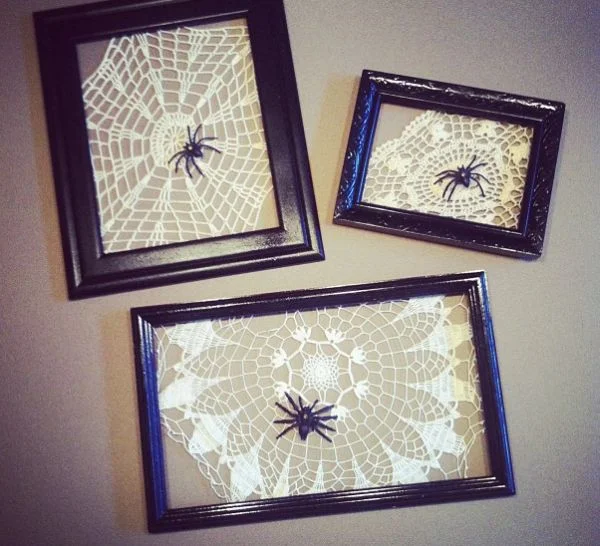
Create two or three frames in different sizes and arrange them together on a wall or shelf. Labels can be added beneath the specimens, but the display also works well without words when the objects are centered neatly.
Aged-finish tip: Dry-brush a small amount of bronze or light brown paint over the frame’s raised edges after the black base coat has dried.
4Craft Floating Halloween Candles
Paint empty cardboard tubes cream or pale gray, then create faux wax drips around the upper edges with low-temperature glue. Place a battery-operated tea light inside the top of each tube once the glue and paint are completely dry.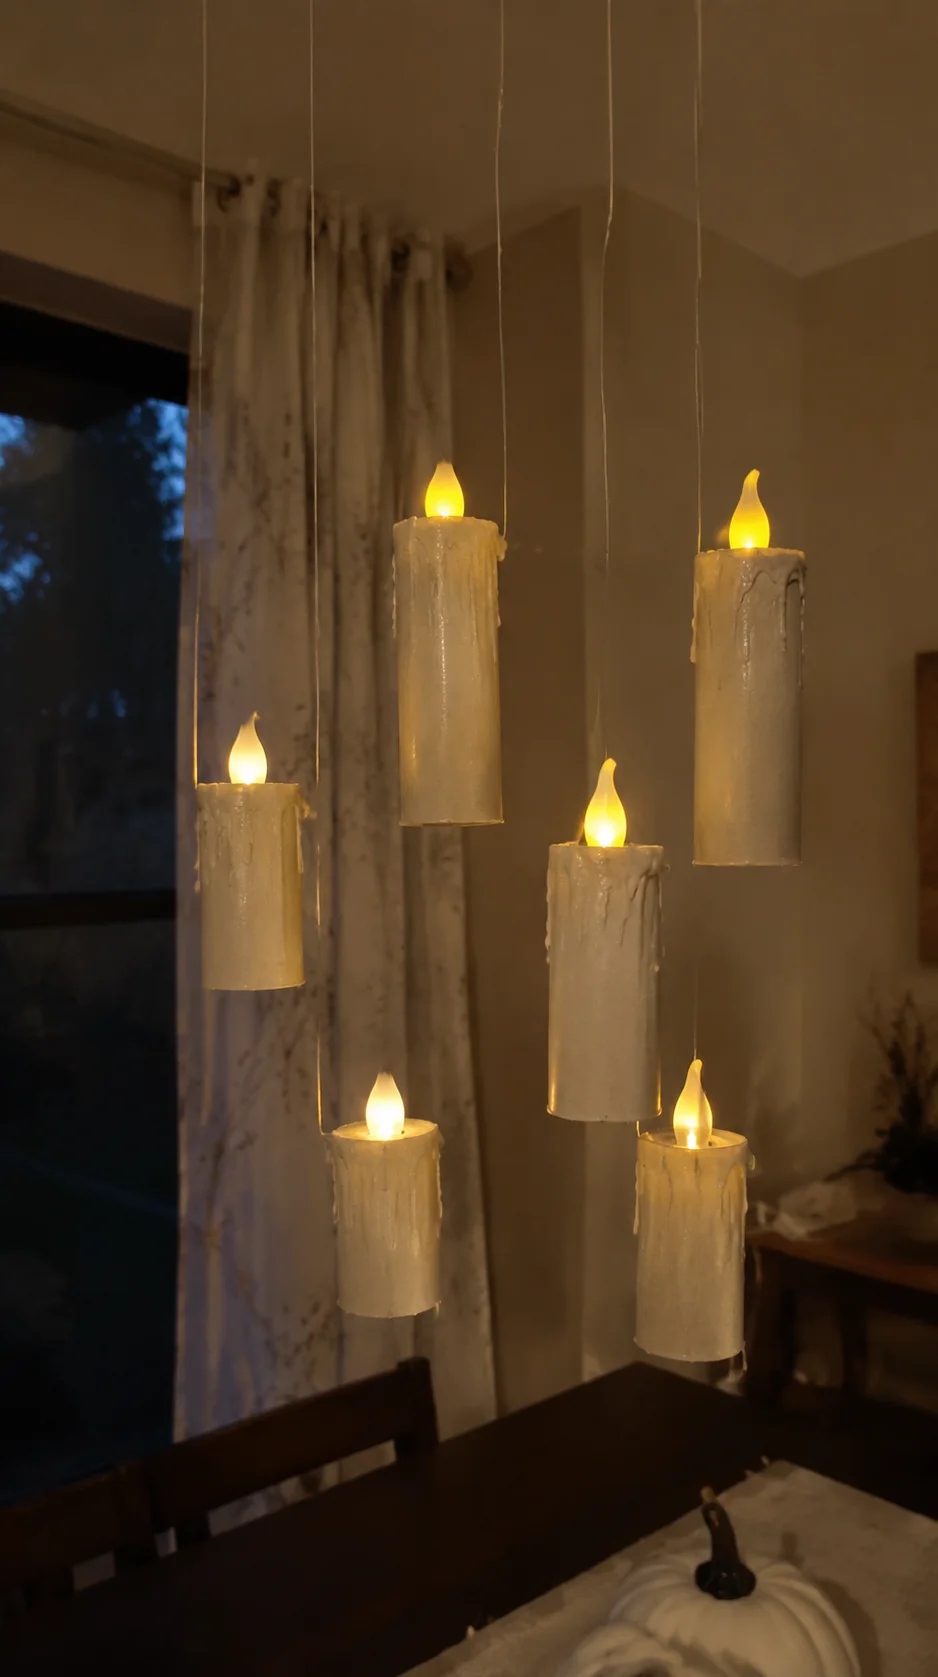
Hang the candles from clear fishing line at different heights above a table or in a doorway. Keep them high enough that guests cannot touch them, and attach the line to secure hooks rated for the combined weight.
Amazon find: Flickering LED tea lights
Lightweight flameless tea lights create the appearance of candle flames without heat, smoke, or exposed fire.
5Design a Black Rose Halloween Wreath
Wrap a foam or grapevine wreath form with black ribbon, mesh, or torn fabric. Attach black and deep burgundy faux flowers around one side, keeping the arrangement fuller near the lower corner and lighter toward the top.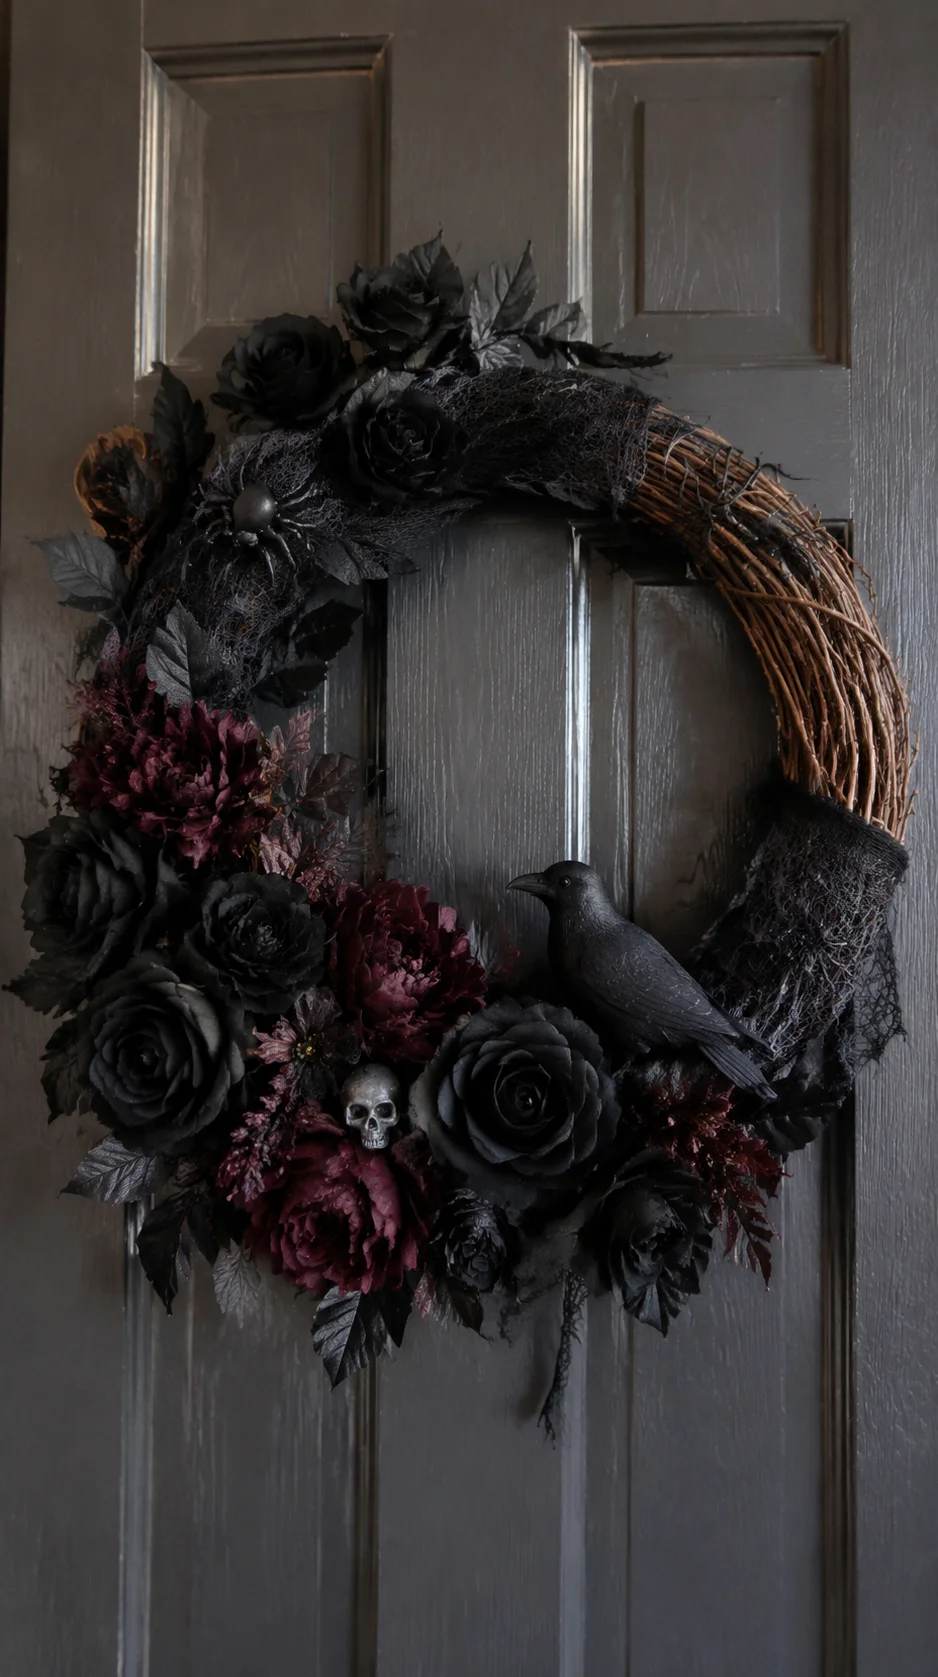
Tuck in plastic spiders, small skulls, dark leaves, or a miniature raven. Leaving part of the wreath form visible creates a more modern shape and reduces the number of flowers required.
Styling tip: Repeat one wreath color elsewhere on the porch, such as burgundy flowers in a planter or black ribbon around a lantern.
6Build a Light-Up Crystal Ball
Place a clear plastic ornament, globe, or round bowl on top of an upside-down candleholder. Lightly paint or sponge the inside with translucent purple, blue, or smoky gray paint while leaving sections clear.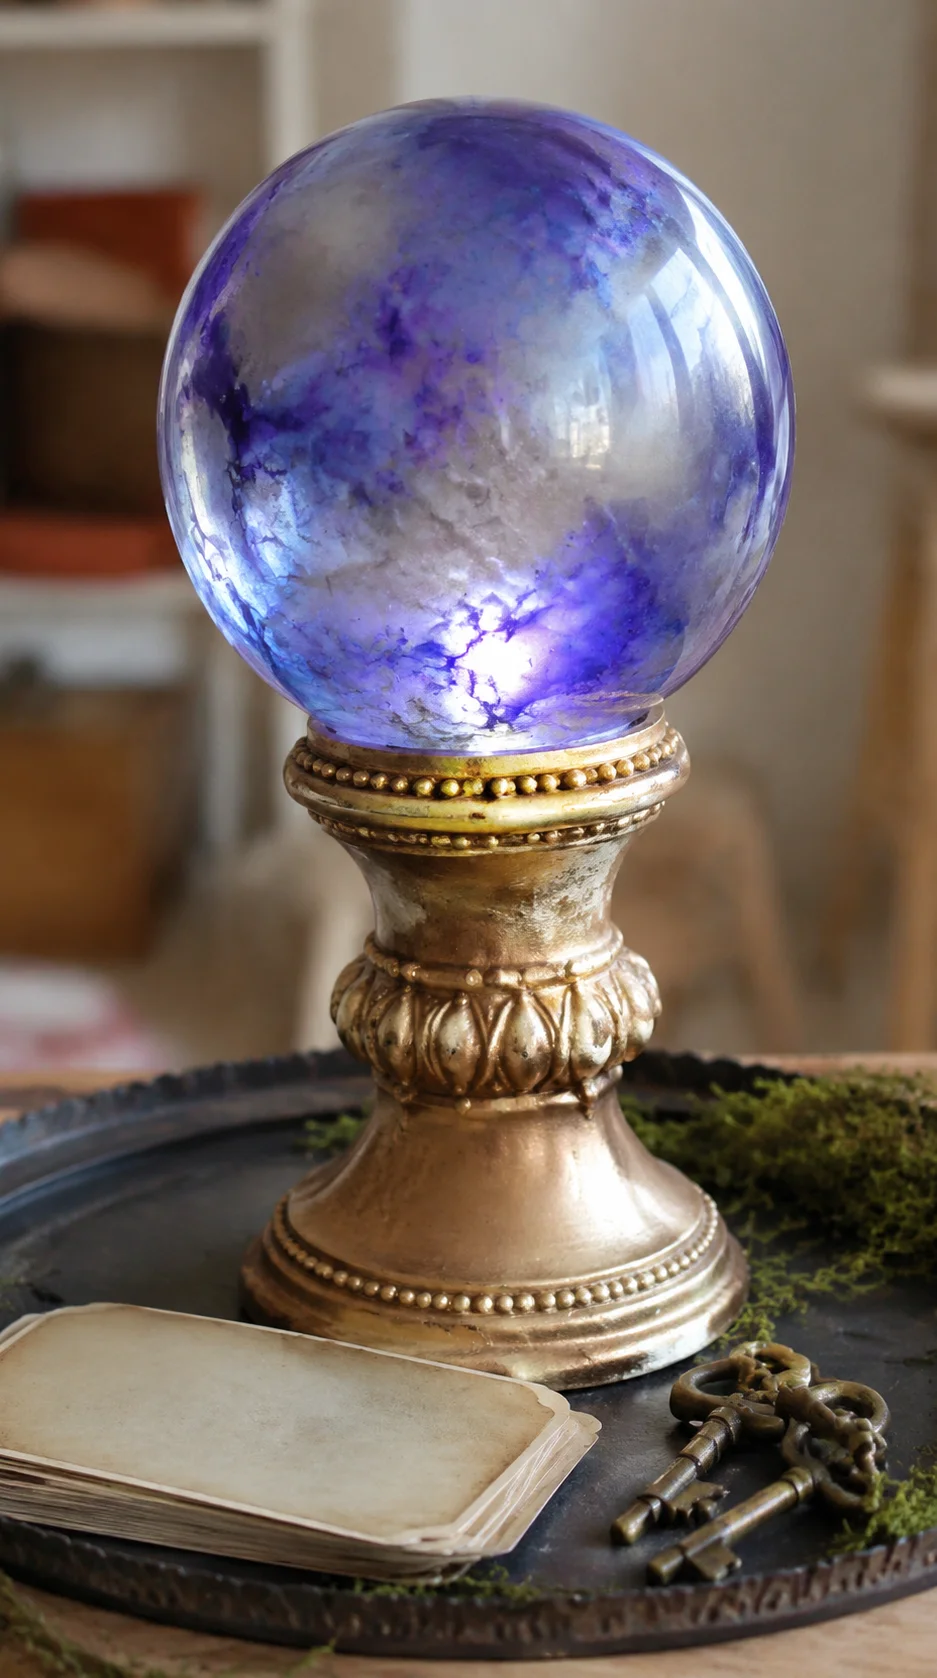
Add a small battery light beneath the globe and decorate the base with metallic paint, beads, or thin craft trim. Display the crystal ball on a dark tray with cards, keys, and faux moss for a mysterious fortune-teller arrangement.
Amazon find: Color-changing LED puck lights
A small LED puck light can illuminate a crystal-ball craft from below and lets you adjust the color for different Halloween displays.
7Make an Aged Potion Bottle Collection
Collect small glass or plastic bottles in different shapes and remove their original labels. Apply matte black, amber, deep green, or smoky gray paint, leaving some areas slightly uneven to create an old apothecary finish.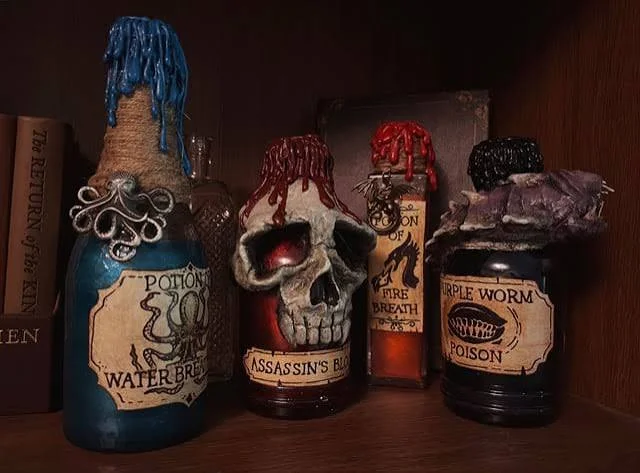
Tie twine around the necks and add tags, wax-style seals, or tiny charms. Group the bottles in sets of three or five on a tray, but do not fill them with unknown liquids that could be mistaken for something safe to drink.
Display idea: Mix tall, medium, and short bottles, then place one small branch behind the group to add height without crowding the tray.
8Turn Mop Heads Into Fluffy Ghosts
Place a white mop head over a foam ball, lightweight ornament, or securely crumpled paper to form a rounded ghost head. Allow the strands to hang naturally around the base and add oval eyes cut from black felt.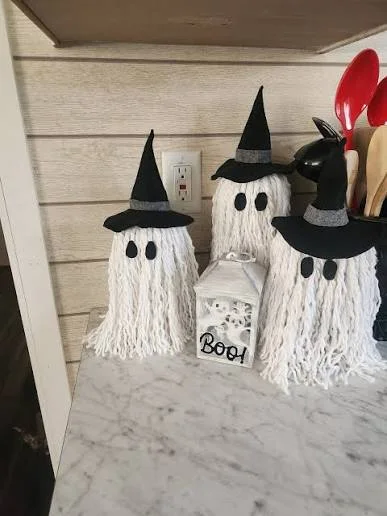
Display the ghost on a shelf, inside a basket, or beside a pumpkin. Make several in slightly different sizes for a cute group, but avoid placing loose strands near candles, heaters, or outdoor areas where they may become wet.
Cute detail: Add a miniature felt witch hat or small velvet bow to one ghost while keeping the remaining figures simple.
9Create a Skeleton Hand Candleholder
Attach lightweight plastic skeleton hands around the outside of a sturdy candleholder or shallow pedestal. Position the fingers so they appear to support a battery-operated pillar candle.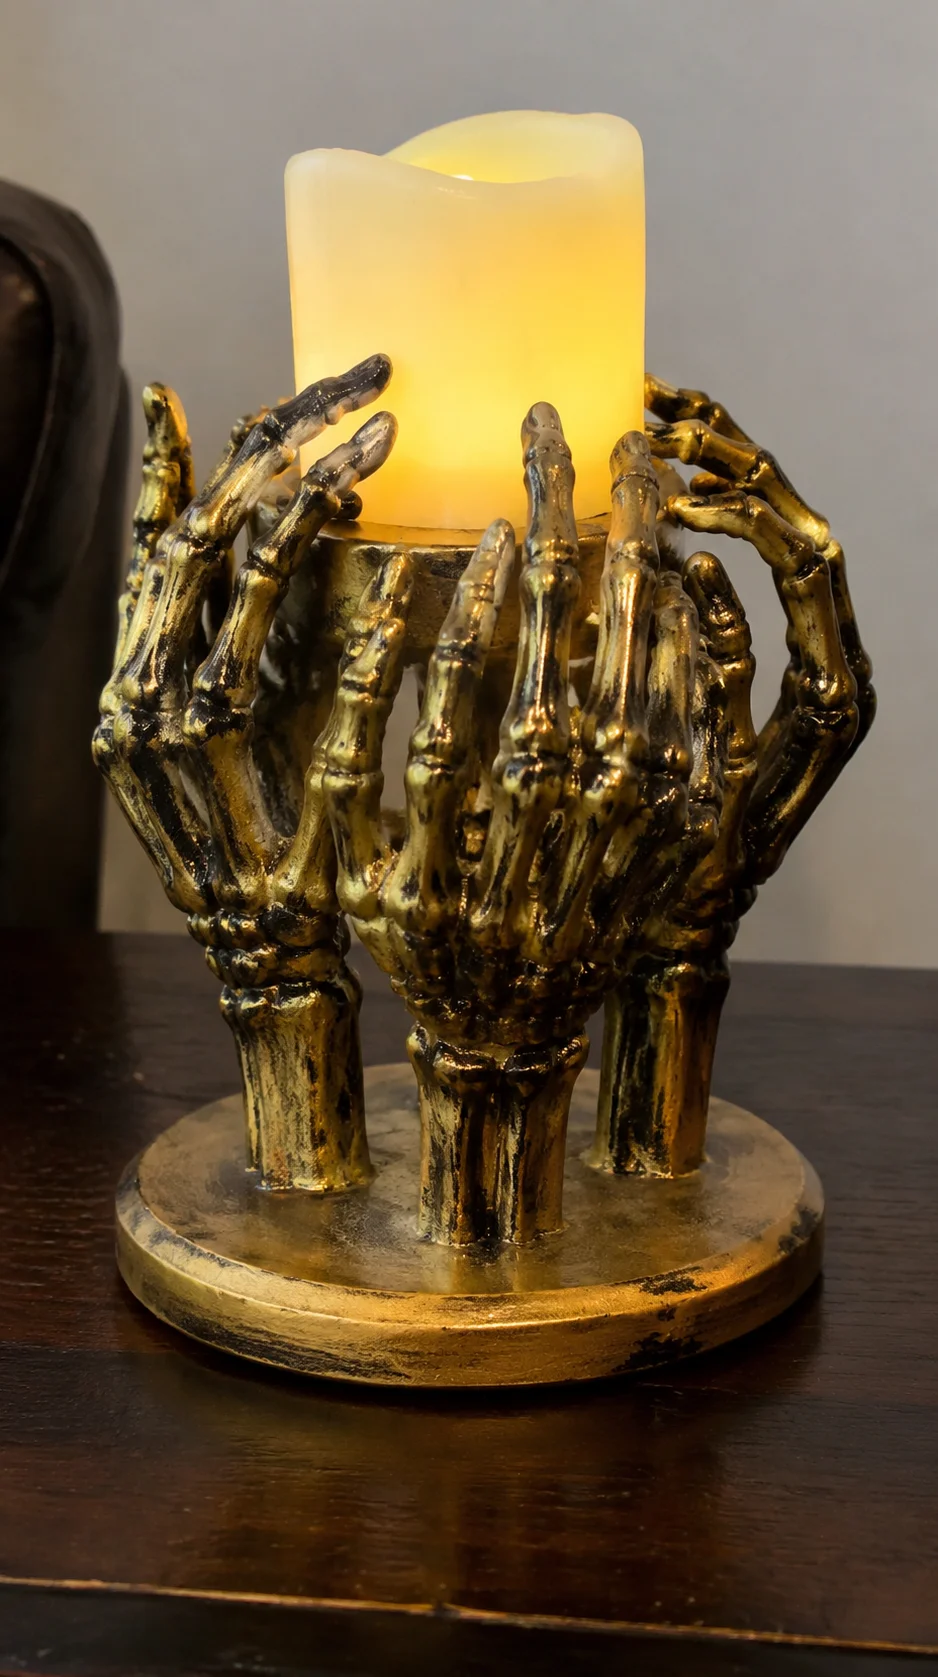
Paint the complete piece matte black, aged bone, or antique gold to make the separate materials look unified. Place felt pads beneath the base to protect furniture and prevent the finished holder from sliding.
Amazon find: Flameless pillar candles
A battery-operated pillar candle provides warm light without placing an open flame near plastic hands, paint, glue, or fabric.
10Give a Plastic Mirror a Haunted Makeover
Paint an inexpensive decorative mirror frame black and dry-brush the raised details with bronze, silver, or dusty gray. If the center is reflective plastic, lightly fog the edges with diluted craft paint while keeping the middle visible.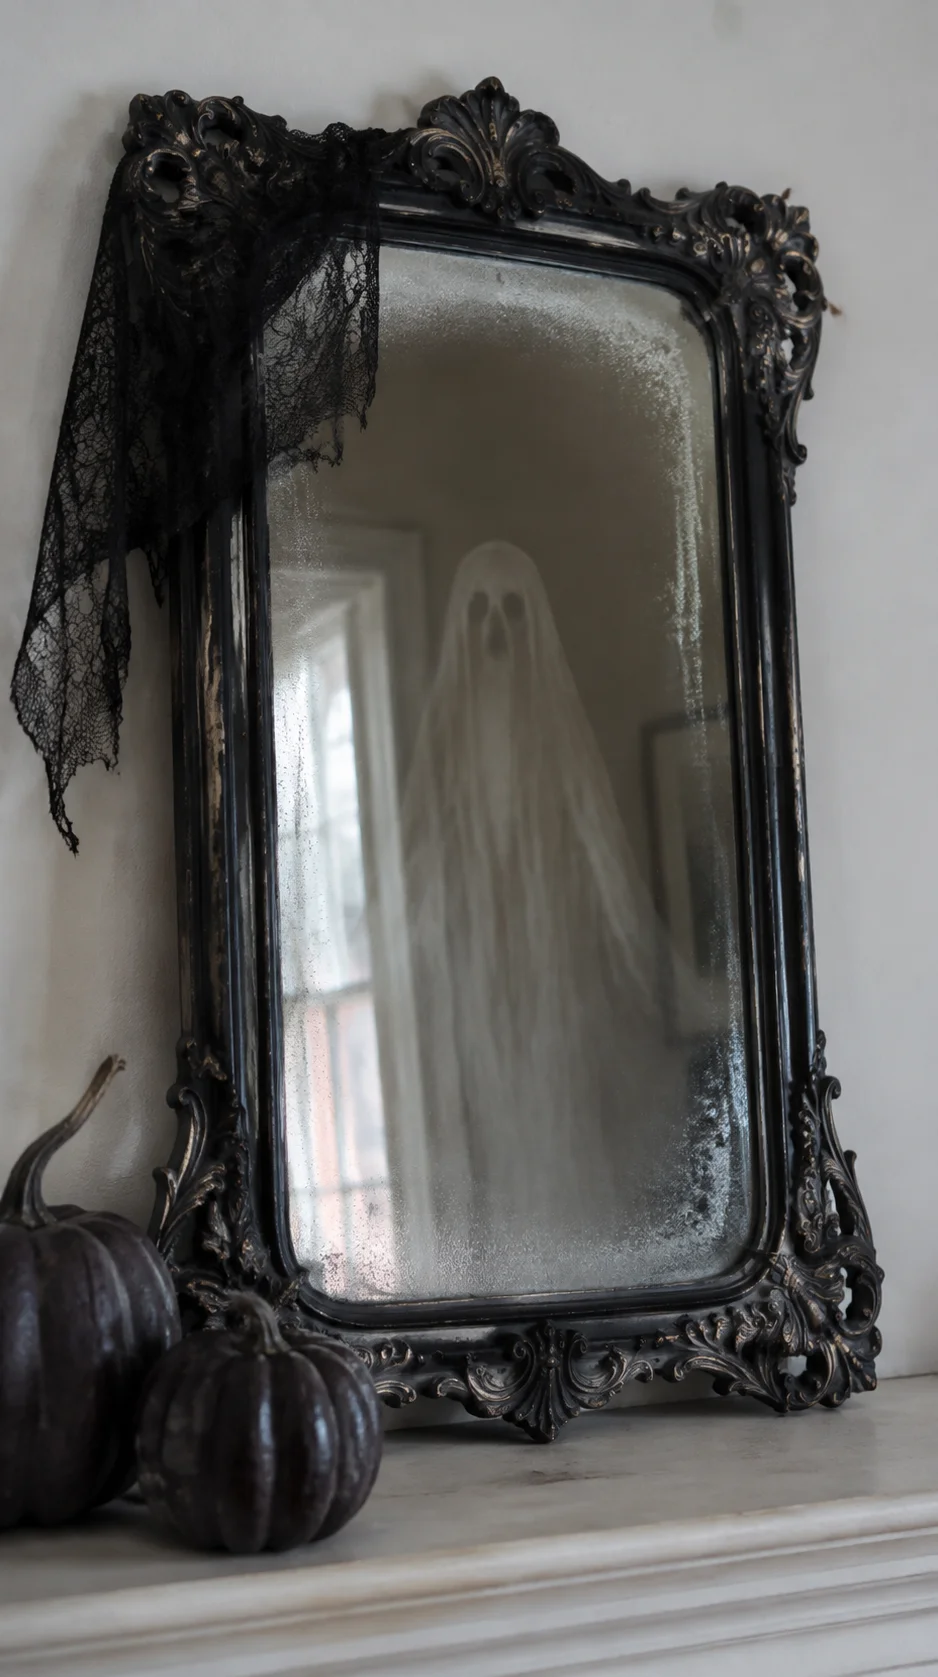
Add a removable ghost silhouette, black lace, or faded portrait behind a clear frame insert. Hang the mirror securely or lean it on a shelf where it cannot be bumped or knocked over.
Make it look older: Concentrate metallic paint on corners and raised patterns where a genuinely aged frame would naturally show wear.
11Paint a Miniature Haunted Village
Look for small ceramic houses, holiday village pieces, or unfinished wood shapes. Paint them matte black, charcoal, or dark purple, then highlight windows, rooflines, and doors with gray or metallic paint.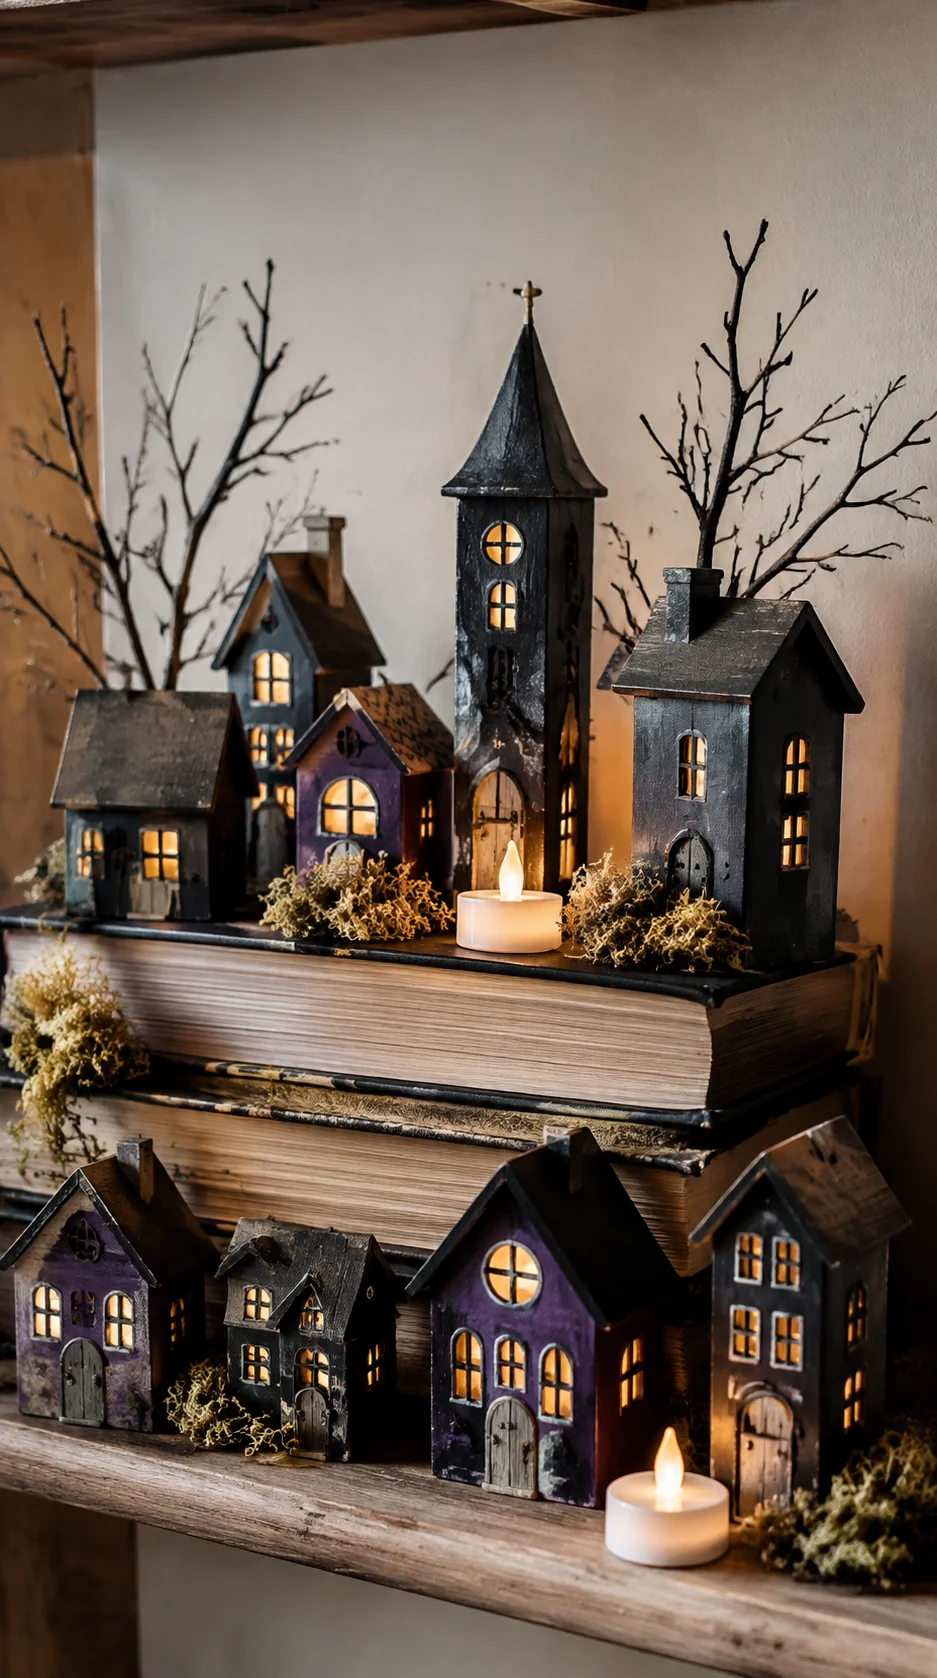
Arrange the houses on stacked books or a narrow shelf with moss, miniature trees, and battery tea lights. Leave space between the buildings so each silhouette remains visible rather than forming one dark cluster.
Amazon find: Miniature Halloween trees
Small black and bare-branched trees help connect individual houses and create the appearance of a complete haunted neighborhood.
12Assemble a Mini Halloween Cloche
Turn a clear plastic bowl or dome upside down over a small tray or painted wood round. Create a miniature scene beneath it with a tiny skull, pumpkin, raven, haunted tree, or foam tombstone.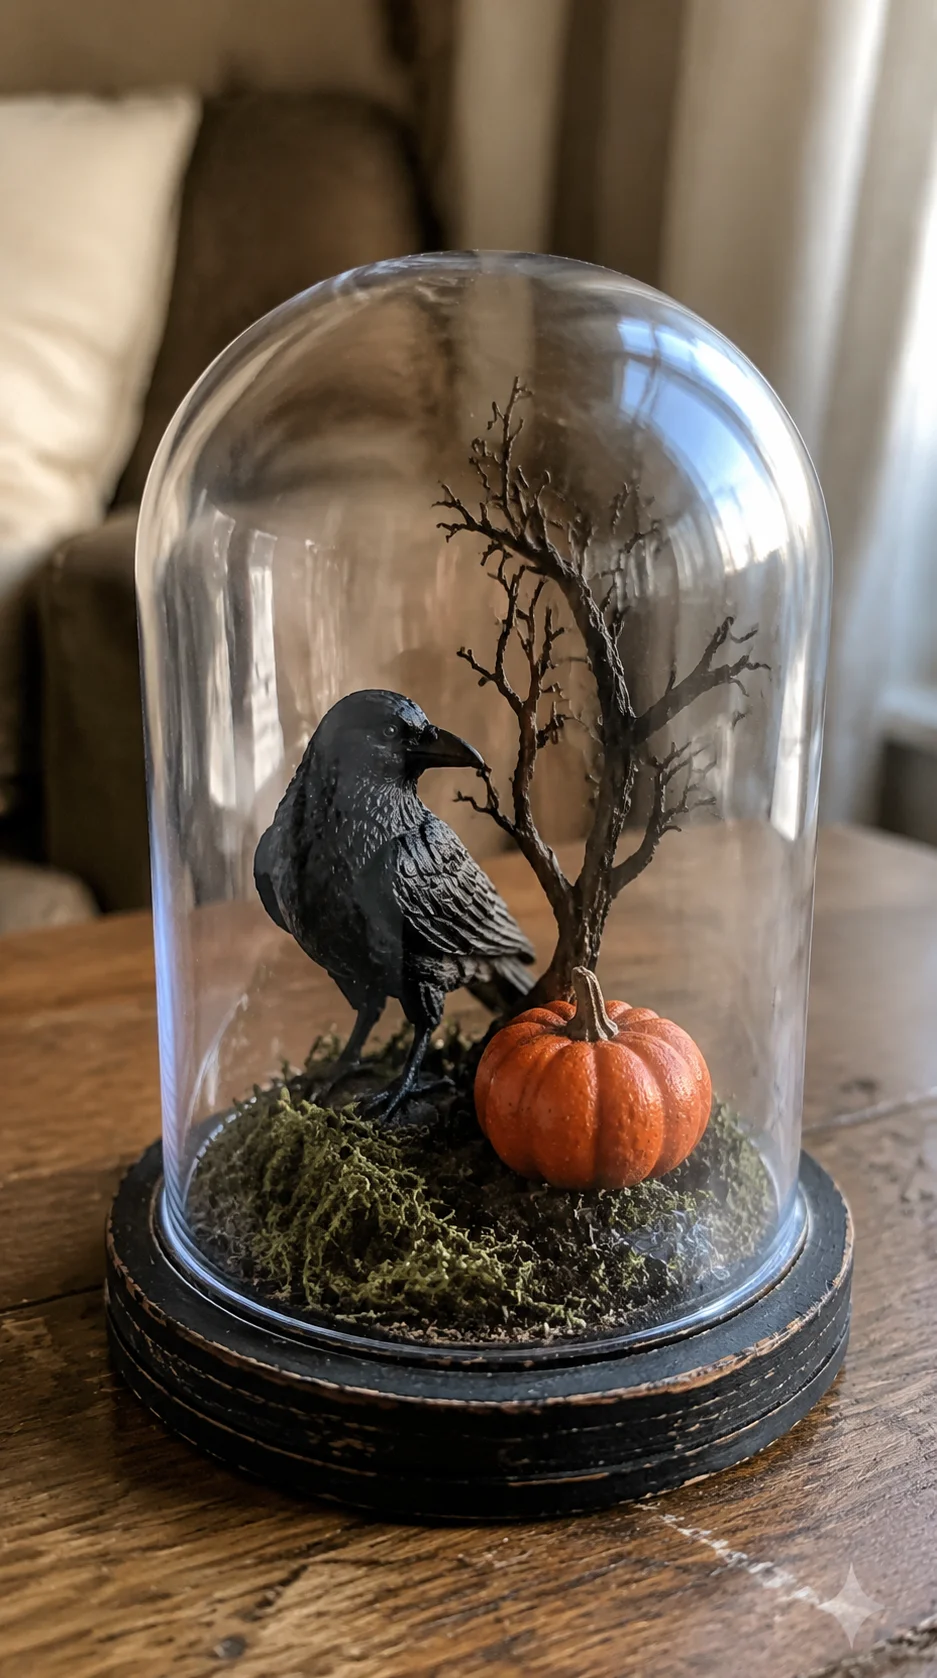
Cover the base with moss and secure every small item before replacing the dome. Use only one main figure and two supporting details so the scene remains easy to see from across the room.
Finishing tip: Paint the base the same color as one detail inside the cloche. This simple repetition makes the complete project look coordinated.
Dollar Tree Halloween Craft Shopping Checklist
| Item | Best For | Amazon Search |
|---|---|---|
| Matte craft paint | Updating frames, houses, and plastic props | Shop on Amazon |
| Low-temperature glue gun | Lightweight fabric and foam projects | Shop on Amazon |
| Flameless candles | Safe illuminated displays | Shop on Amazon |
| Black cheesecloth | Wreaths, shelves, and haunted displays | Shop on Amazon |
| Clear fishing line | Hanging lightweight candles and ghosts | Shop on Amazon |
| Faux moss | Cloche scenes, villages, and potion displays | Shop on Amazon |
Best Color Palettes for DIY Halloween Decor
Classic Halloween
Orange + black + cream: A cheerful palette for pumpkins, ghosts, wreaths, and family-friendly decorations.
Mystical Witch
Purple + black + antique gold: Ideal for crystal balls, potion bottles, candles, and fortune-teller displays.
Haunted Apothecary
Olive green + amber + charcoal: Use this earthy combination for bottles, moss, specimens, and aged labels.
Elegant Gothic
Black + burgundy + aged brass: A dramatic choice for floral wreaths, mirrors, skeleton hands, and candleholders.
Neutral and Ghostly
Cream + gray + faded brown: A softer palette for ghosts, floating candles, vintage frames, and cottage-style rooms.
Common Crafting Mistakes and Safety Tips
- Skipping surface preparation: Clean plastic, glass, and metal before painting so dust and oils do not prevent the finish from sticking.
- Using the wrong paint: Select paint that is appropriate for the project material and follow its ventilation and drying instructions.
- Adding too many details: A limited palette and a few repeated elements usually look more polished than many unrelated embellishments.
- Using indoor materials outside: Paper, cardboard, mop fibers, and many adhesives should remain indoors or on a protected porch.
- Relying on hot glue for heavy items: Use stronger material-appropriate adhesive or mechanical fasteners when a decoration has significant weight.
- Decorating before testing the arrangement: Position pieces temporarily before gluing so you can correct spacing and balance.
- Using open flames: Choose flameless candles around plastic, paper, fabric, glue, dried plants, and painted decorations.
- Leaving sharp craft materials exposed: Cover wire ends, trim zip ties, and keep scissors, blades, and hot tools away from children.
- Ignoring drying time: Let paint and adhesive cure fully before assembling, hanging, or storing the finished craft.
Frequently Asked Questions
What are the best Dollar Tree items for Halloween crafts?
Useful items include wreath forms, plastic pumpkins, picture frames, mop heads, faux flowers, glass bottles, candleholders, miniature houses, plastic bowls, skeleton pieces, ribbon, and battery tea lights. Available products vary by location and season.
How do I make cheap Halloween decorations look better?
Cover shiny finishes with matte paint, use a limited color palette, add subtle aged details, and group related objects together. Natural textures such as twine, moss, branches, and fabric can also soften inexpensive plastic.
When should I shop for Dollar Tree Halloween supplies?
Seasonal inventory often appears well before Halloween, and popular craft bases may sell quickly. Begin checking stores in late summer, but buy only the supplies that match planned projects to avoid unnecessary spending.
Can these DIY Halloween decorations be used outside?
Plastic and weather-resistant pieces may work on a protected porch when securely anchored. Keep cardboard, paper, indoor paint, untreated fabric, mop fibers, and delicate adhesives away from rain, strong wind, and direct moisture.
How can I store homemade Halloween decorations?
Allow every item to dry completely, then wrap fragile pieces in tissue paper and place them in labeled plastic bins. Store wreaths and dimensional projects without stacking heavy objects on top of them, and remove batteries before long-term storage.
Final Thoughts
Dollar Tree Halloween crafts are an affordable way to personalize your seasonal decorations. Simple supplies such as frames, plastic pumpkins, mop heads, bottles, and candleholders can become completely different pieces with paint and a few creative additions.
Start with one project that suits the area you want to decorate. Choose a focused color palette, allow enough drying time, and use battery lighting to give the finished piece a cozy Halloween glow.
Whether you prefer cute ghosts, gothic flowers, haunted villages, or mysterious potion bottles, these DIY ideas can help you create Halloween decor that feels stylish, original, and wonderfully budget-friendly.
1 thought on “12 DIY Dollar Tree Halloween Decoration”