
Air dry clay is one of the easiest materials for making handmade Halloween decorations. It does not require a kiln or home oven, and it can be shaped into witch hats, bubbling cauldrons, potion bottles, broom ornaments, moons, and other magical details.
These witchy clay crafts are designed for beginners and use simple sculpting techniques. Slightly uneven edges, crooked hats, and hand-shaped details can make each piece feel more charming instead of looking unfinished.
Below, you will find 12 air dry clay Halloween crafts, practical shaping and drying advice, color palette inspiration, a supply checklist, styling suggestions, safety information, and helpful product finds.
More Halloween Craft Inspiration
Quick List of Air Dry Clay Witch Crafts
- Witch hat trinket dish
- Mini bubbling cauldron
- Crescent moon wall hanging
- Witch broom ornaments
- Mini potion bottles
- Black cat familiar figure
- Witch boot shelf sitters
- Clay spell book decoration
- Moon-phase garland
- Witch cottage tealight house
- Mushroom and crystal ring dish
- Witchy Halloween ornaments
How to Work With Air Dry Clay
Prepare a clean, smooth work surface before opening the clay. A silicone craft mat, ceramic tile, or piece of parchment paper can keep the clay from sticking and make cleanup easier. Keep a small bowl of water nearby, but use water sparingly because too much can make the clay soft and difficult to shape.
Knead only the amount of clay you plan to use immediately and keep the remaining material sealed. Roll slabs to an even thickness so they dry at a similar rate. Pieces that are extremely thin may curl, while very thick pieces can take longer to dry and may crack.
When attaching two clay pieces, lightly scratch both contact areas with a toothpick, add a tiny amount of water or clay slip, and press them together. Blend the seam gently without flattening the surrounding details.
Allow every project to dry according to the clay manufacturer’s directions. Turn flat pieces when appropriate so both sides receive air, and do not paint or seal the clay until the center is completely dry.
One basic clay shape + one magical symbol + carved texture + dark paint wash + one metallic highlight
Which Clay Witch Craft Should You Make?
| Style or Area | Best Pieces to Use | Why It Works |
|---|---|---|
| Halloween Mantel | Witch hat, cauldron, spell book, and black cat | Different heights and recognizable shapes create an easy themed display. |
| Entryway | Moon garland, wall hanging, and miniature witch cottage | The handmade pieces add Halloween character without occupying much space. |
| Coffee Table | Trinket dish, cauldron, and potion bottles | Small projects can be grouped neatly on a decorative tray. |
| Bookshelf | Spell book, cat figure, witch boots, and tiny bottles | Compact clay pieces layer naturally with books and everyday decor. |
| Halloween Party | Ornaments, potion bottles, and moon decorations | Small handmade pieces can decorate place settings, favors, and food tables. |
| Beginner Project | Broom ornaments, moon phases, and flat ornaments | Flat shapes are easier to cut, texture, dry, paint, and repair. |
Easy DIY Air-Dry Clay Witch Crafts for Halloween
1Shape a Witch Hat Trinket Dish
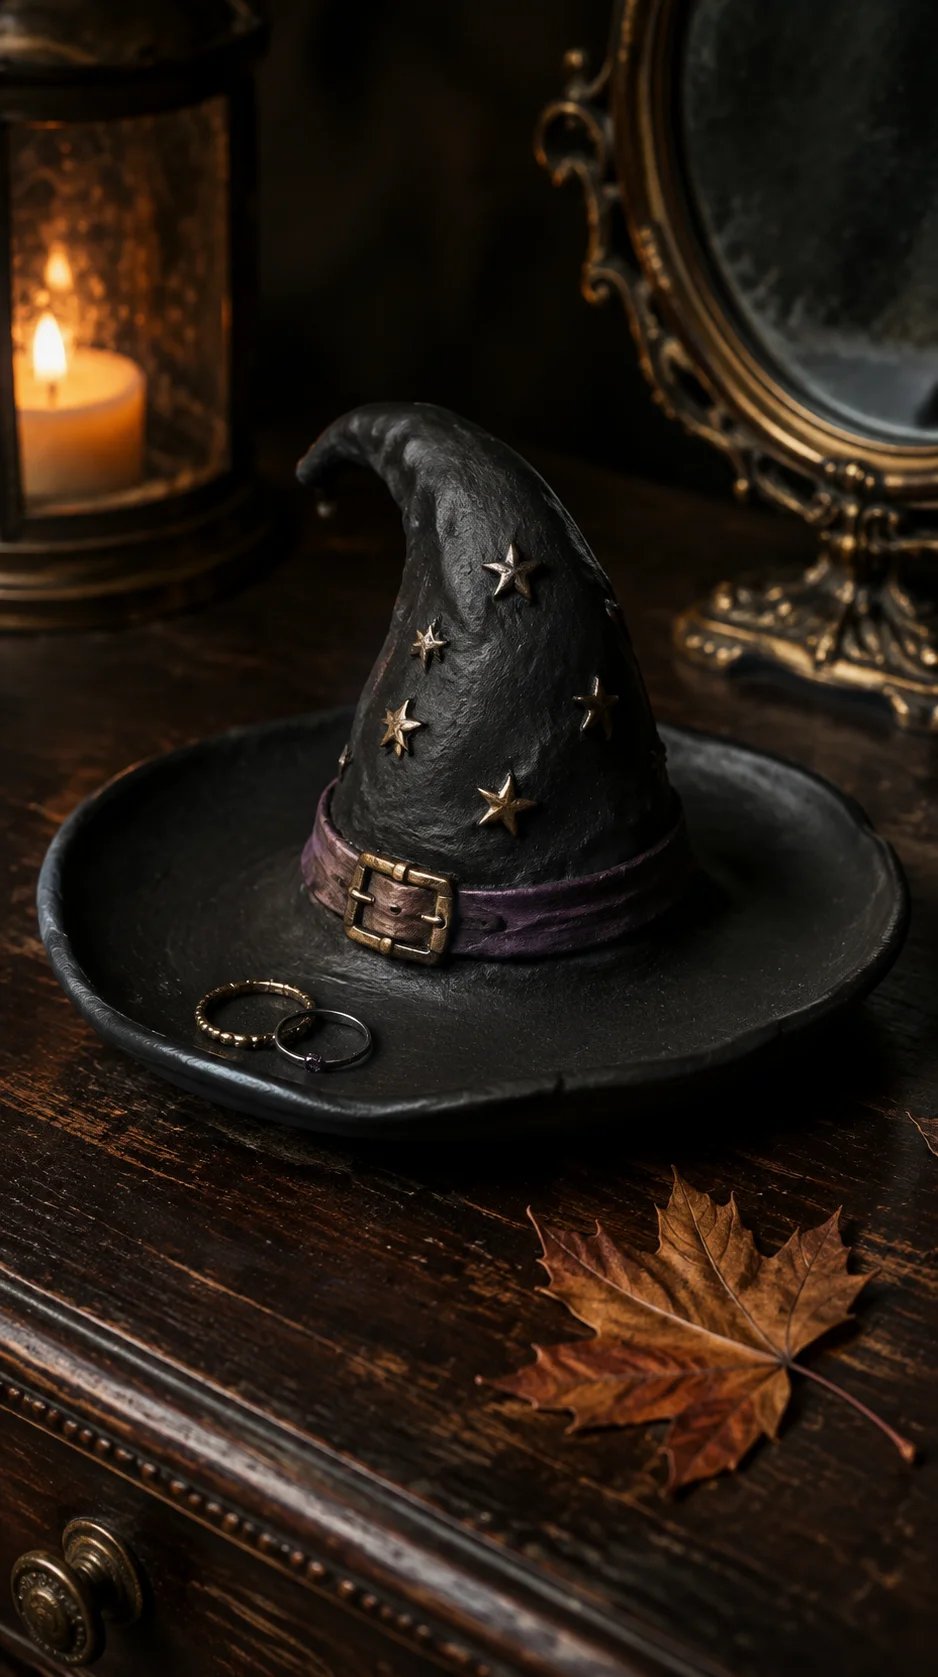 Roll the clay into an even slab and cut out a wide circle for the hat brim. Gently lift the outer edge to form a shallow dish, then shape a separate cone with a curved tip and attach it to the center.
Add a thin clay hatband, tiny buckle, stars, or a miniature moon. Once the piece has dried completely, paint it matte black, purple, or muted green and brush a small amount of metallic paint over the raised details.
2Sculpt a Mini Bubbling Cauldron
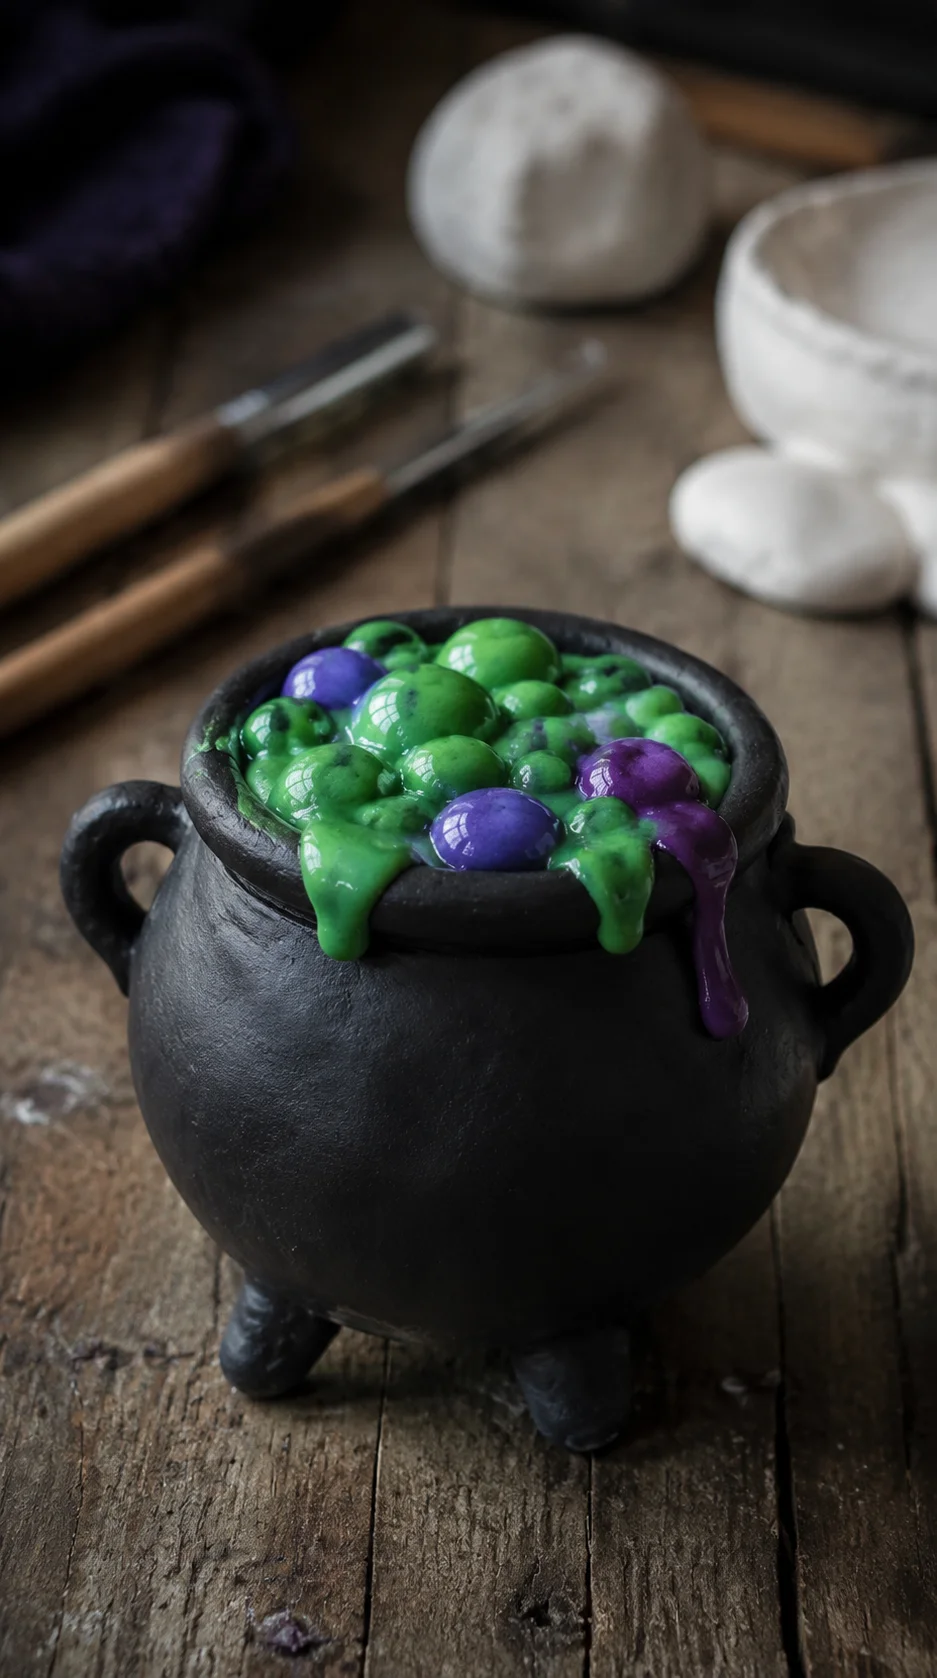 Shape a thick clay bowl with a rounded body and stable flat bottom. Add a rolled rim, two small handles, and three short feet. Make sure each foot touches the work surface evenly so the cauldron does not wobble.
Fill the opening with small clay bubbles in different sizes and add one or two bubbles spilling over the rim. Paint the cauldron charcoal or matte black, then use green, purple, or metallic paint on the potion bubbles.
Amazon find: White Air Dry Modeling Clay
A smooth white clay provides a flexible base for painting cauldrons, witch hats, ornaments, and other Halloween decorations.
3Make a Crescent Moon Wall Hanging
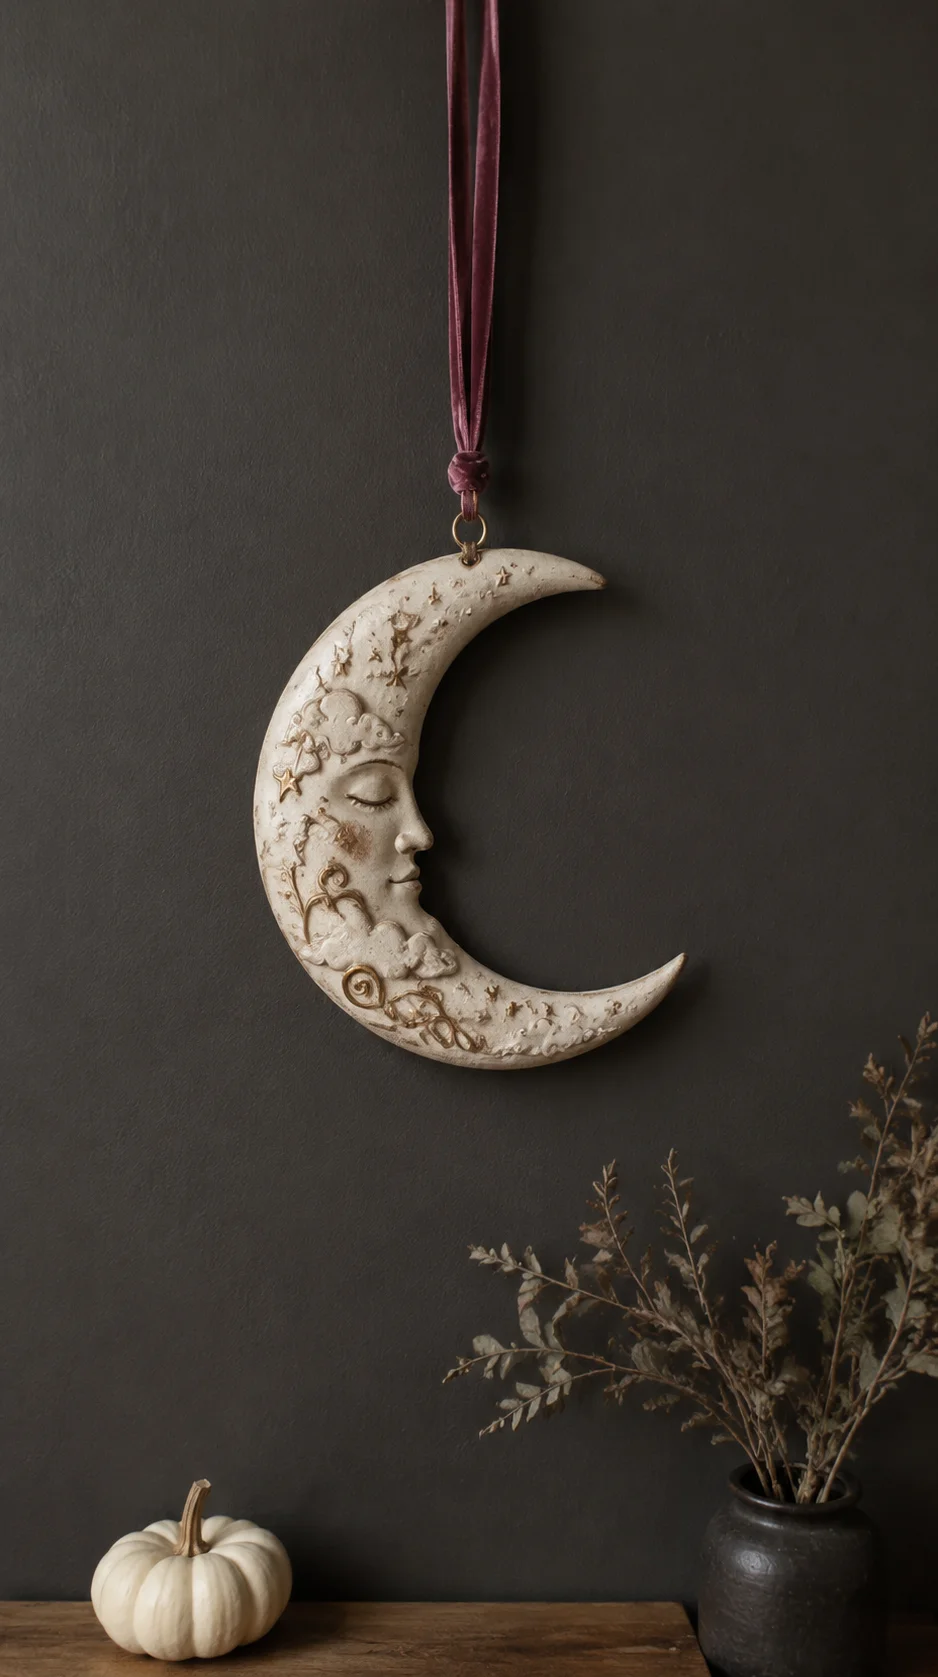 Roll the clay into a slab approximately one-quarter inch thick and cut a crescent moon using a paper template. Smooth the edges with a damp fingertip and carve small stars, vines, clouds, or celestial lines into the surface.
Make one or two hanging holes before the clay dries. Paint the finished moon cream, gold, charcoal, or deep purple, then thread it with velvet ribbon, jute twine, or a lightweight bead strand.
4Create Mini Witch Broom Ornaments
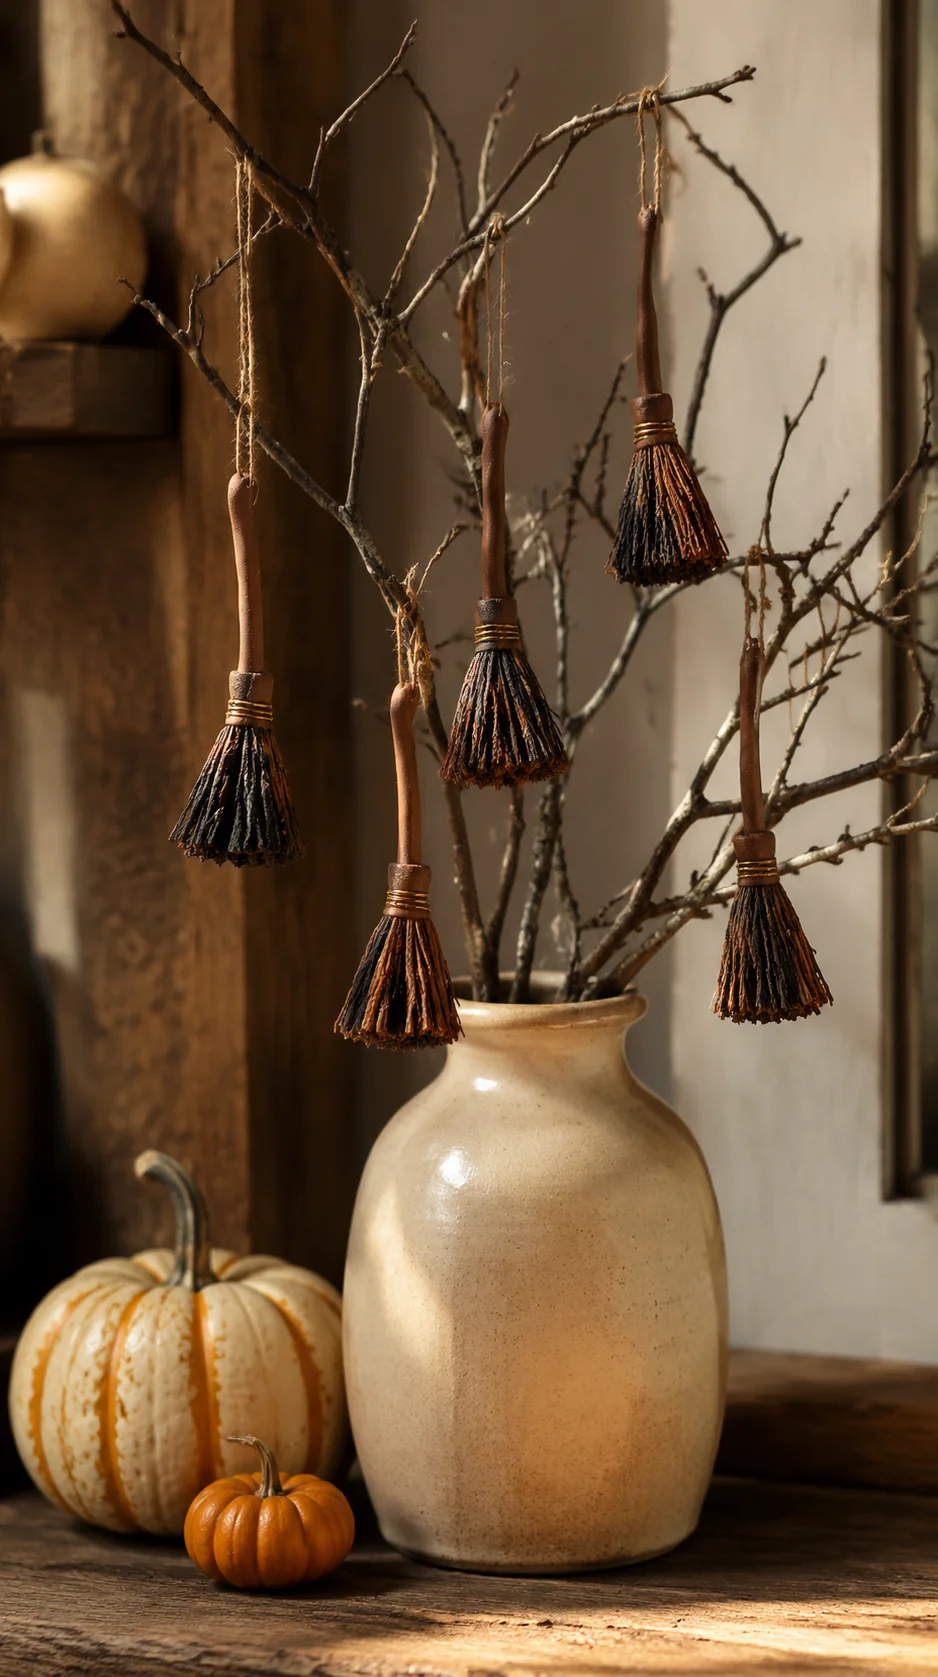 Roll small clay handles and allow them to remain slightly crooked for a handmade appearance. Form the broom bristles from flat teardrop shapes and carve several vertical lines into each one with a toothpick.
Join the handle and bristles carefully, then add a thin clay band around the connection. Make a hanging hole before drying and finish each broom with black, brown, rust, or gold paint.
Amazon find: Beginner Clay Sculpting Tool Set
Basic shaping tools help carve broom bristles, smooth seams, create small holes, and add texture without requiring advanced equipment.
5Form Miniature Potion Bottles
 Shape small clay bottles with round, square, or uneven bodies. Add narrow necks, tiny stoppers, and raised details such as moons, skulls, vines, stars, or wax-like drips.
Paint the bottles in smoky green, plum, black, rust, or antique ivory. Use a dark paint wash in the recessed details and dry-brush a lighter shade across raised edges to create an aged finish.
6Sculpt a Black Cat Familiar
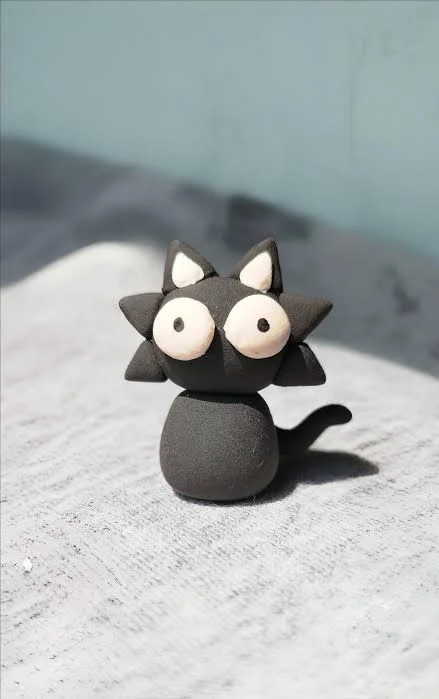 Begin with an oval clay body and a smaller round head. Pinch two pointed ears from the head, then add simple paws and a curved tail. A seated shape is usually easier for beginners to balance than a standing cat.
Carve small eyes, whiskers, and fur lines before drying. Paint the cat matte black or dark brown, then add tiny gold, green, or amber eyes and a small crescent moon collar.
7Make Crooked Witch Boot Shelf Sitters
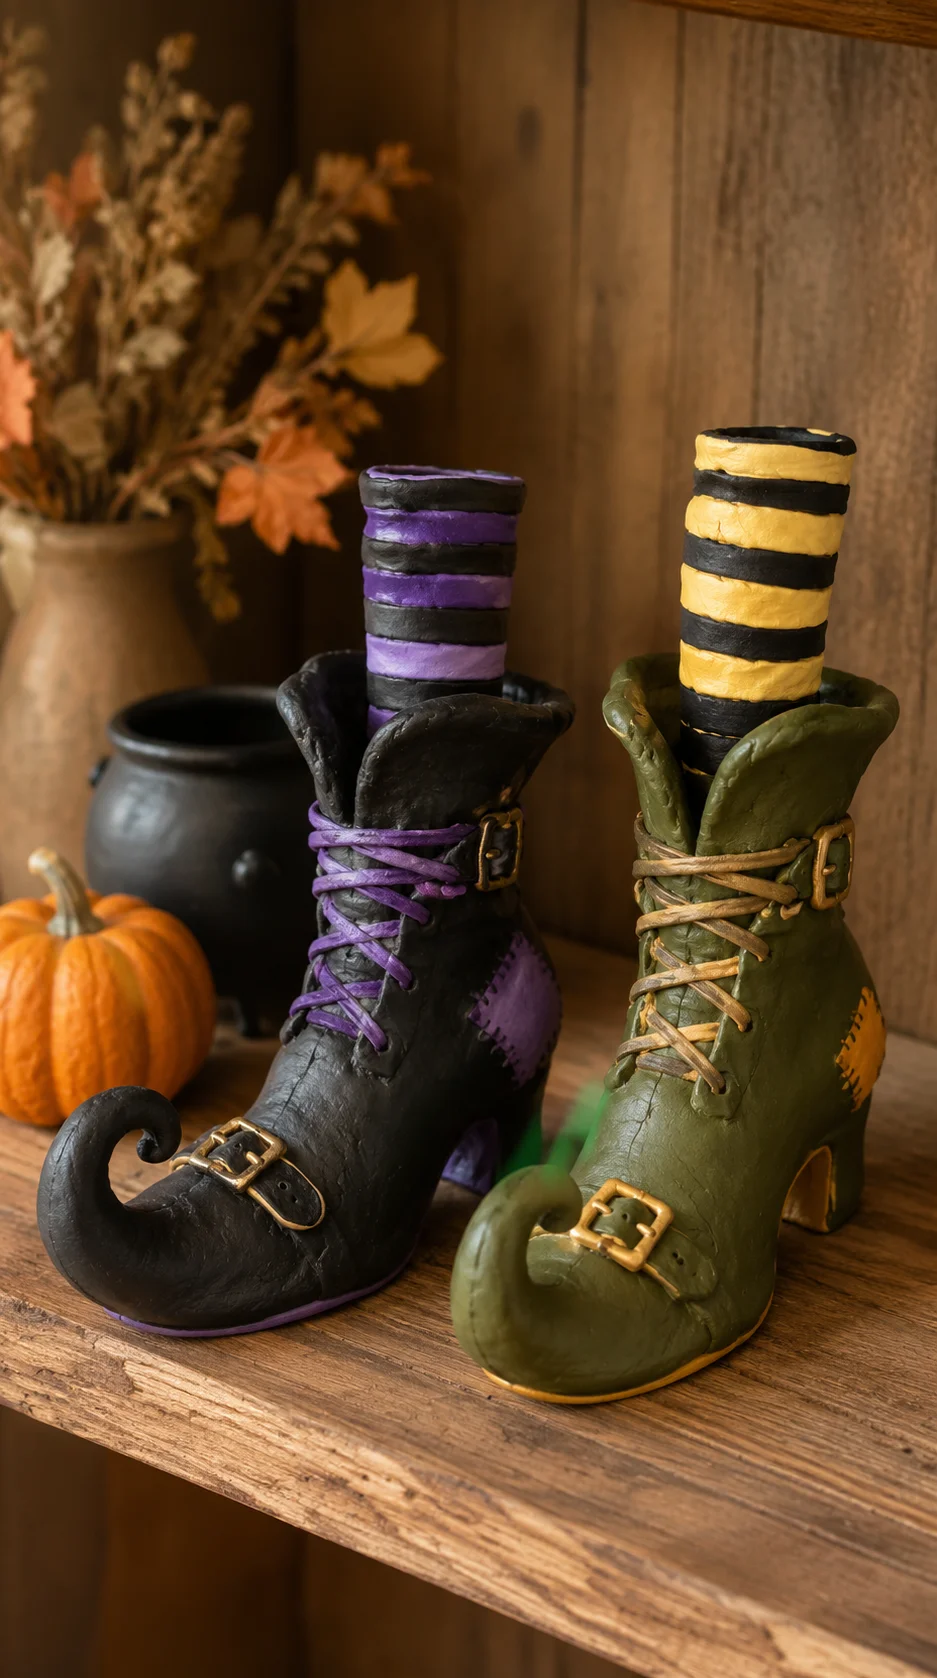 Shape two chunky ankle boots with curled toes and wide, flat bottoms. Add raised soles, buckles, buttons, laces, or striped sock details around the top.
Paint the boots black, purple, olive, or dark brown and add a metallic accent to the buckles. Display the pair near stacked books, pumpkins, or a small cauldron so they appear to belong to an unseen miniature witch.
Amazon find: Fine Detail Craft Paintbrushes
Small brushes make it easier to paint buckles, laces, eyes, stars, potion labels, and other tiny Halloween details.
8Craft a Mini Clay Spell Book
 Form a thick rectangle with slightly uneven edges and carve several lines along three sides to suggest stacked pages. Add a thin clay cover around the outside, allowing it to extend slightly beyond the page block.
Decorate the cover with a raised moon, key, eye, star, or curling vine. Paint the book dark green, burgundy, black, or brown, then brush cream across the page edges and metallic paint over the raised cover detail.
9String a Moon-Phase Clay Garland
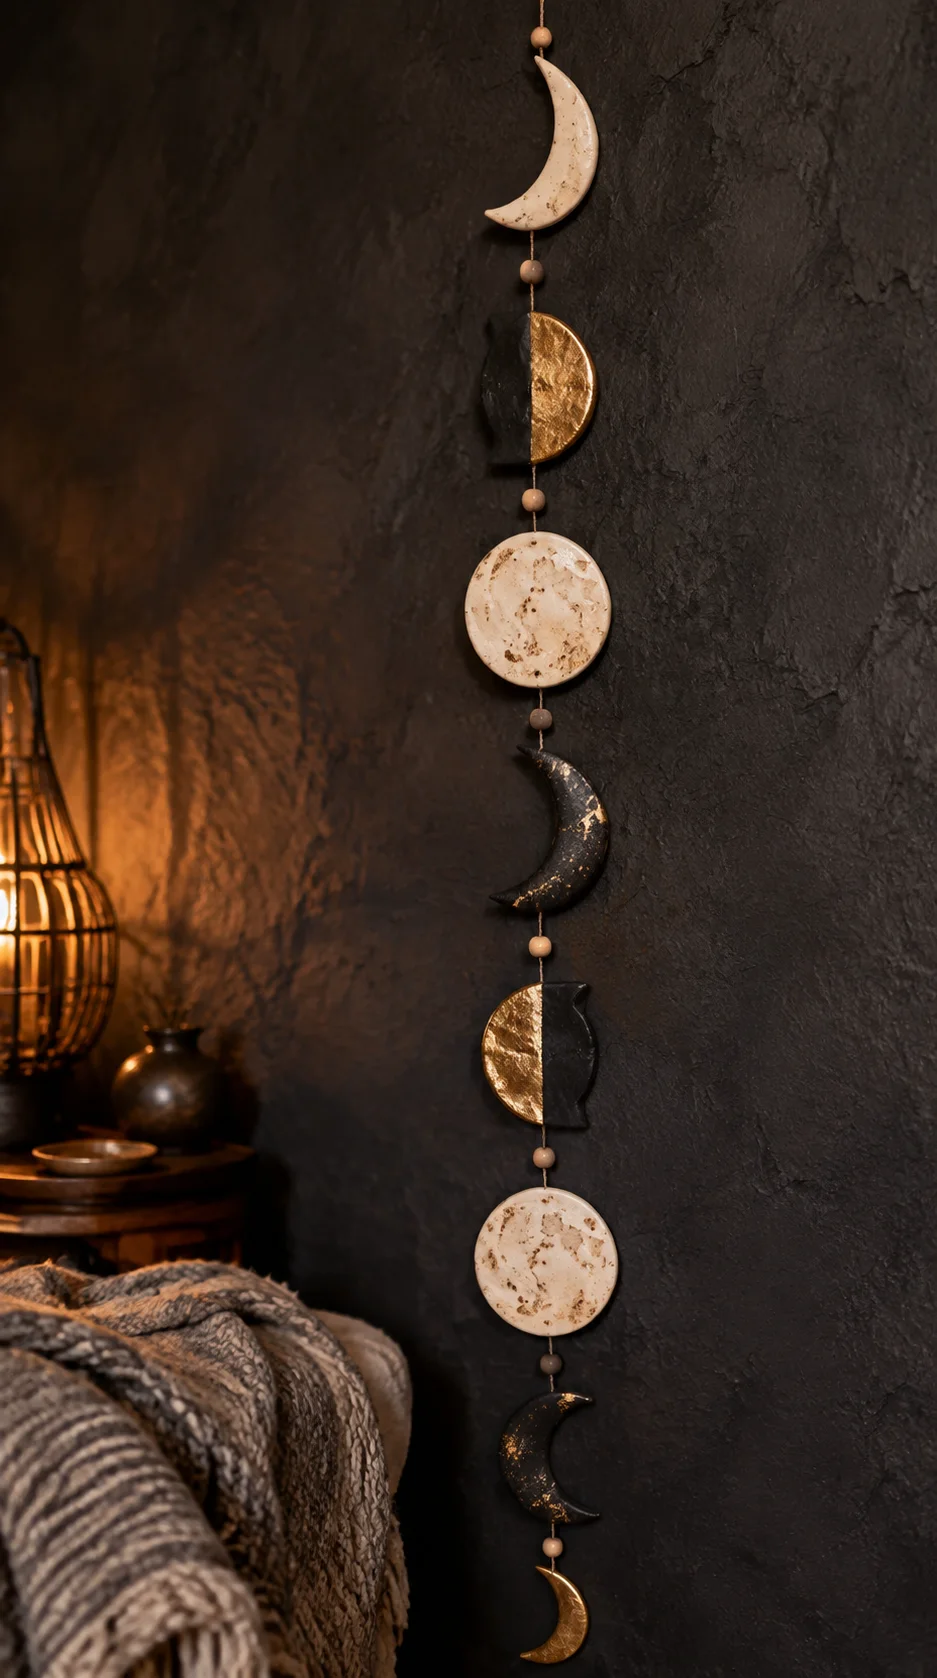 Roll an even clay slab and cut several matching circles. Leave one circle full, trim others into crescent shapes, and create intermediate moon phases by carving or painting sections after drying.
Make two hanging holes in every piece before the clay hardens. Paint the phases black, cream, charcoal, or gold and string them in order along twine, velvet ribbon, or a lightweight chain.
Amazon find: Small Circle Cutters for Clay
A set of round cutters helps create consistent moon pieces, ornaments, tags, and medallions in several sizes.
10Build a Mini Witch Cottage Tealight House
 Cut simple house walls from clay slabs and make small window openings before the pieces begin to firm. Add a crooked doorway, textured roof, tiny chimney, mushrooms, vines, or miniature pumpkins.
Join the walls carefully and leave the back or bottom open. After the cottage dries, paint it in muted Halloween colors and place a battery-operated tea light behind it so the windows glow.
11Make a Mushroom and Crystal Ring Dish
 Shape a shallow round or oval dish and gently raise the edges. Add two or three miniature mushrooms along one side, keeping the stems thick enough to remain sturdy as they dry.
Form simple crystal points beside the mushrooms and carve tiny stars into the dish. Paint the finished piece in earthy green, cream, plum, rust, and gold for a magical woodland-witch appearance.
12Cut Witchy Halloween Ornaments
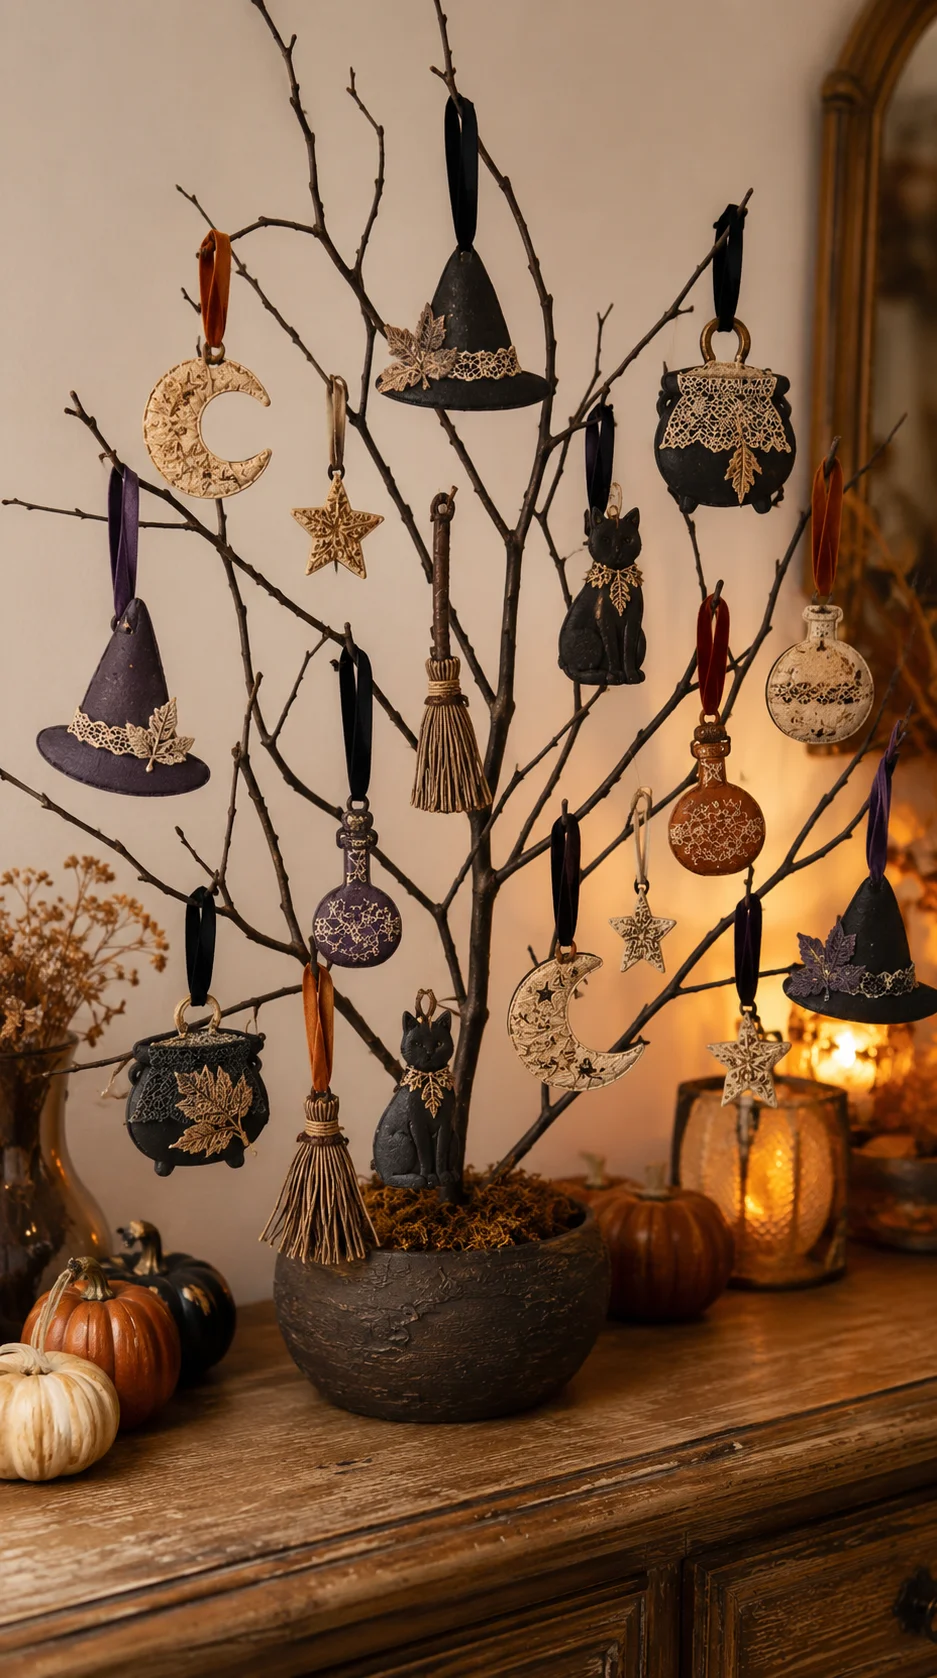 Roll the clay into an even slab and cut witch hats, cauldrons, brooms, cats, potion bottles, moons, or stars. Press lace, leaves, stamps, or textured fabric into the surface before cutting if you want a detailed background.
Make a hanging hole in every ornament while the clay is soft. After drying, paint the pieces individually or use one coordinated palette, then finish them with ribbon for branches, garlands, gifts, cabinet handles, or an indoor Halloween tree.
Amazon find: Halloween Mini Shape Cutters
Small cutters make it easier to create consistent hats, moons, bats, stars, pumpkins, and other flat clay ornaments.
How to Make Air Dry Clay Crafts Look Expensive
Focus on texture rather than adding many tiny decorations. Lace impressions, carved lines, rough stone effects, page marks, and raised vines make a single-color clay piece look detailed and thoughtfully designed.
Use layered paint instead of one flat coat. Apply the main color first, brush a darker wash into recessed areas, and gently wipe the raised surface. Once dry, add a very small amount of metallic or lighter paint to the edges.
Finish the project neatly by sanding rough areas with fine sandpaper when appropriate, removing dust, painting the bottom, and applying a compatible sealer. Follow the directions for your clay, paint, and sealer because not every product combination works together.
Easy Aged-Finish Formula
Main color + thin dark wash in the carved details + wiped raised areas + light dry-brushing + one subtle metallic accent
Best Color Palettes for Witchy Clay Crafts
Matte black, deep purple, burnt orange, cream, and antique gold
Moss green, mushroom brown, rust, ivory, and aged bronze
Midnight blue, charcoal, lavender, silver, and pale cream
Burgundy, dusty rose, black, parchment, and muted brass
Charcoal, faded orange, dark brown, antique white, and pewter
Common Air Dry Clay Mistakes and Safety Tips
- Using too much water: Excess water weakens the clay and can create a slimy surface, uneven drying, or cracks.
- Making pieces extremely thin: Thin tails, hat tips, legs, and handles are more likely to break. Keep delicate parts slightly chunky.
- Skipping the scoring step: Scratch and moisten both surfaces before joining separate pieces so they form a stronger connection.
- Drying the clay too quickly: Direct heat can dry the outside before the center and increase cracking. Follow the manufacturer’s directions.
- Painting damp clay: Moisture trapped beneath paint or sealer may damage the finish. Wait until the piece is completely dry.
- Using real candles: Air dry clay decorations are not automatically heat-resistant or fire-safe. Use battery-operated lighting.
- Treating decorative clay as food-safe: Do not use handmade pieces for uncovered food, drinks, or food preparation unless every material is specifically certified for that purpose.
- Leaving sharp tools accessible: Use craft knives and carving tools on a protected surface and store them safely after use.
- Displaying unprotected clay outdoors: Air dry clay may absorb moisture even after sealing. Keep these projects indoors unless the manufacturer approves outdoor use.
Frequently Asked Questions
How long does air dry clay take to dry?
Drying time depends on the brand, thickness, room temperature, humidity, and design. Thin ornaments may dry faster than solid figures. Always follow the manufacturer’s directions and wait until the entire piece is dry before painting.
How do I stop air dry clay from cracking?
Use an even thickness, avoid excessive water, join pieces securely, and let the project dry gradually according to its instructions. Keep narrow details slightly thicker and avoid placing wet clay near direct heat.
What paint works best on air dry clay?
Acrylic craft paint is commonly used because it dries quickly and is available in many colors. Make sure the clay is completely dry, apply thin paint layers, and confirm that any sealer is compatible with both the clay and paint.
Can air dry clay Halloween crafts be used outside?
Most air dry clay is best kept indoors. It can absorb moisture and weaken even when painted or sealed. Check your clay and sealer instructions before considering outdoor display.
Which witchy clay craft is easiest for beginners?
Flat witch ornaments, moon phases, broom decorations, and simple crescent wall hangings are the easiest starting projects. They require fewer joins and are generally easier to dry, paint, and repair than hollow or freestanding sculptures.
Final Thoughts
Air dry clay makes it possible to create charming witch-themed Halloween decorations without a kiln or complicated sculpting equipment. Simple shapes such as hats, moons, brooms, cats, cauldrons, and spell books can become beautiful seasonal pieces with only a little texture and paint.
If this is your first time using air dry clay, begin with a flat ornament or moon garland. Once you feel comfortable controlling the thickness and joining pieces, move on to a cauldron, cat figure, trinket dish, or miniature witch cottage.
Do not worry about making every edge perfectly straight. Crooked hats, uneven books, and hand-carved details give these witch crafts their personality and make your Halloween decor feel genuinely handmade.
1 thought on “12 Easy DIY Air Dry Clay Witch Crafts for Halloween”