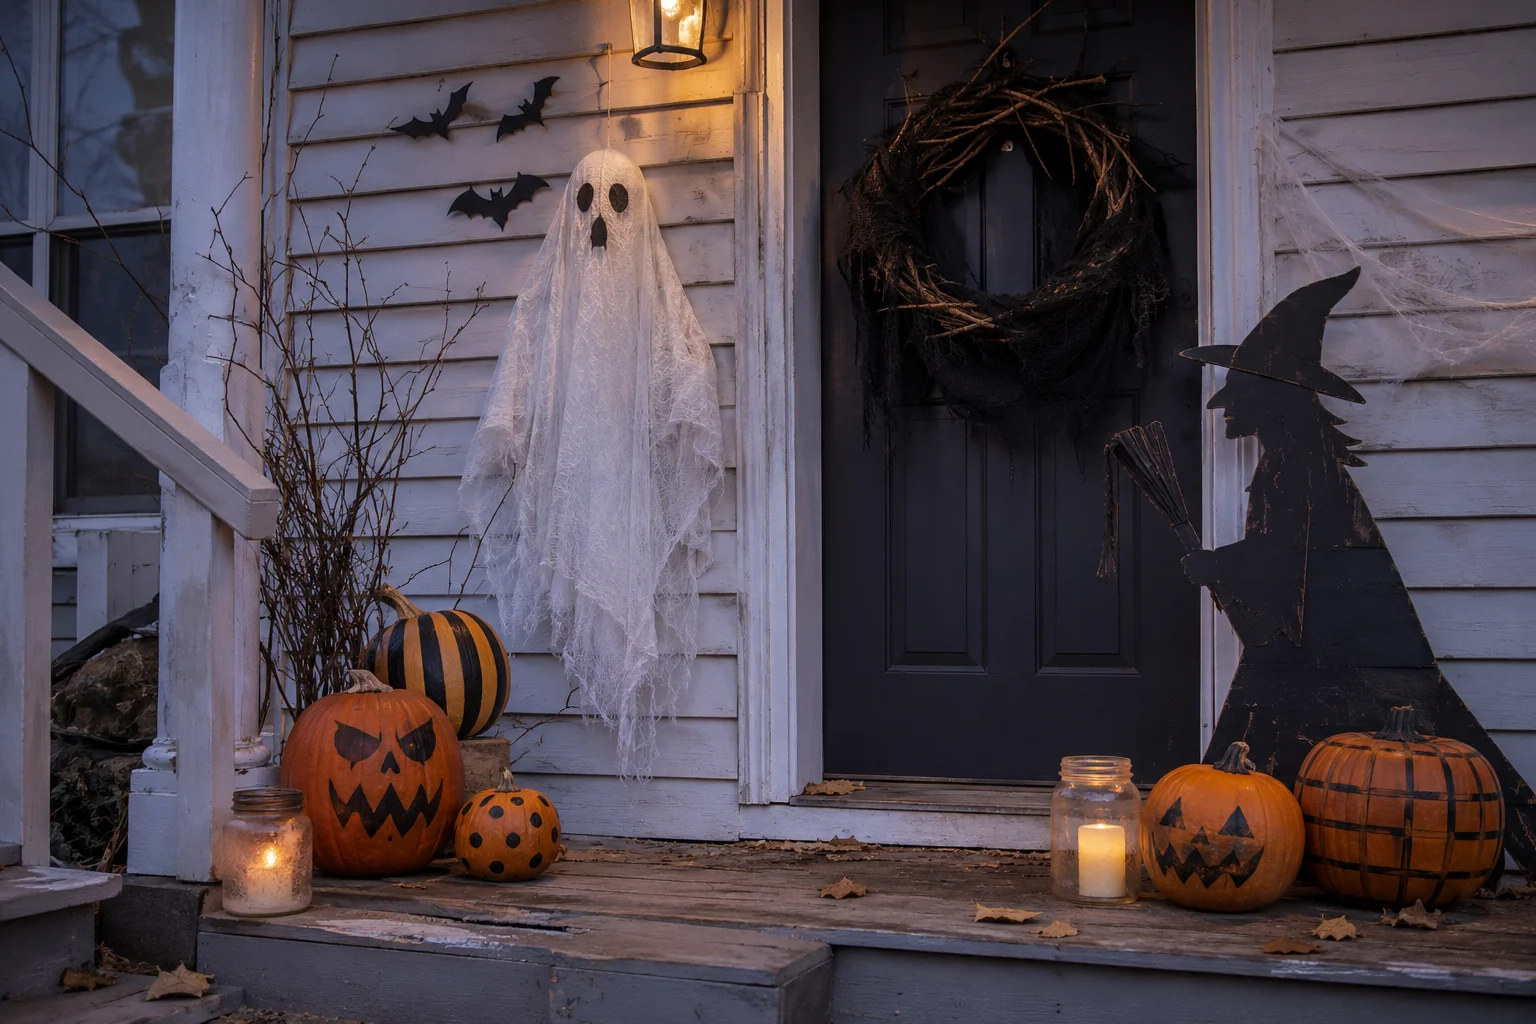
Homemade Halloween decorations can make your home feel more creative, personal, and wonderfully spooky. You can transform cardboard, jars, fabric, branches, paper, and other basic materials into impressive decorations without buying expensive finished props.
The key is choosing projects that work with your available space and decorating style. A few carefully made decorations will usually create more impact than many small items placed randomly around the house.
Below, you will find 13 wicked homemade Halloween decoration ideas for mantels, porches, windows, tables, and party entrances, along with supply recommendations, color palettes, money-saving tips, and essential safety advice.
Affiliate note: This article may contain affiliate links. If you buy through these links, we may earn a small commission at no extra cost to you.
More DIY Halloween Inspiration
Quick List of Homemade Halloween Decorations
- Stiffened cheesecloth ghosts
- Cardboard haunted-house windows
- Glowing jar lanterns
- Twisted branch Halloween wreath
- Oversized trash-bag spider
- Floating witch hat lights
- DIY cardboard tombstones
- Creepy changing portraits
- Chicken-wire yard ghost
- Flying paper bat wall
- Fabric scrap pumpkins
- Spooky apothecary bottles
- Halloween paper-bag luminaries
How to Make Homemade Halloween Decorations Look Impressive
Begin with one clear decorating theme, such as haunted mansion, witch’s cottage, vintage Halloween, friendly ghosts, or outdoor graveyard. This will help you choose materials and prevent unrelated projects from making the display look cluttered.
Use a limited palette of two main colors and one accent. Matte finishes tend to look more convincing than shiny plastic, while layered gray, brown, or metallic paint can make cardboard and inexpensive materials appear aged.
Finish each arrangement with lighting. Battery-operated candles, warm string lights, or colored LED spotlights add depth and make simple homemade props stand out after dark without requiring an open flame.
Simple Halloween decor formula: One handmade statement piece + two smaller supporting props + layered texture + hidden battery lighting.
Where to Use Homemade Halloween Decor
| Style, Area, or Item | Best Pieces to Use | Why It Works |
|---|---|---|
| Front Porch | Wreath, ghosts, luminaries, pumpkins | Creates a welcoming Halloween focal point |
| Front Yard | Tombstones, giant spider, wire ghost | Larger props remain visible from the street |
| Mantel | Portraits, bottles, bats, jar lanterns | Allows small handmade pieces to be layered at eye level |
| Party Entrance | Floating hats, ghosts, branches, lights | Establishes the theme before guests enter |
| Small Apartment | Paper bats, framed art, fabric pumpkins | Adds seasonal character without using much storage space |
Hauntingly Clever Halloween Decorations to Make at Home
1Make Stiffened Cheesecloth Ghosts
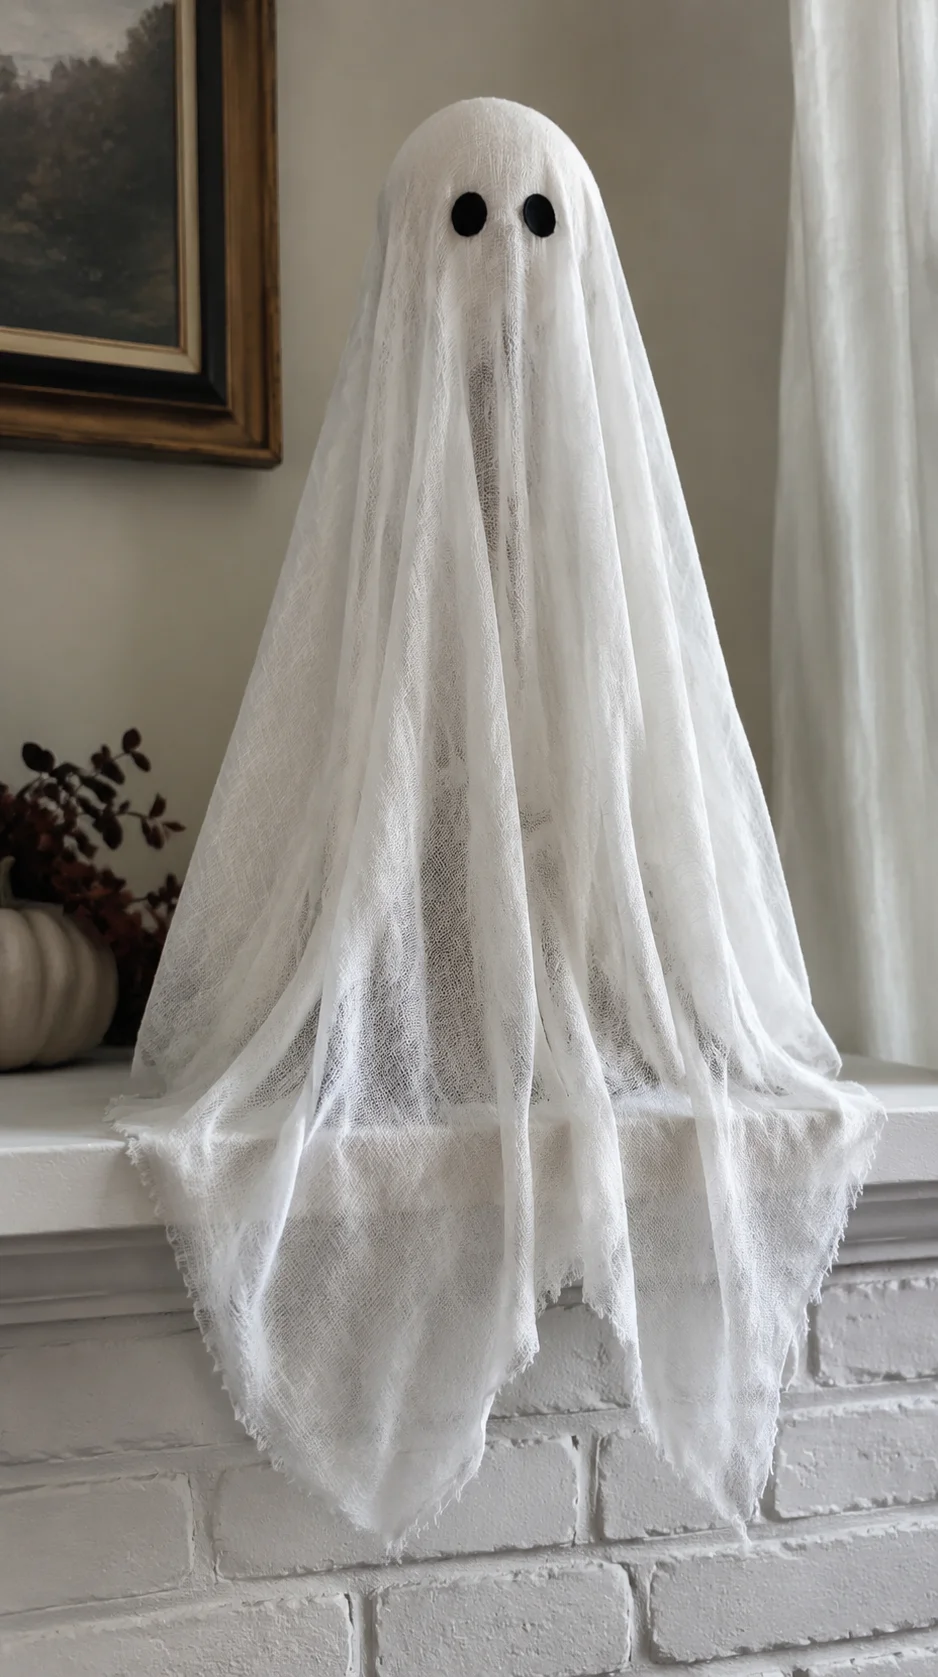 Build a temporary form with a foam ball for the head and bottles or wire for the body and arms. Drape cheesecloth over the form, then brush or spray it with fabric stiffener until the material is thoroughly coated.
Allow the ghost to dry completely before removing the support. Trim the lower edge into an uneven shape and add small black felt eyes. Display the finished ghost on a table, mantel, staircase landing, or covered porch.
Amazon find: Fabric stiffener for cheesecloth
Ready-to-use fabric stiffener helps the ghost hold flowing folds after the temporary support has been removed.
2Create Cardboard Haunted-House Windows
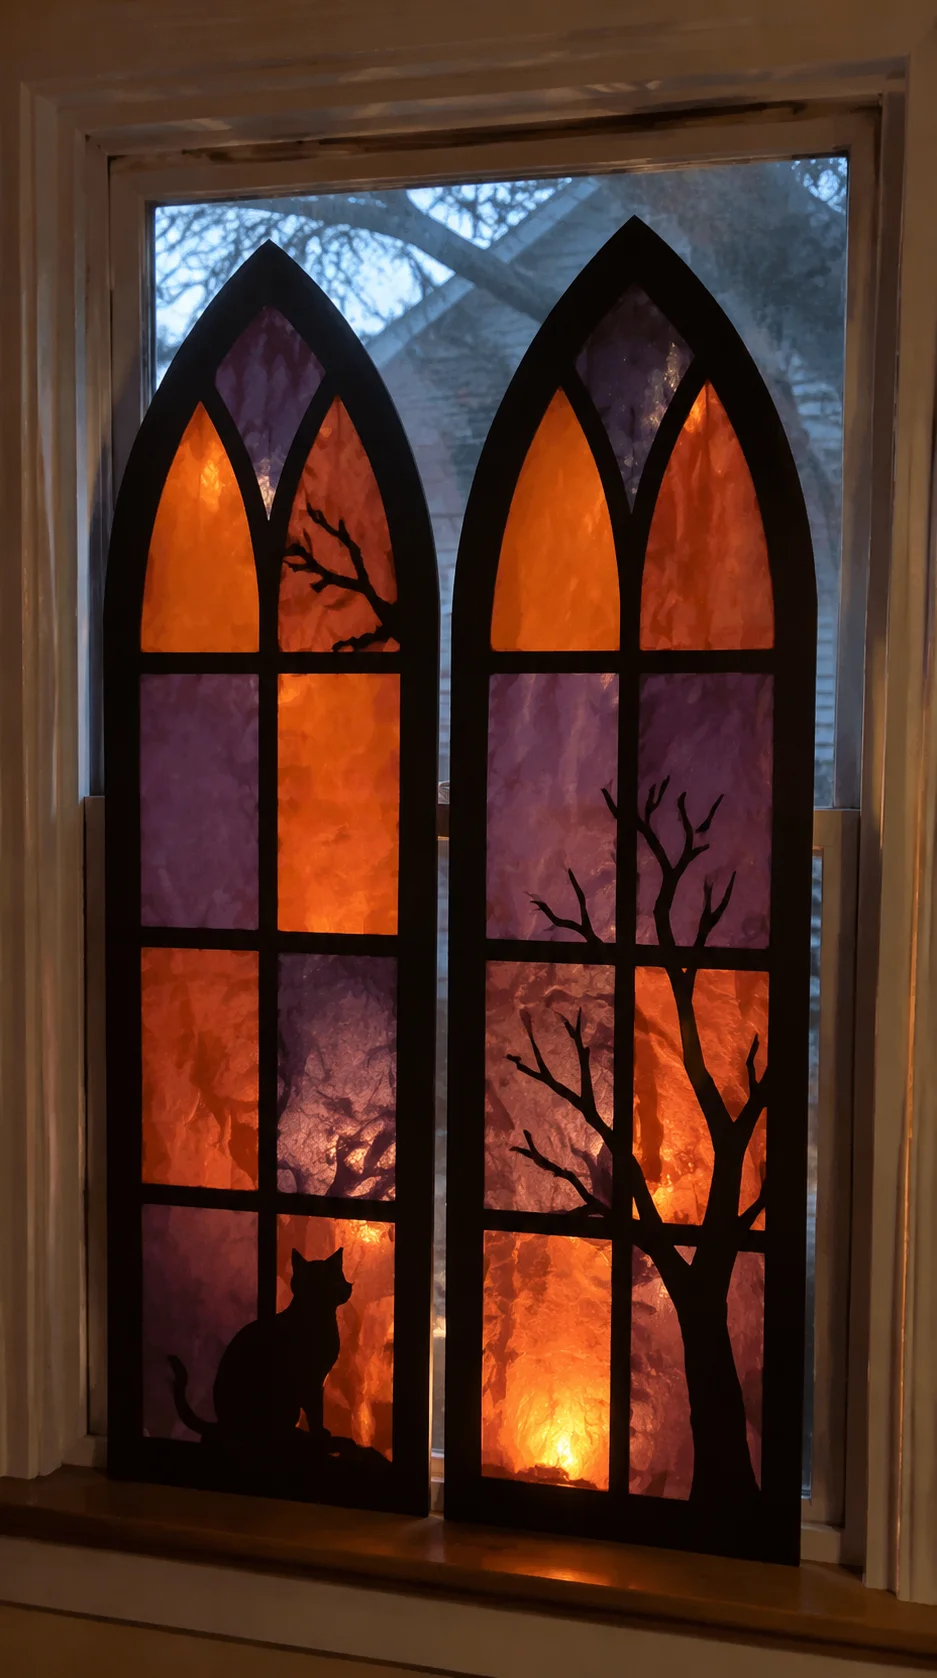 Cut tall window shapes from sturdy cardboard and divide each one into smaller panes with thin cardboard strips. Paint the frames matte black, then place translucent orange, purple, or green paper behind the openings.
Add silhouettes of cats, ghosts, candles, or crooked branches to selected panes. Place battery lights behind the finished window and lean it against a wall or hang it securely in an actual window.
Budget tip: Use large shipping boxes for the frame. Choose flat, undamaged sections and reinforce thin cardboard by gluing two layers together.
3Paint Glowing Halloween Jar Lanterns
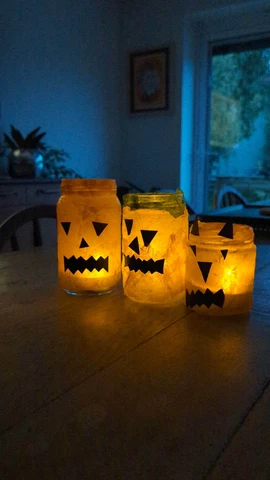 Clean empty glass jars and coat the outside with a thin layer of translucent orange, purple, or smoky gray paint. Add black paper silhouettes of jack-o’-lantern faces, bats, haunted trees, or cats.
Place a battery-operated tea light inside each jar and group them in odd numbers on a tray. Wrap black twine around the rims to hide threads and give the lanterns a more finished appearance.
Amazon find: Flickering LED tea lights
Flameless tea lights provide a soft glow inside painted jars without producing heat, smoke, or an exposed flame.
4Build a Twisted Branch Halloween Wreath
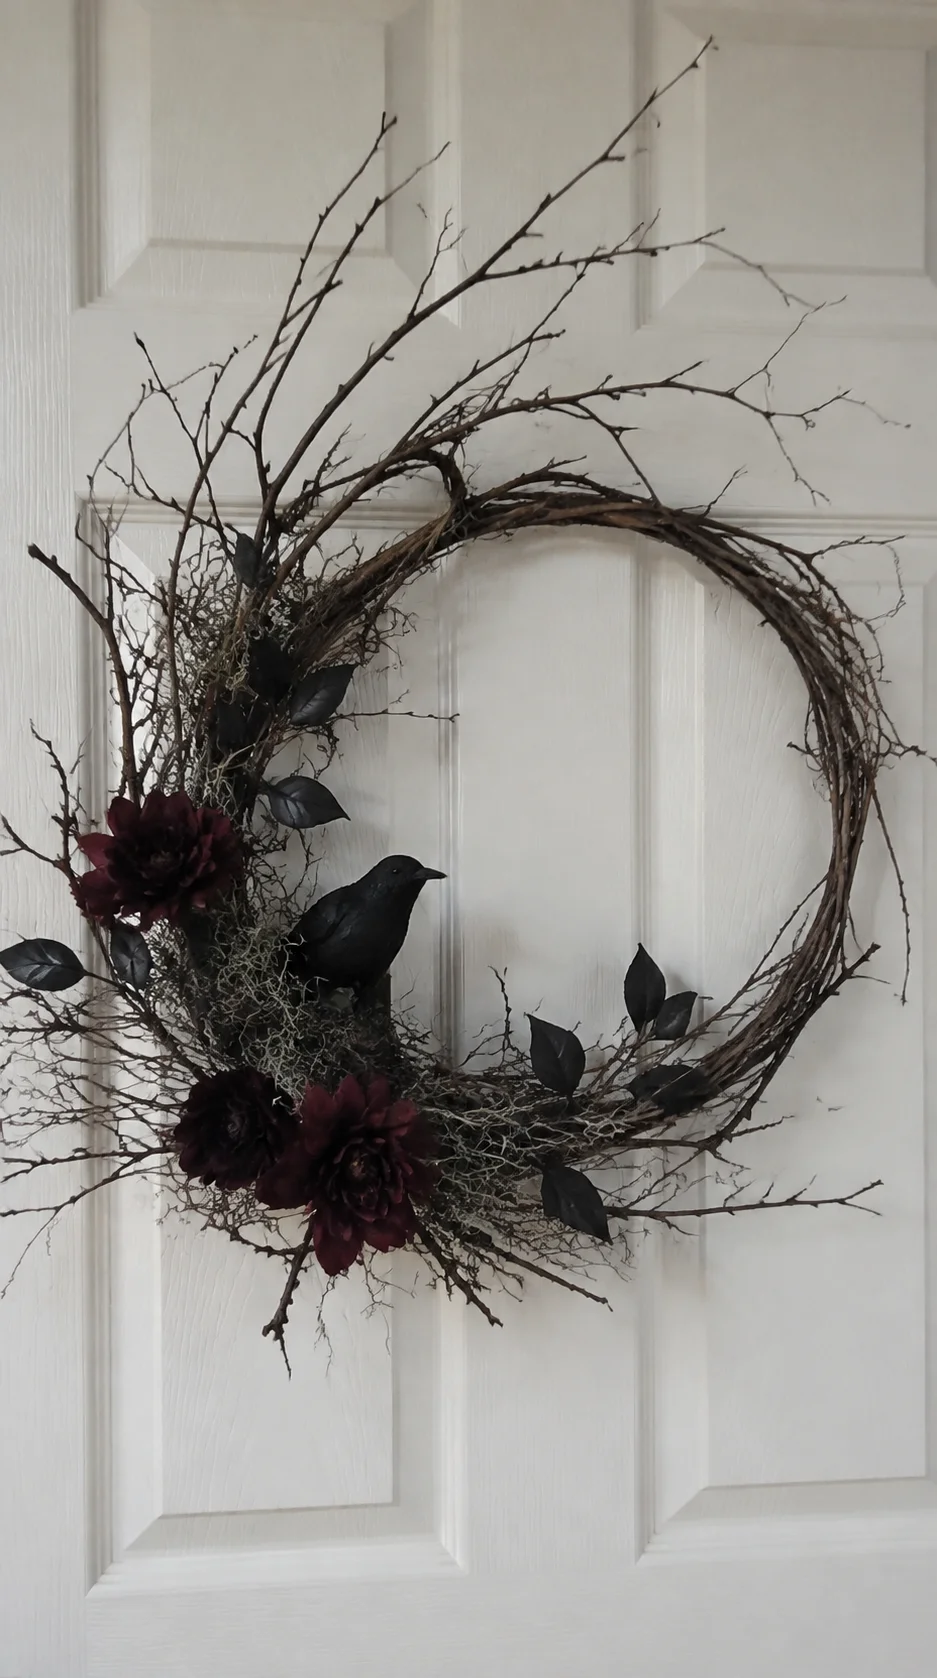 Attach thin, dry branches to a grapevine wreath with floral wire, directing the longest pieces toward one side. Add black leaves, moss, a small raven, or a few deep burgundy flowers for color.
Keep part of the grapevine base visible so the wreath retains an airy, natural shape. Trim or cover sharp branch ends and hang the wreath where it will not scratch guests or catch on clothing.
Styling tip: Concentrate decorations on the lower-left or lower-right portion of the wreath instead of spacing everything evenly around the circle.
5Construct an Oversized Trash-Bag Spider
 Fill one black trash bag with lightweight packing material to create the body and use a smaller filled bag for the head. Twist additional bags or cover flexible foam tubes to form eight long legs.
Secure the spider to a porch wall, fence, or low roofline with outdoor-rated ties. Bend the legs at different angles and add two large reflective eyes so the spider remains visible after dark.
Outdoor tip: Do not place the spider where its legs can hang across steps, railings, sidewalks, or emergency exits. Remove it during strong wind or severe weather.
6Hang Floating Witch Hat Lights
 Thread clear fishing line through the top of lightweight witch hats and place a battery-operated glow stick or mini light inside each one. Hang the hats at slightly different heights above a covered porch, party table, or wide hallway.
Secure the lights inside so they cannot fall, and keep every hat well above head level. Three to five hats usually create enough visual impact without making the ceiling feel crowded.
Amazon find: Clear line for hanging decorations
Strong transparent line creates the floating effect while keeping lightweight hats securely attached to rated hooks.
7Make Weathered Cardboard Tombstones
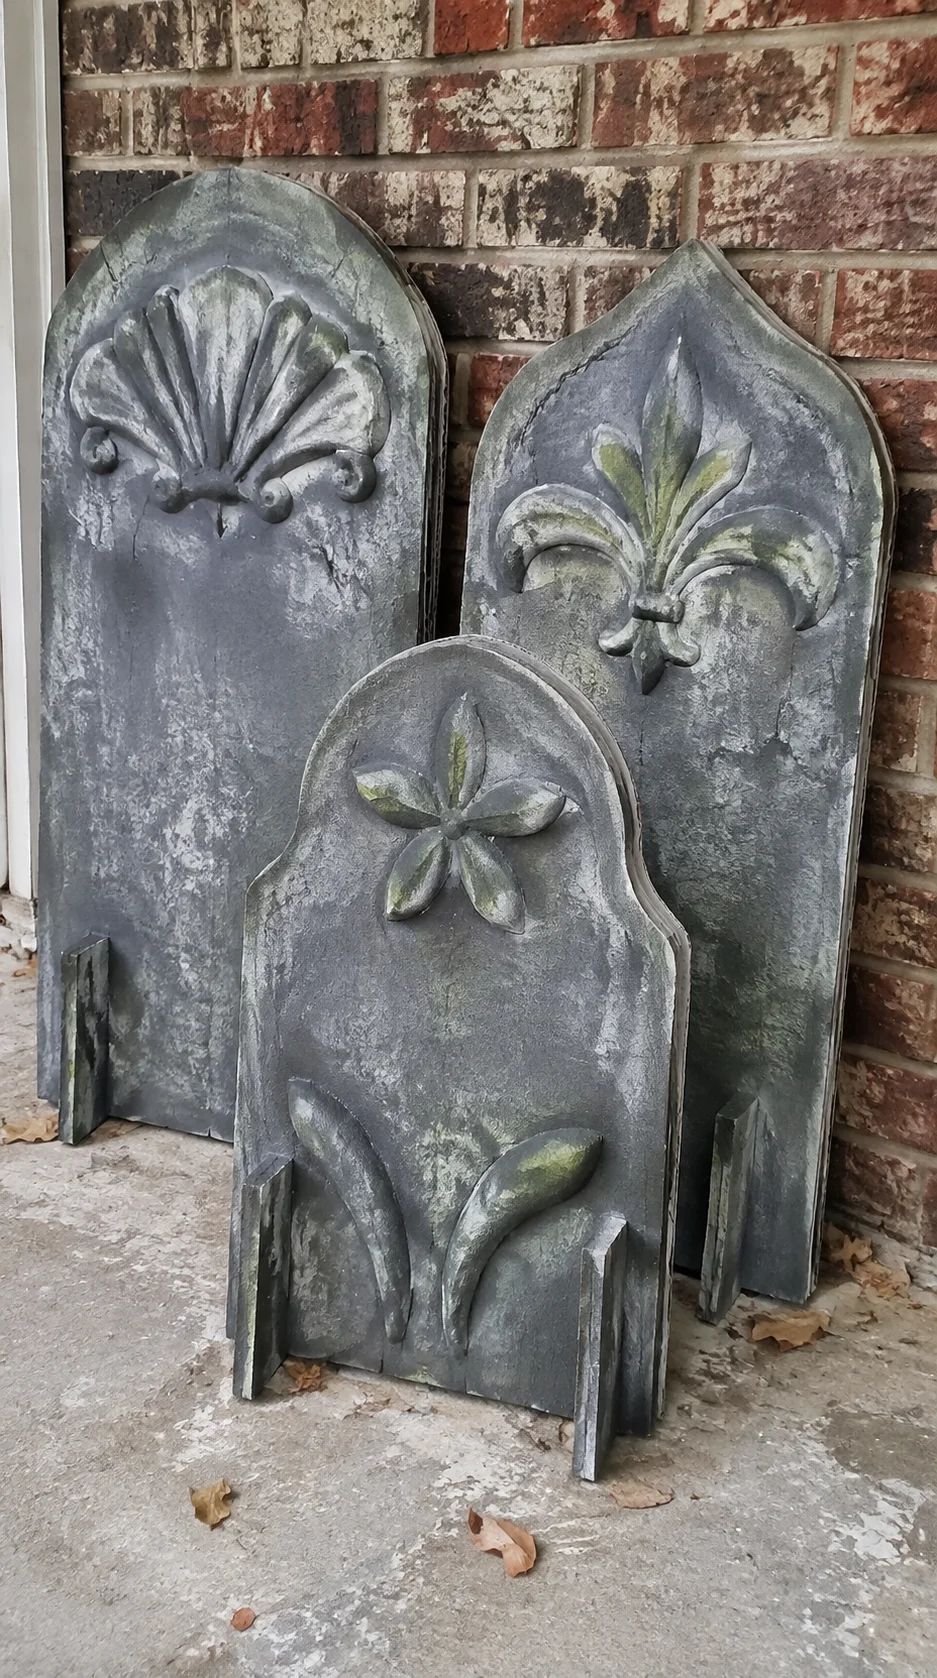 Cut tombstone shapes from thick cardboard and glue extra strips around the back for support. Paint the surface medium gray, then sponge on lighter and darker shades to imitate aged stone.
Add cracks, mossy green patches, and raised designs made from additional cardboard. Use these tombstones indoors or on a dry covered porch because untreated cardboard will soften quickly when exposed to moisture.
Realistic paint tip: Use a torn sponge rather than a smooth brush for the final gray layers. Uneven paint patterns produce a more natural stone texture.
8Create Creepy Changing Portraits
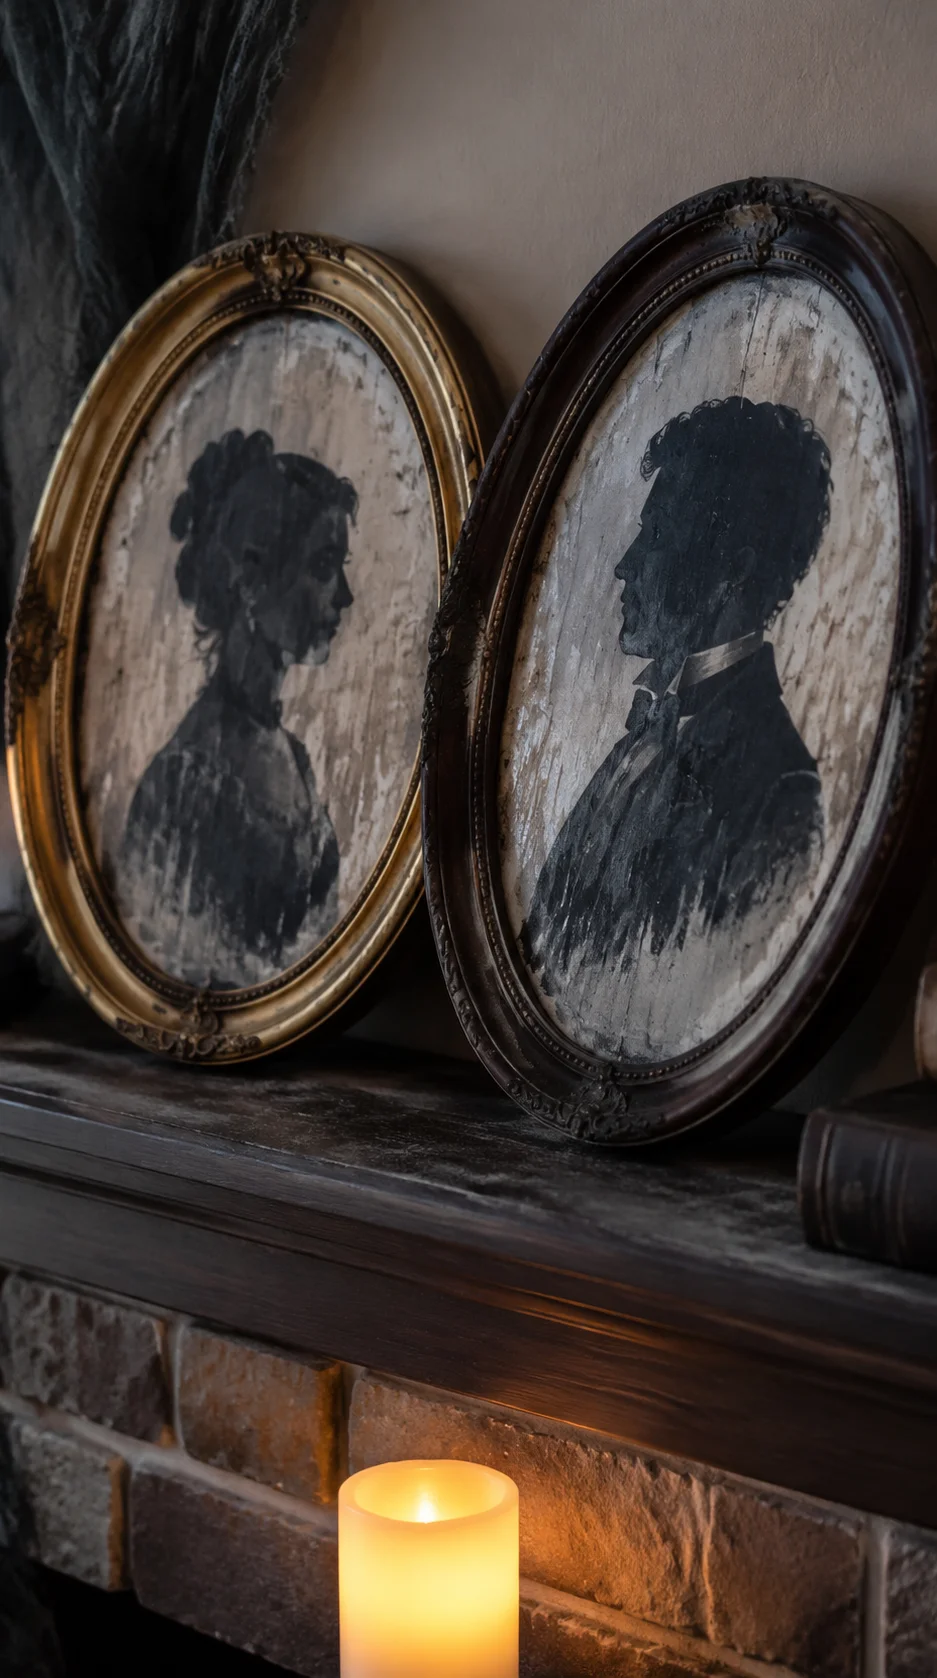 Print black-and-white portraits and give them subtle Halloween changes with charcoal, white pencil, or diluted paint. Add hollow-looking eyes, shadowed cheeks, small cracks, or a faint ghostly figure in the background.
Place the finished images inside thrifted frames painted dark brown, black, or aged gold. Arrange two or three portraits on a mantel or gallery wall and illuminate them from below with a flameless candle.
Easy update: Place the Halloween portrait in front of your regular artwork inside the same frame. You can restore the original display after the season without finding extra storage for the frame.
9Shape a Chicken-Wire Yard Ghost
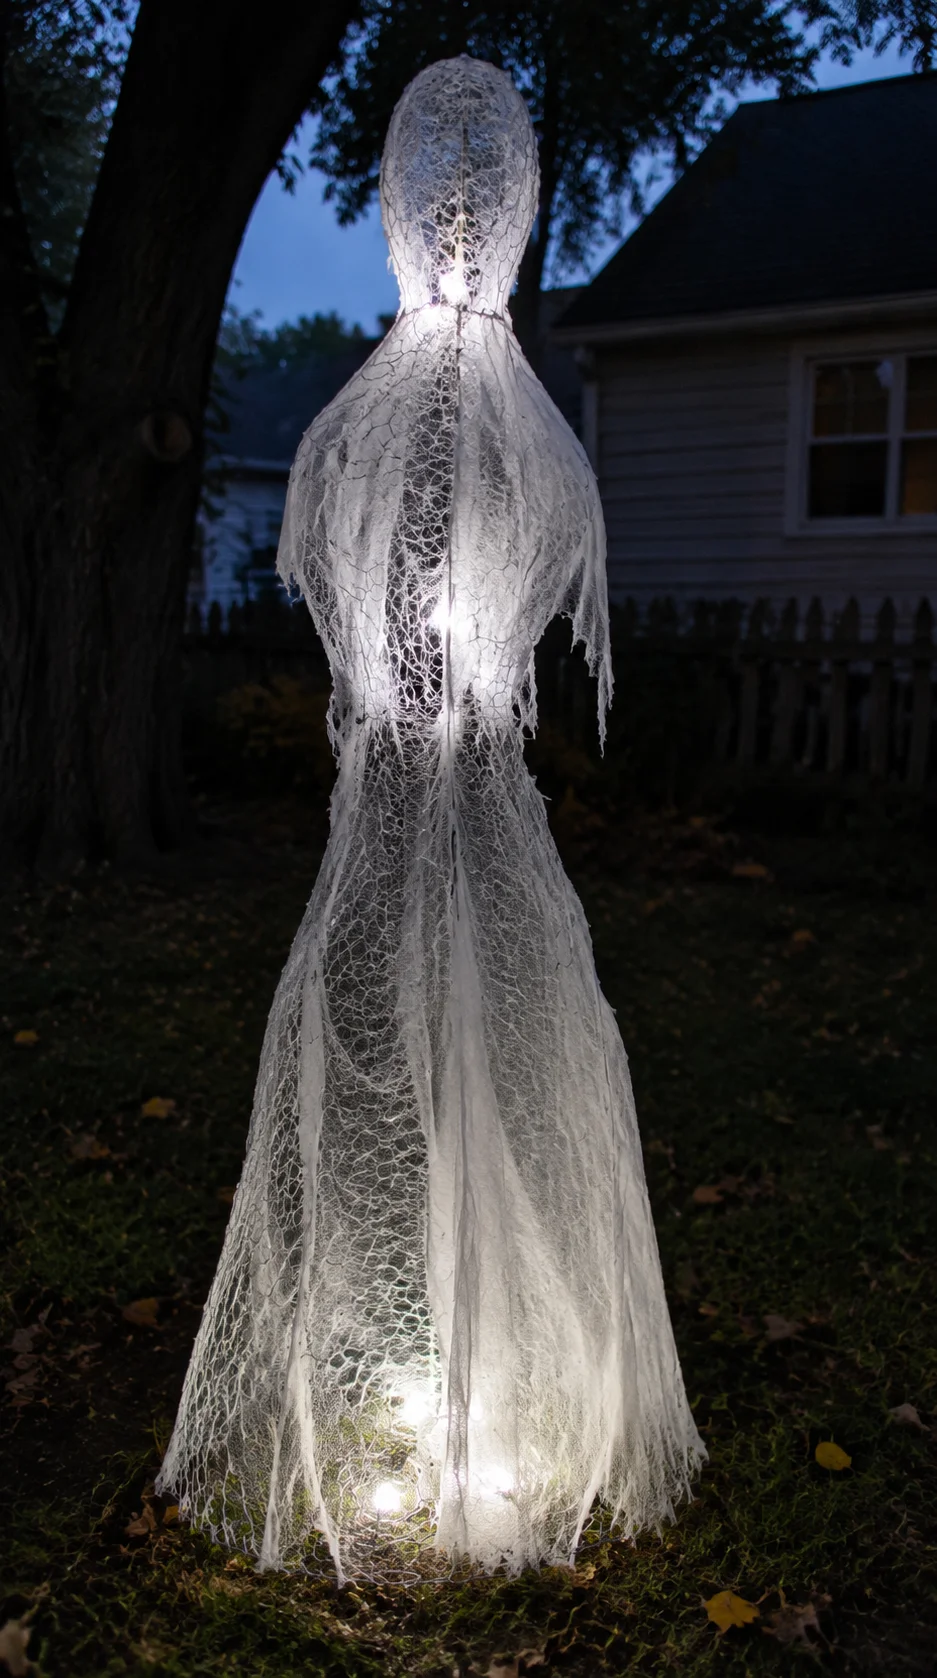 Wearing sturdy work gloves, shape chicken wire into a long skirt and narrow upper body. Form the head separately around a ball, remove the temporary form, and securely join the sections with folded wire ends.
Drape thin cheesecloth over the structure or leave some wire exposed for a transparent effect. Place a cool-white spotlight behind the figure so it appears to glow in the yard at night.
Amazon find: Cut-resistant work gloves
Protective gloves help shield your hands while cutting, bending, and joining sharp wire edges during this project.
10Arrange a Swarm of Paper Bats
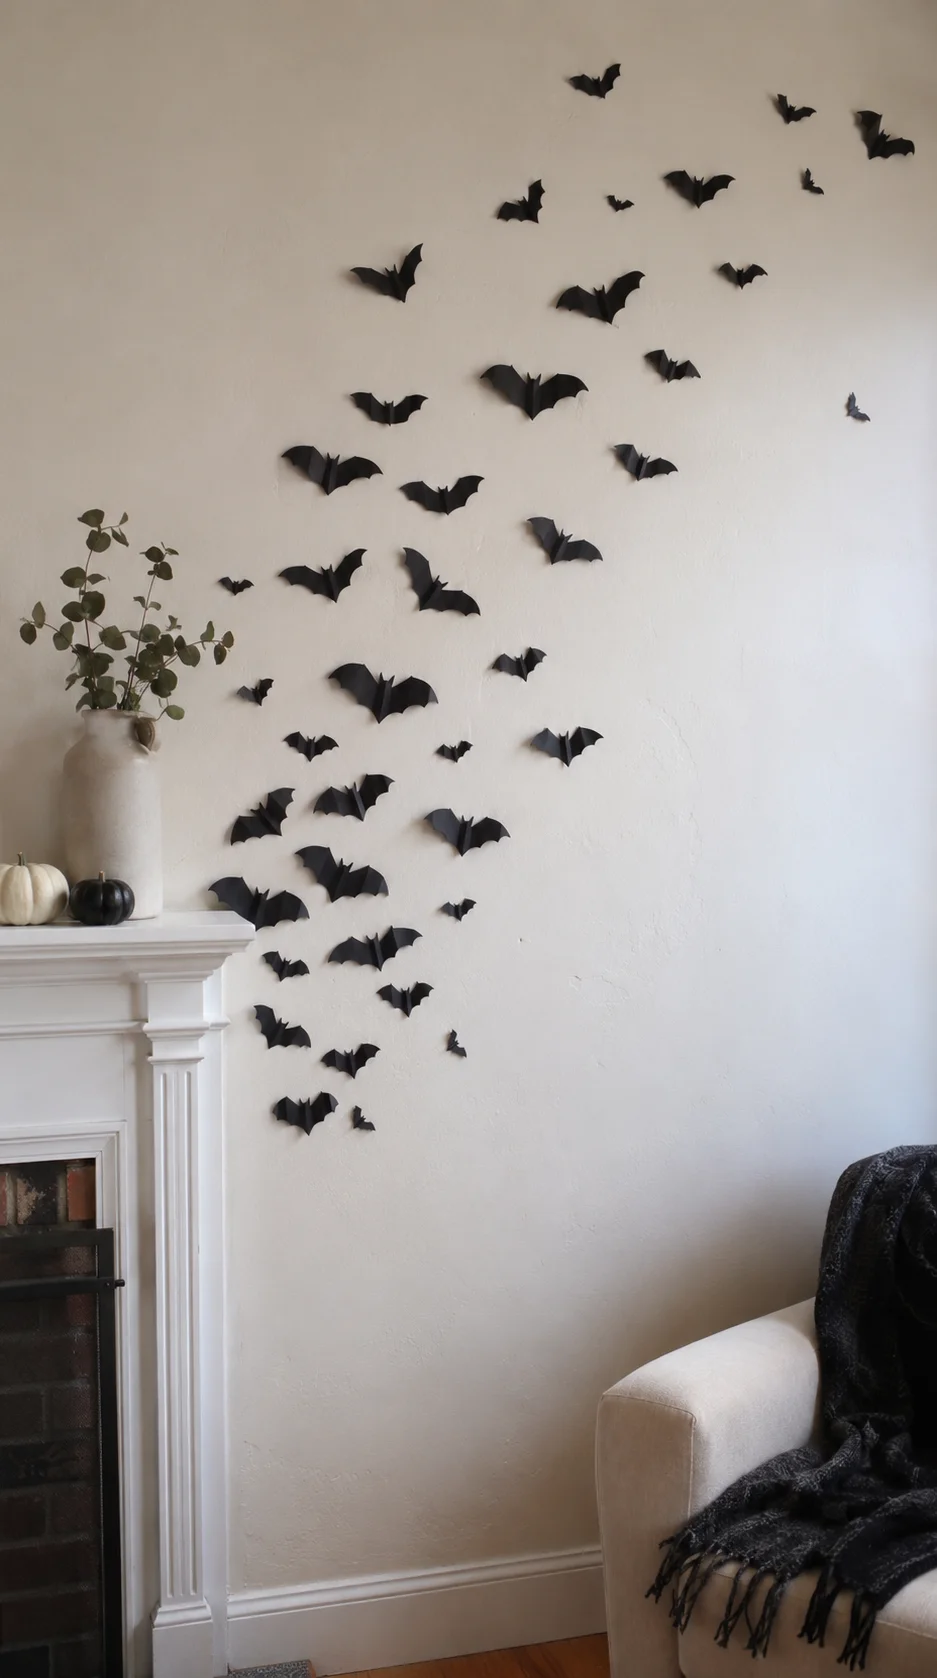 Cut bats in several sizes from black cardstock or lightweight craft foam. Fold each bat gently along the center so its wings lift away from the wall and create small shadows.
Begin with a dense group near a mantel, mirror, or doorway and spread the bats outward in a curved path. Use removable adhesive and test it on an inconspicuous area before attaching the complete arrangement.
Layout tip: Arrange the bats on the floor first and photograph the layout. Use the picture as a guide when transferring the swarm to the wall.
11Sew Simple Fabric Scrap Pumpkins
 Cut a rectangle from velvet, plaid, linen, or an old sweater sleeve. Join the short sides, gather the bottom edge, fill the shape with stuffing, and gather the top closed to form a soft pumpkin.
Wrap strong thread around the pumpkin several times to create sections. Finish it with a short twig stem and ribbon or felt leaves. Make three pumpkins in coordinating fabrics for a mantel, shelf, or table centerpiece.
Amazon find: Craft stuffing
Soft polyester filling makes fabric pumpkins lightweight and easy to shape into full, rounded sections.
12Assemble Spooky Apothecary Bottles
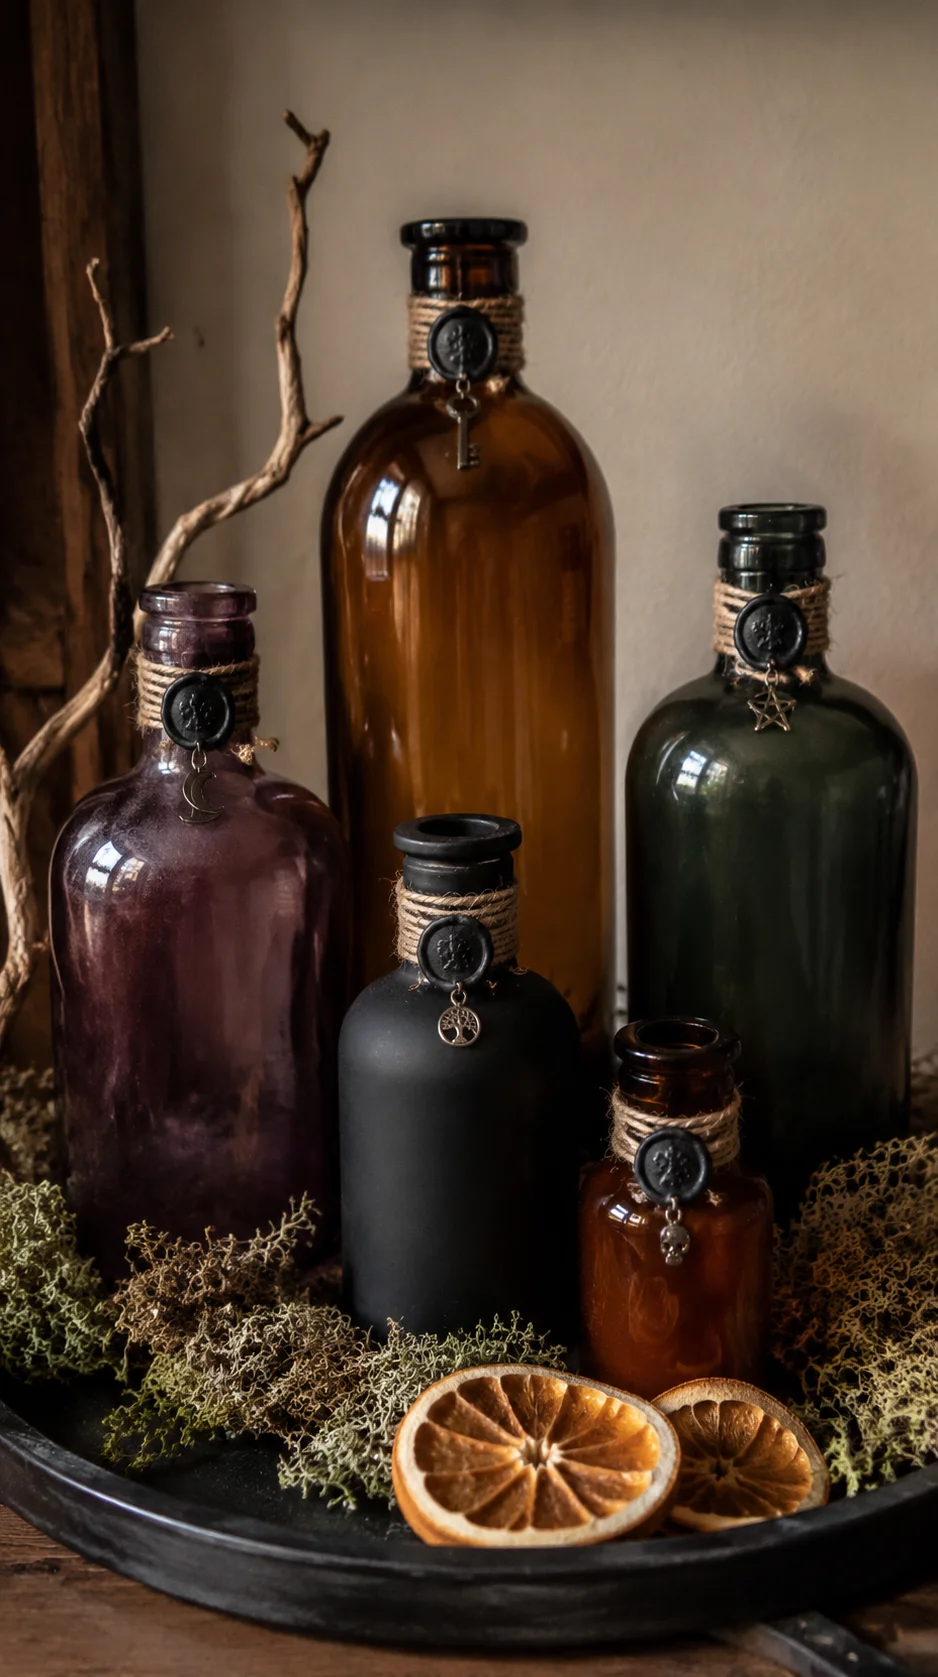 Clean empty bottles and jars, remove their original labels, and paint selected pieces amber, black, deep green, or smoky purple. Add twine, paper tags, small charms, or faux wax seals around the necks.
Group the bottles on a tray with moss, dried orange slices, and a small branch. Keep them empty or fill them only with clearly decorative, nontoxic materials that cannot be mistaken for food, drinks, or medicine.
Styling formula: One tall bottle + two medium bottles + two short jars + one natural accent creates a balanced apothecary collection.
13Line the Porch With Paper-Bag Luminaries
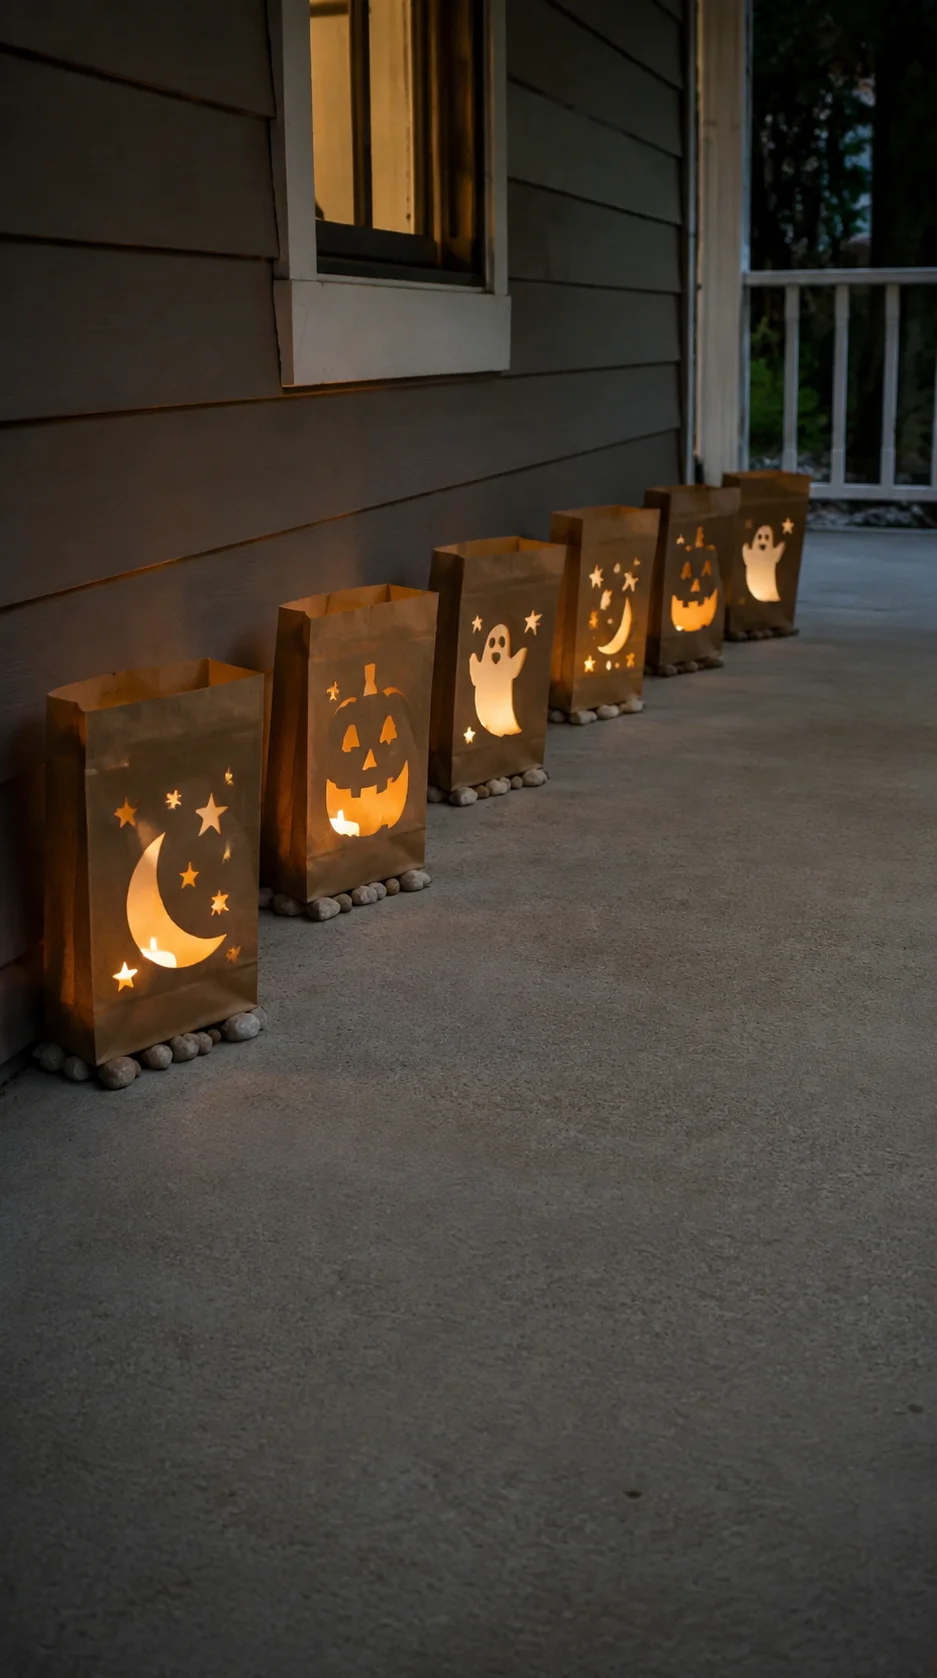 Cut simple pumpkin, moon, ghost, or star shapes into sturdy paper bags. Place a small amount of sand or clean gravel inside each bag to keep it upright, then add a battery-operated tea light.
Arrange the luminaries along a dry, covered porch or beside a walkway where they will not narrow the path. Space them evenly and remove them immediately if rain or strong wind begins.
Amazon find: Battery tea lights with timers
Timer-operated tea lights make it easy to illuminate several luminaries at the same time without using real candles.
Homemade Halloween Decoration Shopping Checklist
| Item | Best For | Amazon Search |
|---|---|---|
| Matte craft paint | Cardboard, frames, jars, and aged finishes | Shop on Amazon |
| Low-temperature glue gun | Fabric, foam, paper, and lightweight details | Shop on Amazon |
| Cheesecloth | Ghosts, wreaths, and haunted displays | Shop on Amazon |
| Flameless lights | Jars, hats, windows, and luminaries | Shop on Amazon |
| Removable adhesive | Paper bats and lightweight wall decorations | Shop on Amazon |
| Protective work gloves | Wire, branches, and outdoor prop projects | Shop on Amazon |
Best Color Palettes for Homemade Halloween Decor
Classic Halloween
Orange + black + cream: Perfect for pumpkins, bats, luminaries, and family-friendly displays.
Haunted Graveyard
Stone gray + charcoal + moss green: A convincing combination for tombstones, wire ghosts, and aged outdoor props.
Mystical Witch
Purple + black + antique gold: Use this dramatic palette for hats, potion bottles, jars, and magical lighting.
Gothic Mansion
Burgundy + black + aged brass: Ideal for portraits, wreaths, candles, and elegant indoor Halloween decor.
Ghostly Neutral
Cream + pale gray + faded brown: A softer palette for cheesecloth ghosts, fabric pumpkins, and vintage-style rooms.
Common Crafting Mistakes and Safety Tips
- Starting without measuring: Check the display area before building large props so doors, stairs, and pathways remain clear.
- Using too many unrelated colors: Limit each project to a small palette for a more polished and coordinated result.
- Skipping surface preparation: Clean jars, frames, plastic, and recycled materials before applying paint or adhesive.
- Using indoor materials outside: Keep cardboard, paper, fabric pumpkins, and delicate glue projects in dry, protected locations.
- Leaving wire edges exposed: Fold, cover, or file sharp ends and wear protective gloves while working with wire.
- Creating a trip hazard: Keep cords, fabric, luminaries, props, and hanging pieces away from walking paths.
- Using open flames: Choose battery-operated candles around paper, cardboard, fabric, paint, moss, and plastic.
- Hanging props from weak hooks: Use fasteners rated for the decoration’s weight and test every suspended project before guests arrive.
- Ignoring bad weather: Bring lightweight outdoor decorations inside during strong wind, heavy rain, or storms.
Frequently Asked Questions
What household items can I use for Halloween decorations?
Useful materials include cardboard boxes, empty jars, paper bags, fabric scraps, shipping paper, old frames, bottles, branches, sweater sleeves, and clean plastic containers. Check that every reused item is clean, dry, and safe to cut or paint.
How can I make homemade Halloween decorations look expensive?
Use matte finishes, repeat a limited color palette, hide unfinished edges, and group decorations in coordinated arrangements. Layered lighting and subtle aged paint can also make inexpensive materials look more detailed.
Which homemade Halloween decorations are easiest for beginners?
Paper bat walls, jar lanterns, fabric pumpkins, paper-bag luminaries, and painted apothecary bottles are good beginner projects. They use basic materials and do not require complicated construction.
Can homemade Halloween decorations stay outside?
Only use outdoor-safe materials in exposed areas. Cardboard, paper, indoor paint, untreated fabric, and many craft adhesives should remain on a dry covered porch or indoors. Secure lightweight decorations and remove them during bad weather.
How should I store homemade Halloween crafts?
Clean and dry every piece before storage. Wrap fragile decorations in tissue paper, remove batteries, and place items in labeled plastic bins. Store dimensional projects without stacking heavy objects on top of them.
Final Thoughts
Homemade Halloween decorations give you the freedom to create a display that fits your home, budget, and favorite spooky theme. Everyday materials such as cardboard, jars, paper, fabric, and branches can become impressive decorations with a little planning.
Start with one statement project and add two or three smaller pieces that repeat its colors or textures. This approach creates a coordinated Halloween display without requiring you to craft every decoration at once.
Whether you choose floating ghosts, glowing lanterns, a giant spider, or a mysterious collection of potion bottles, these projects can help make your home feel wonderfully wicked for Halloween.
2 thoughts on “13 wicked Homemade Halloween Decoration”