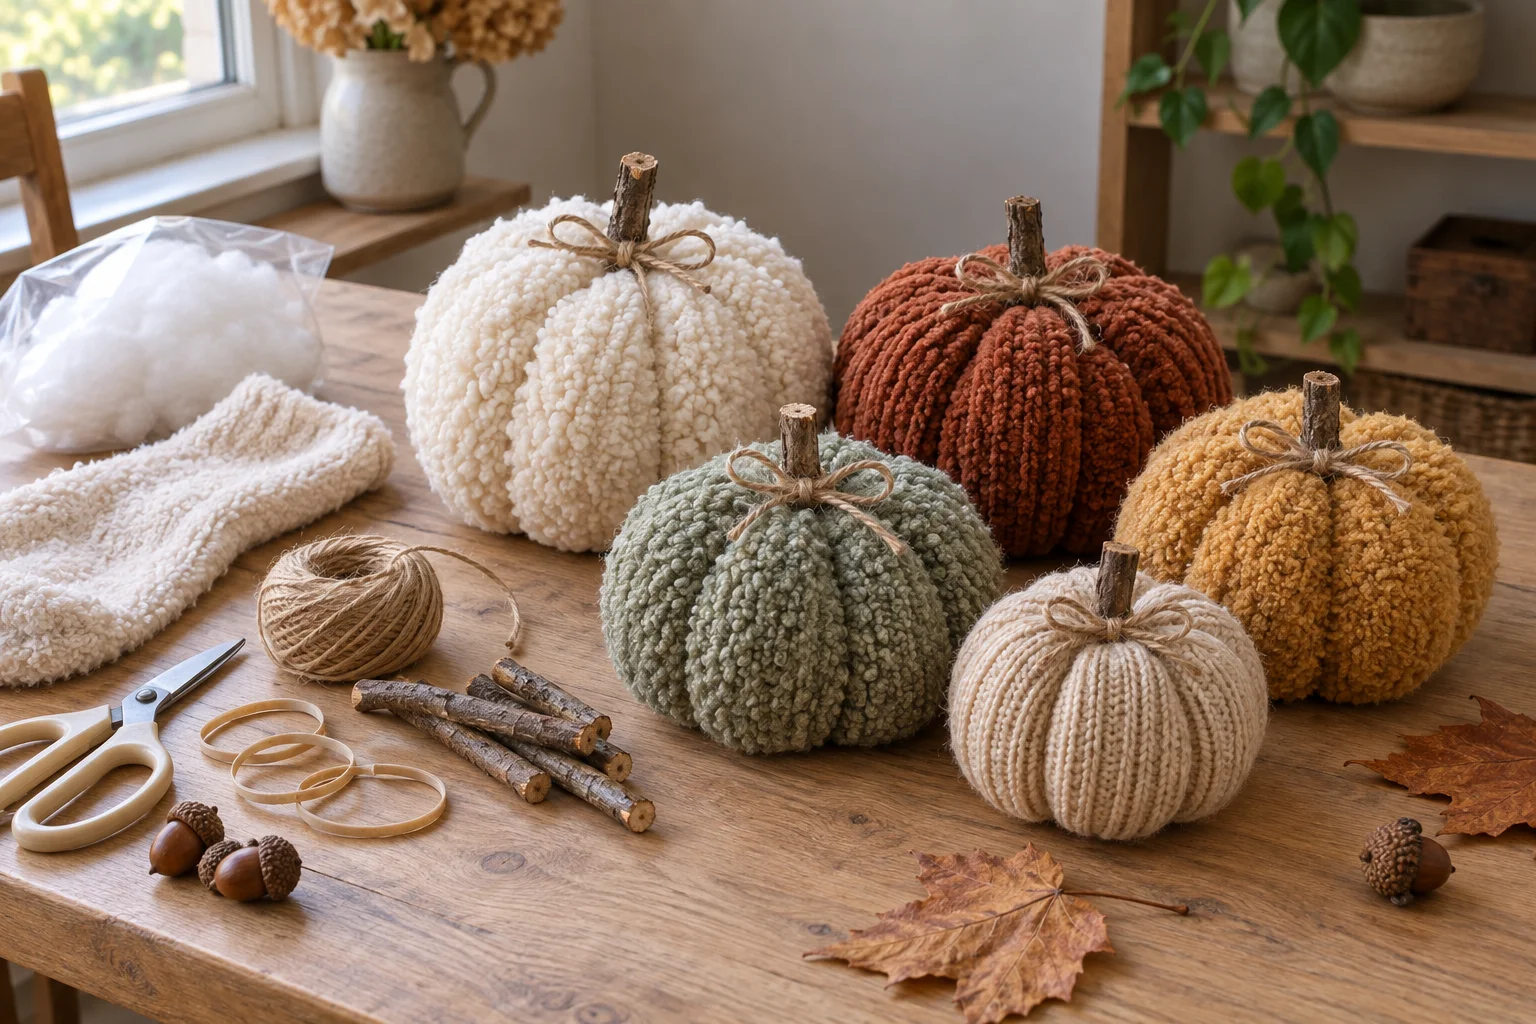
Turn a pair of soft, fluffy socks into adorable fall pumpkins with this easy no-sew craft. These cozy fabric pumpkins are inexpensive to make, simple to customize, and perfect for adding a handmade touch to your autumn decor.
You do not need a sewing machine or advanced craft skills. With socks, filling, rubber bands, strong thread or twine, and a few decorative details, you can create a complete pumpkin in about 15 to 25 minutes.
This step-by-step tutorial explains how to shape the pumpkin, form even sections, attach a stem, hide the unfinished areas, and style your finished sock pumpkins around the home.
More Cozy Fall Decorating Ideas
Quick Project Overview
- Skill level: Beginner
- Time needed: About 15–25 minutes per pumpkin
- Sewing required: None
- Best socks: Fluffy, chenille, knit, ribbed, or fuzzy socks
- Best filling: Polyester fiber fill or clean fabric scraps
- Main steps: Cut, fill, close, shape, divide, and decorate
- Best uses: Trays, shelves, mantels, tables, and tiered stands
Supplies You Will Need
Most supplies for this no-sew pumpkin craft are inexpensive, and you may already have several of them at home. One adult-size sock generally makes one medium pumpkin, while shorter socks are useful for smaller designs.
- One fluffy or textured sock
- Polyester fiber fill, fabric scraps, or another soft filling
- Strong rubber bands or small hair elastics
- Strong thread, embroidery floss, thin twine, or yarn
- Sharp scissors
- Hot glue gun with glue sticks or strong fabric glue
- A short twig, cinnamon stick, wine cork, or wooden piece for the stem
- Optional felt leaves, faux greenery, ribbon, raffia, or jute twine
- Optional dried beans or rice for a weighted base
Simple sock pumpkin formula:
Fluffy sock + soft filling + tight closure + wrapped sections + rustic stem + one decorative accent.
Choose the Right Materials for Your Pumpkin
| Material or Style | Best Pieces to Use | Why It Works |
|---|---|---|
| Soft and fluffy | Chenille or fuzzy socks | Creates a full, cozy pumpkin with minimal effort |
| Rustic farmhouse | Ribbed knit socks, twine, and twig stems | Adds visible texture and natural character |
| Weighted pumpkin | Rice or dried beans beneath fiber fill | Helps the pumpkin remain upright on shelves and trays |
| Soft rounded shape | Polyester fiber fill | Easy to shape and adjust without adding much weight |
| Low-cost recycled craft | Clean fabric scraps and an unmatched sock | Reuses materials that might otherwise be discarded |
An Easy Non-Sew Fall Craft Using Cozy Socks and Simple Supplies
1Prepare and Trim the Sock
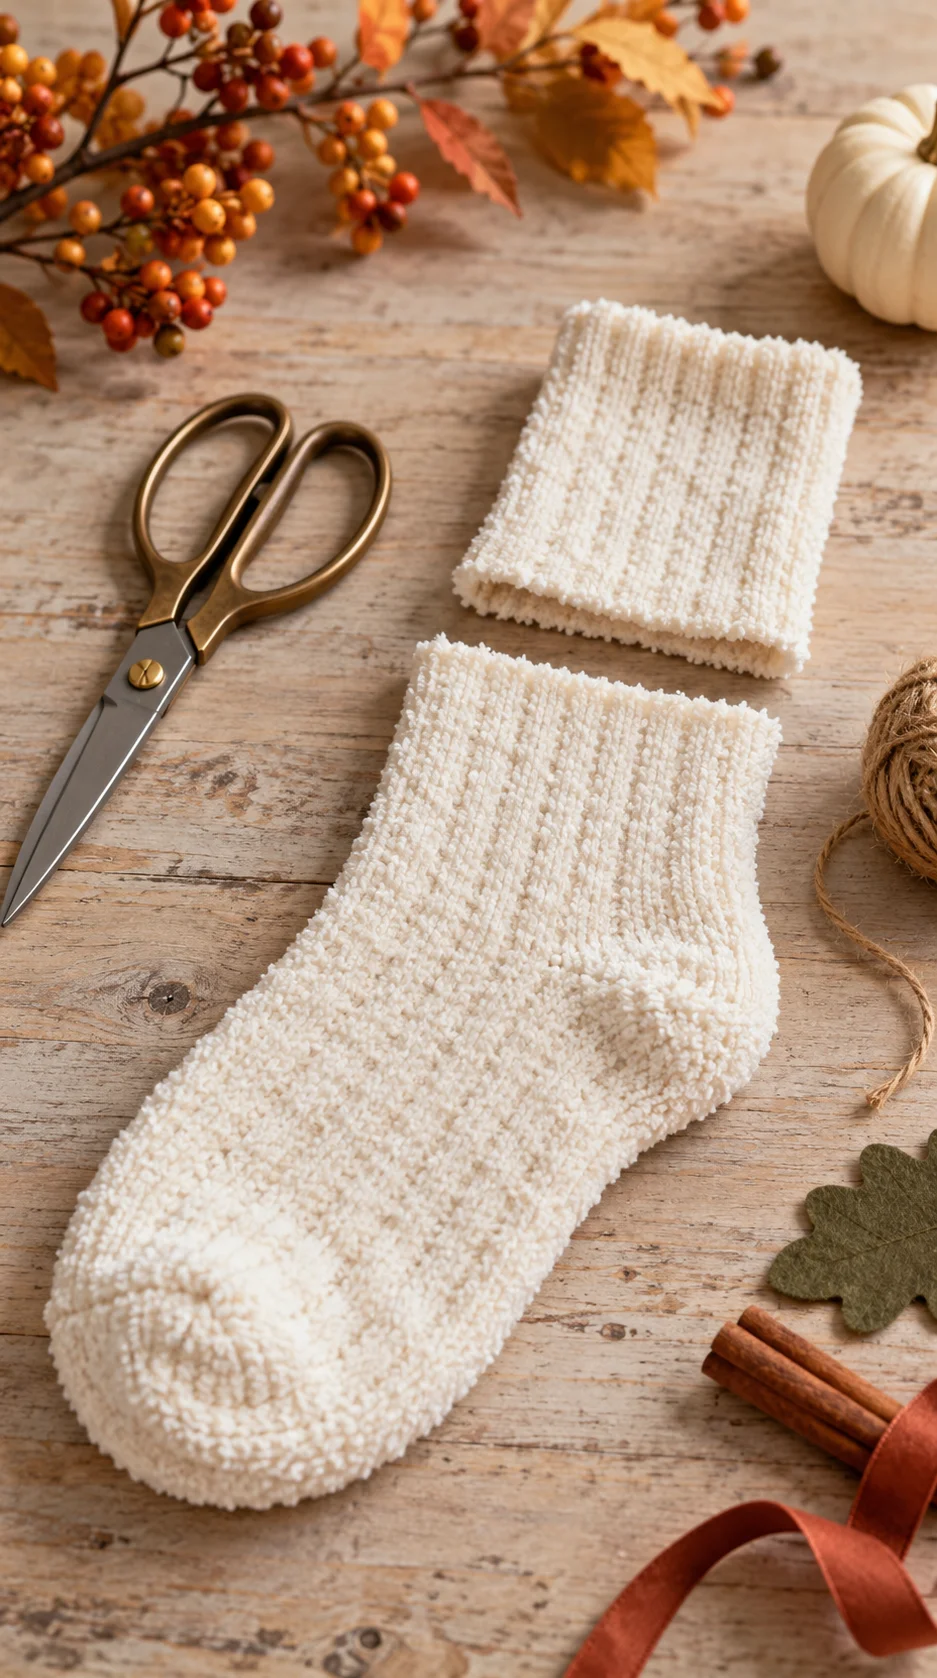
Lay the sock flat and smooth out any folds. For a medium pumpkin, cut across the sock a few inches above the heel and use the lower foot section. The exact cutting point can be adjusted depending on how tall you want the finished pumpkin to be.
A wider, shorter section will create a round pumpkin, while a longer section will produce a taller shape. Do not pull or stretch the fabric while cutting because this can make the edge uneven.
2Close the Bottom Securely

Turn the sock section inside out. Gather one cut end together and wrap a strong rubber band around it several times. The closure should be tight enough to prevent the filling from escaping.
Turn the sock right side out again so the rubber-band closure sits inside the pumpkin. Press the tied area flat with your fingers to create an even base.
Amazon find: Small Clear Hair Elastics
Small elastics create a compact closure that is easier to hide inside a soft fabric pumpkin.
3Add Filling to the Sock
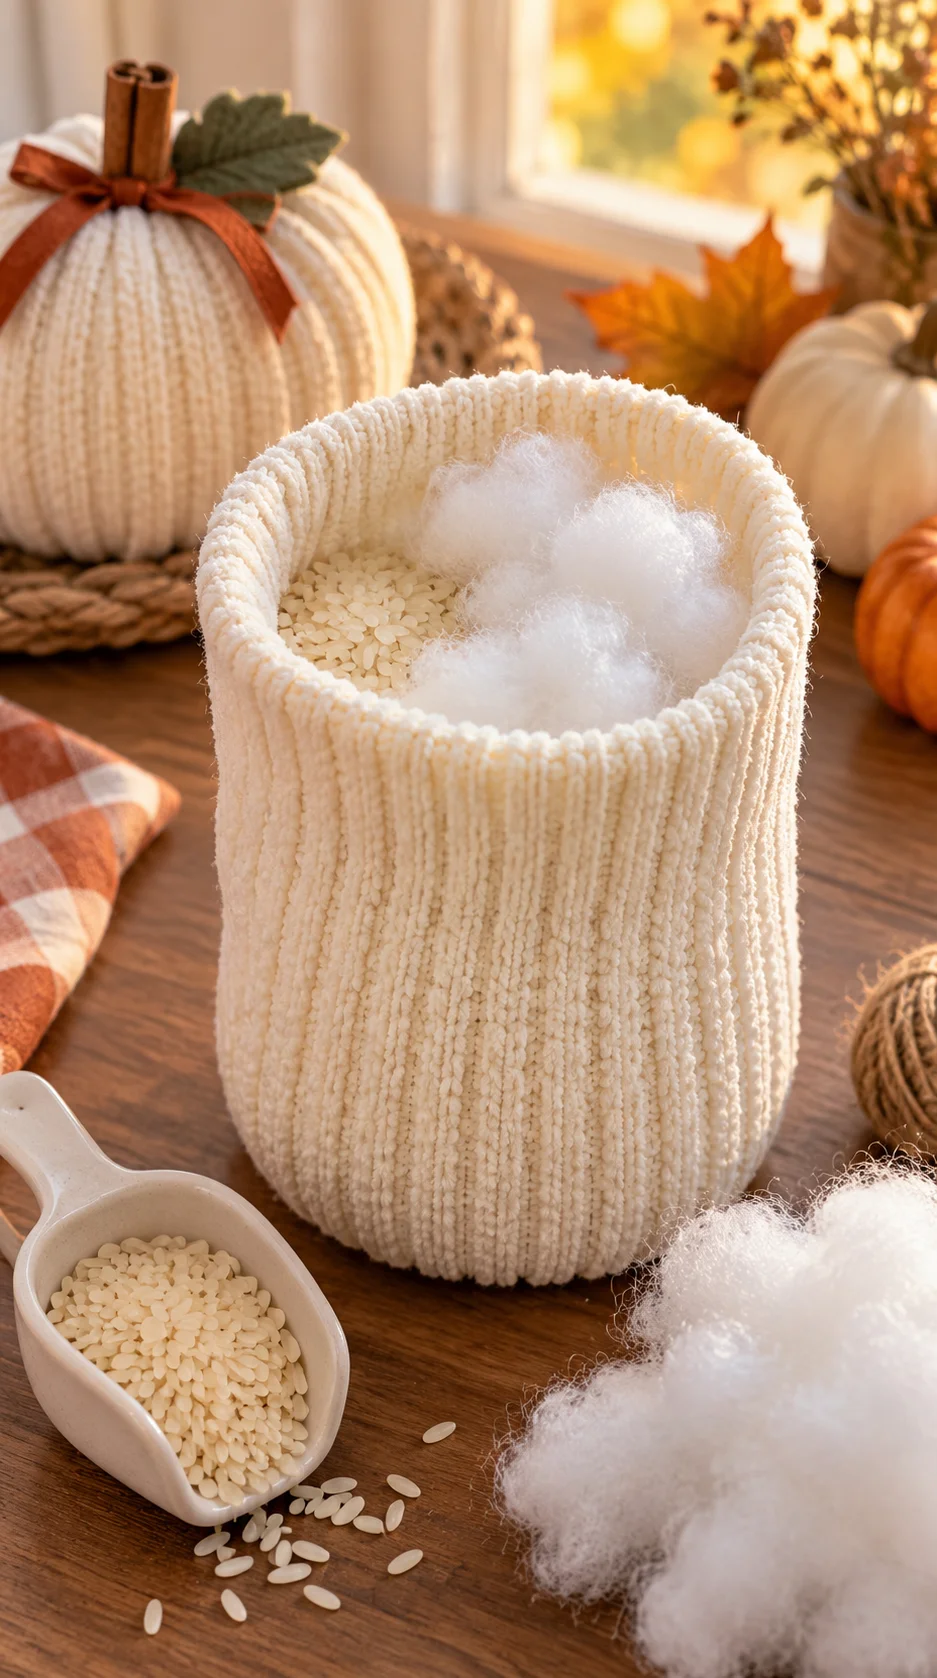
Place a small scoop of dry rice or beans in the bottom if you want the pumpkin to have extra stability. This step is optional, but it can help small pumpkins remain upright on tiered trays and narrow shelves.
Add polyester fiber fill a little at a time. Push the filling toward the sides and rotate the sock as you work. Continue until the pumpkin feels full but can still be compressed and shaped with your hands.
4Close the Top of the Pumpkin
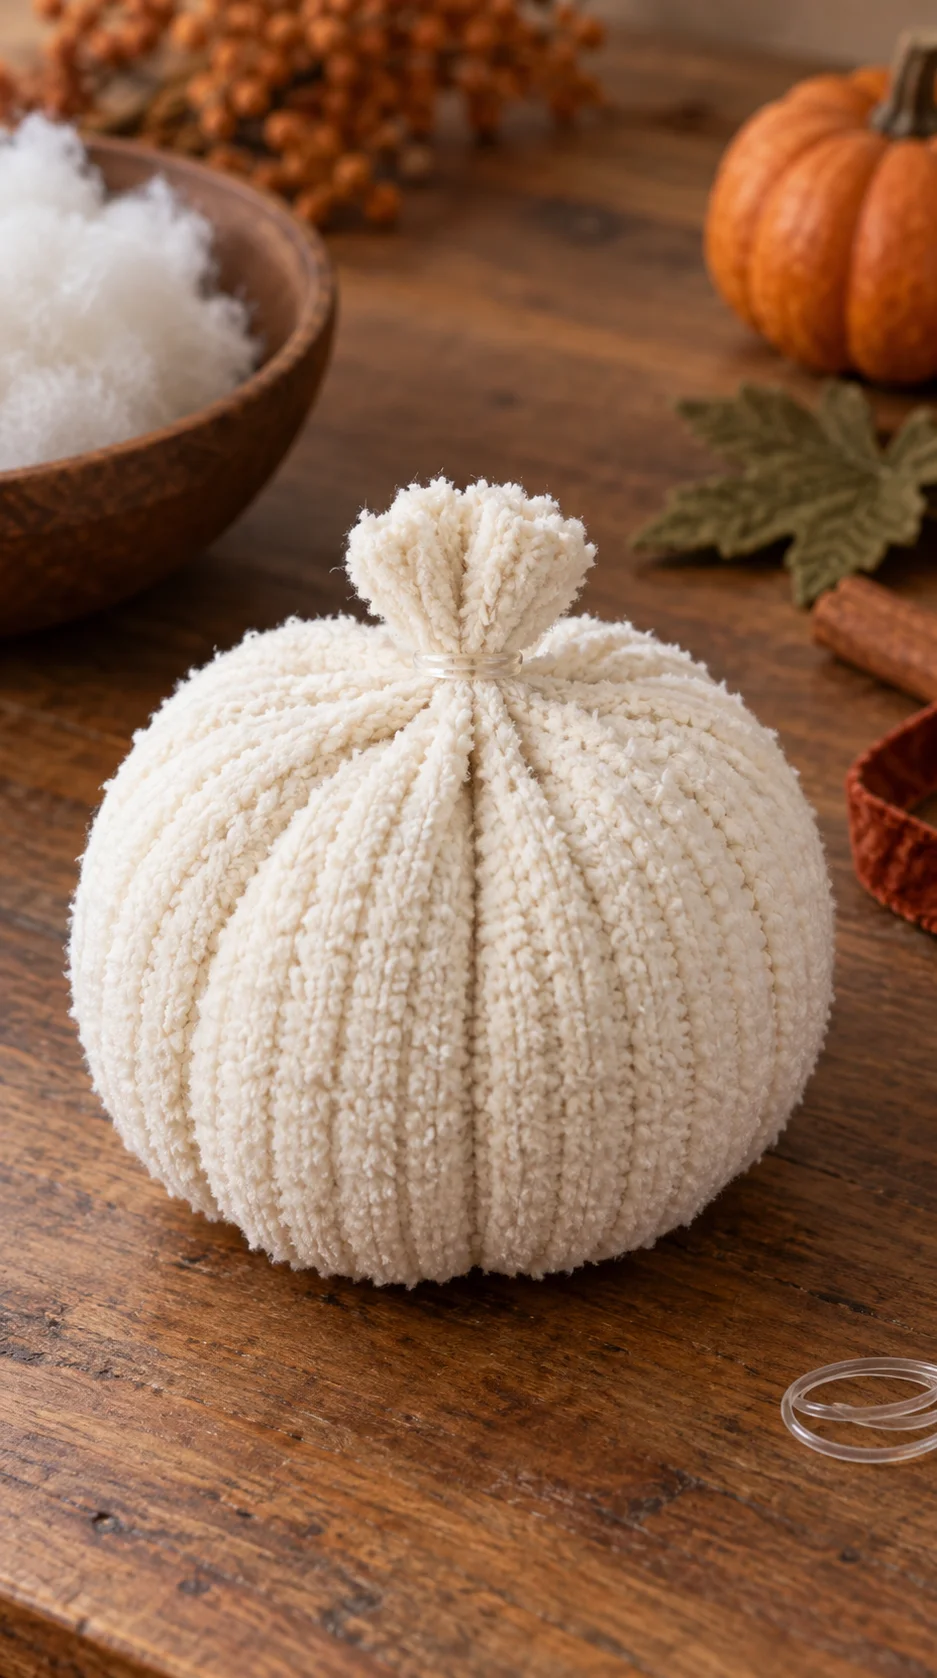
Gather the open end of the sock above the filling. Wrap a strong rubber band tightly around the fabric, leaving a small amount of sock material above the closure.
Press down on the center while gently pushing the sides outward. Adjust the filling until the pumpkin has a balanced, rounded shape and can sit without leaning.
Amazon find: Polyester Fiber Fill
Soft fiber fill creates a lightweight pumpkin that can be reshaped until the proportions look right.
5Form the Pumpkin Sections
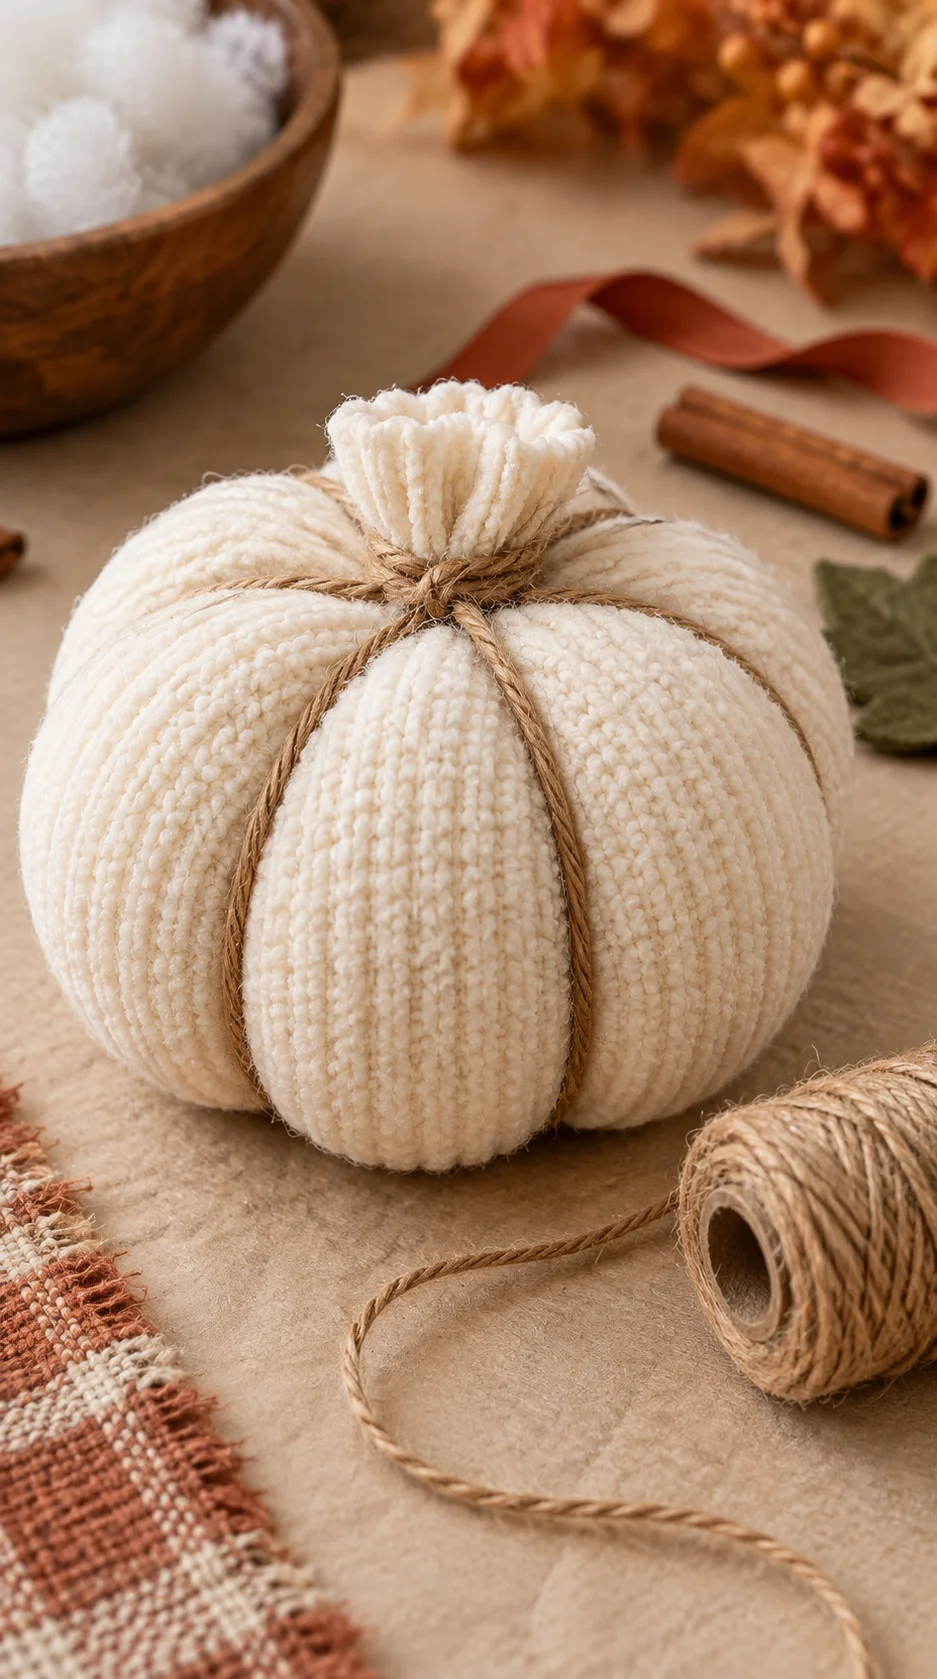
Cut a long piece of strong thread, thin twine, embroidery floss, or yarn. Place the center of the strand under the pumpkin, bring both ends over the top, and pull gently until a visible groove forms.
Cross the strands at the top, rotate the pumpkin, and wrap again. Continue until you have created four to eight sections. Keep the spacing as even as possible, then tie the ends firmly near the top closure.
6Attach a Rustic Pumpkin Stem
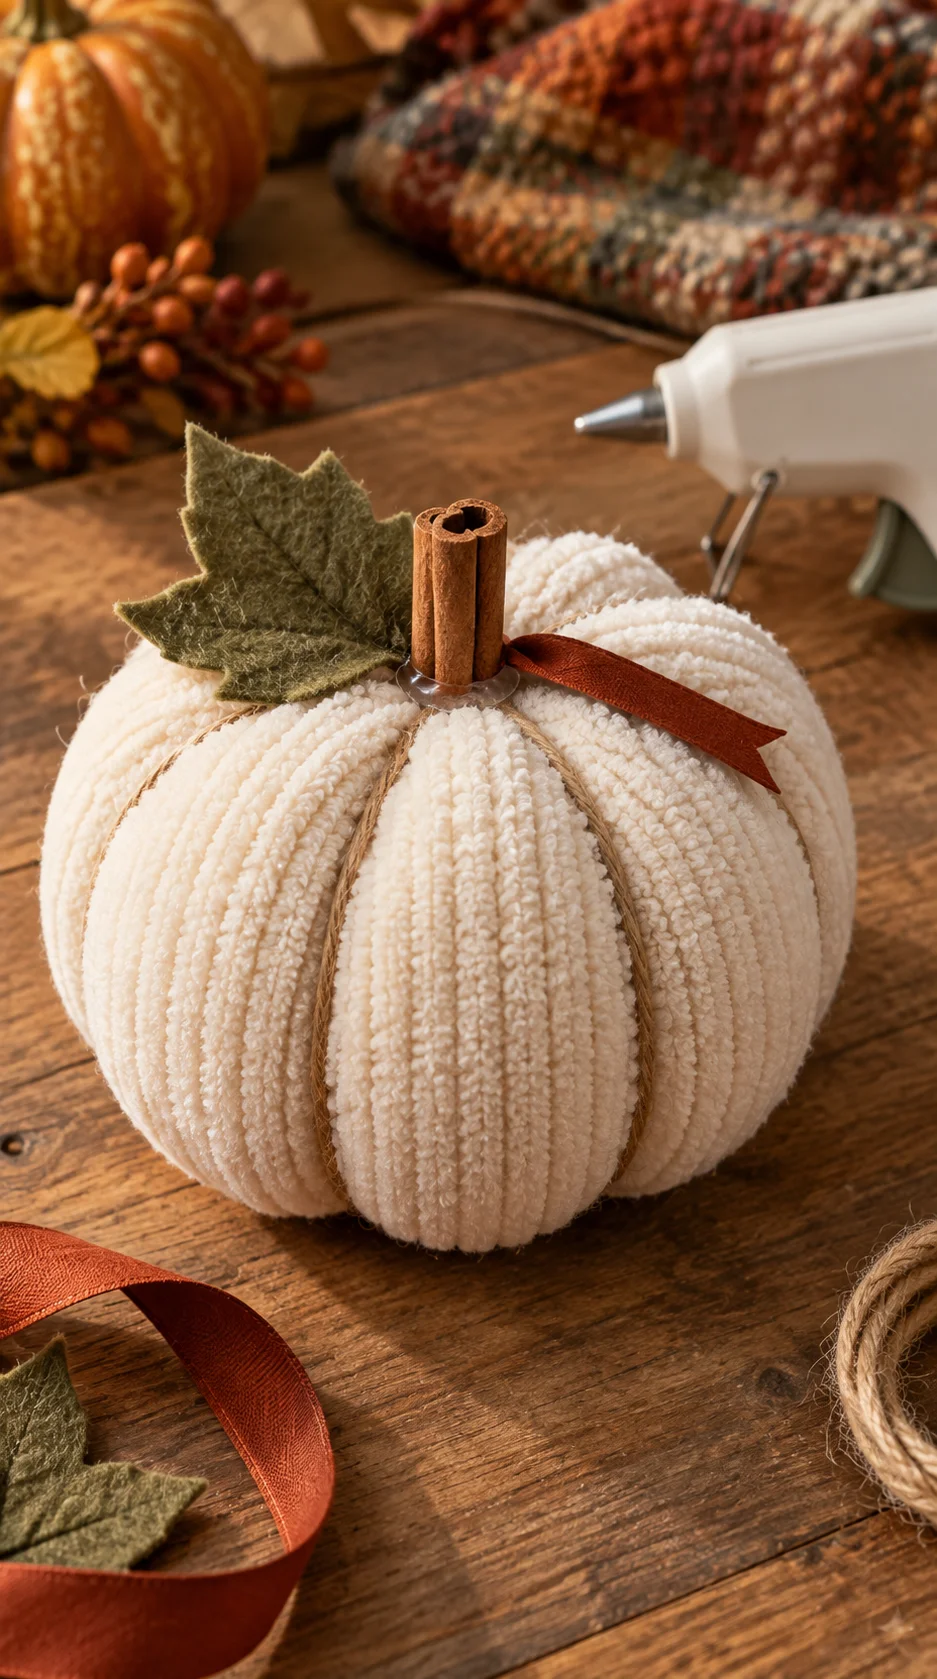
Trim the excess sock fabric above the top closure, leaving enough material to remain securely gathered. Apply a small amount of hot glue around the center and press the chosen stem into position.
A twig creates a natural farmhouse look, a cinnamon stick adds warm seasonal character, and a wine cork produces a neat, rounded stem. Hold the piece steady until the adhesive has cooled or set.
Amazon find: Mini Hot Glue Gun
A compact glue gun provides controlled adhesive placement when attaching small stems, leaves, and ribbon.
7Add Leaves, Ribbon, or Twine
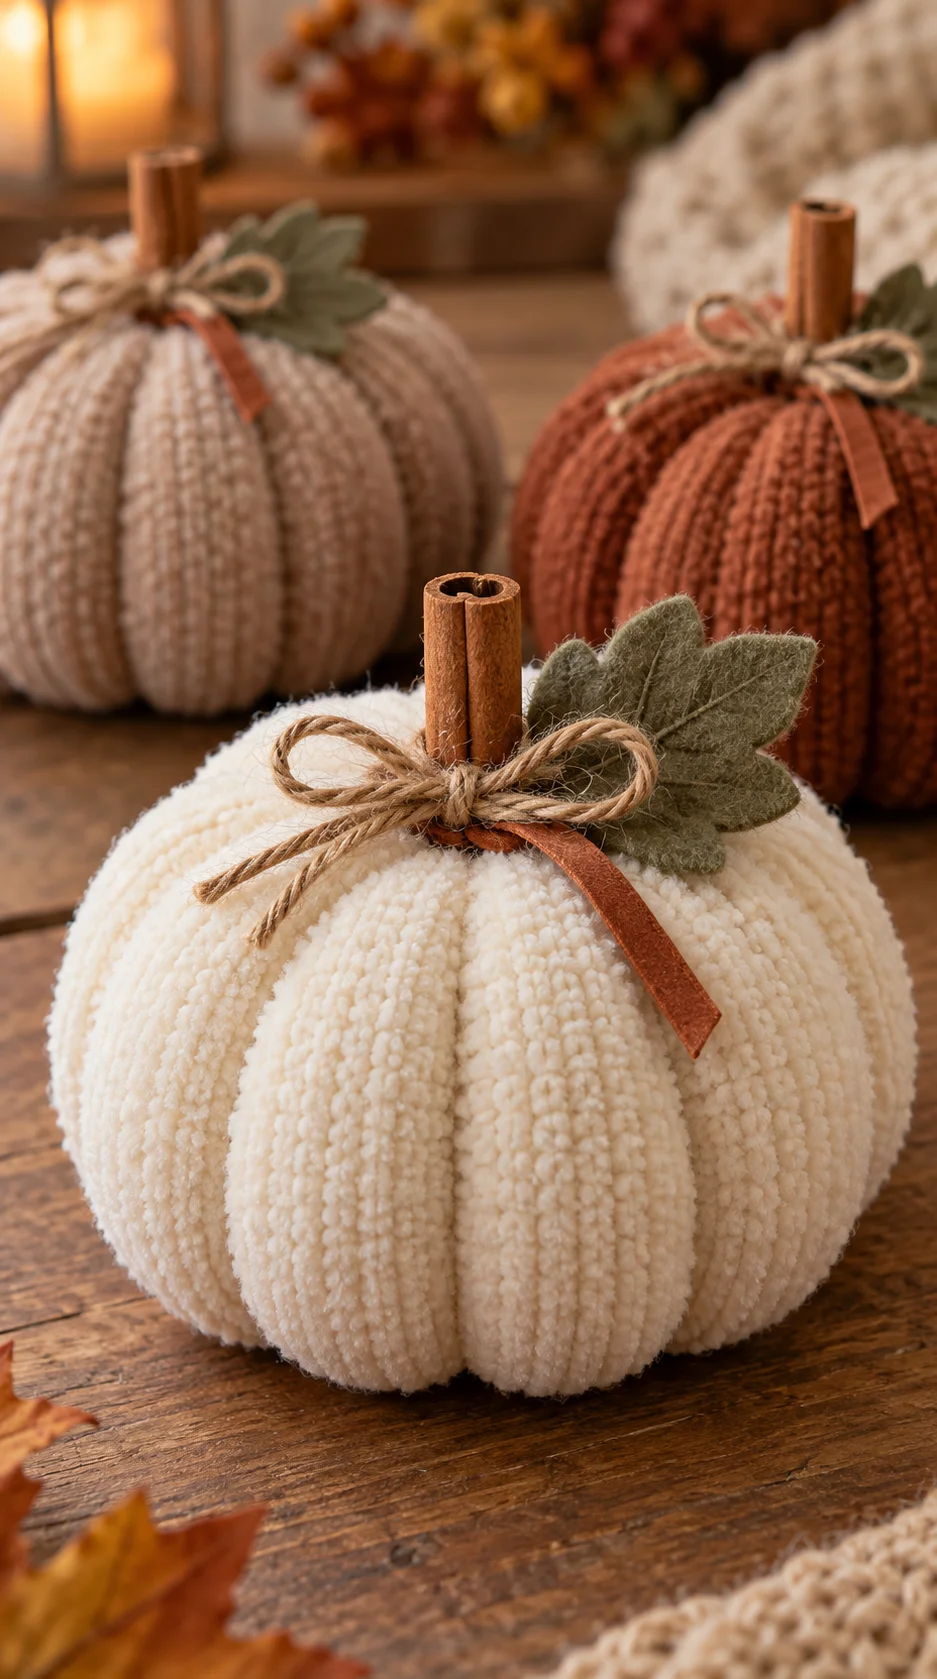
Hide the gathered fabric and rubber band with a small felt leaf, faux greenery, raffia, jute twine, or narrow ribbon. Place these accents around the base of the stem and secure them with a small amount of glue.
Choose one or two embellishments rather than covering the entire top. Fluffy fabric already adds plenty of texture, so a simple tied bow or single leaf is often enough.
8Give the Pumpkin Its Final Shape

Place the finished pumpkin on a flat surface and gently press down on the top. Pull outward on any narrow sections and redistribute the filling with your fingers until the shape looks balanced.
Turn the pumpkin around to inspect it from every angle. Adjust the dividing strands if one section is noticeably wider than the others, and remove any visible glue strings before displaying it.
Easy Ways to Style Fluffy Sock Pumpkins
- Create a tiered-tray display: Pair two small pumpkins with a mug, fall leaves, and a miniature sign.
- Decorate a mantel: Arrange pumpkins in different sizes between candles and loose greenery.
- Fill a shallow bowl: Combine mini sock pumpkins with pinecones and wooden beads.
- Style an entryway: Place three pumpkins on a tray beside a vase of autumn branches.
- Create a centerpiece: Line several low pumpkins down the center of a table with flameless candles.
- Decorate open shelves: Use one pumpkin per shelf and repeat the same colors through books, pottery, or foliage.
Fluffy Sock Pumpkin Shopping Checklist
| Item | Best For | Amazon Search |
|---|---|---|
| Fluffy socks | Creating a soft pumpkin body | Shop on Amazon |
| Polyester fiber fill | Lightweight, adjustable stuffing | Shop on Amazon |
| Strong elastic bands | Closing both ends without sewing | Shop on Amazon |
| Jute twine | Forming sections and rustic bows | Shop on Amazon |
| Mini glue gun | Attaching stems and decorations | Shop on Amazon |
| Artificial fall leaves | Hiding the top closure | Shop on Amazon |
Best Color Palettes for Sock Pumpkins
- Classic autumn: Burnt orange, mustard yellow, rust, and warm cream.
- Neutral farmhouse: Ivory, oatmeal, beige, taupe, and muted brown.
- Earthy cottage: Olive green, terracotta, cream, and dusty gold.
- Soft and romantic: Blush pink, mauve, warm white, and sage green.
- Moody fall: Burgundy, chocolate brown, deep green, and antique gold.
Common Mistakes and Safety Tips
- Adding too much filling: Leave enough flexibility for the thread or twine to create visible pumpkin sections.
- Using weak thread: Thin thread may snap when tightened. Choose embroidery floss, strong yarn, or durable twine.
- Making uneven sections: Mark four equal points mentally before adding smaller sections between them.
- Leaving the closure loose: Wrap the elastic several times and test it before forming the pumpkin.
- Using too much glue: Apply small amounts so adhesive does not soak through the sock or remain visible.
- Handling hot glue carelessly: Hot glue and the metal nozzle can cause burns. Adults should handle the glue gun and supervise children closely.
- Using food filling in damp areas: Keep rice- or bean-filled pumpkins dry to prevent moisture damage, odors, or pests.
- Displaying near flames: Keep fabric pumpkins away from fireplaces, burning candles, stovetops, heaters, and other heat sources.
Frequently Asked Questions
What kind of socks work best for sock pumpkins?
Fluffy, chenille, fuzzy, ribbed, and medium-weight knit socks work well because they stretch around the filling and add visible texture. Very thin socks may show lumps, while extremely thick socks can be difficult to tie.
What can I use instead of polyester stuffing?
You can use clean fabric scraps, filling from an old pillow, soft yarn remnants, or cut pieces of an unwanted T-shirt. Use small pieces and distribute them evenly to reduce lumps.
Can I make sock pumpkins without hot glue?
Yes. Strong fabric glue can attach lightweight stems and felt decorations, although it usually requires more drying time. Twine can also be wrapped tightly around the stem and top closure to hold simple decorations in place.
How do I make a sock pumpkin sit flat?
Add a small amount of dry rice or beans to the bottom before adding soft filling. After closing the pumpkin, press it onto a flat surface and gently redistribute the filling around the weighted base.
How should I store fluffy sock pumpkins?
Place them in a clean, dry, lidded container and avoid compressing them beneath heavy decorations. If they contain rice or beans, store the pumpkins in a secure location that remains dry and protected from pests.
Final Thoughts
Fluffy sock pumpkins are an easy way to create warm fall decor without sewing. The soft texture looks beautiful on shelves, mantels, tables, and decorative trays, while the simple construction makes this project suitable for beginners.
Make one pumpkin first to learn the shaping technique, then create a small group in different sizes and coordinating colors. Changing the stems, ribbons, and leaves will give each pumpkin its own character.
This is also a wonderful project for reusing unmatched socks and leftover craft materials. Enjoy experimenting with textures and colors as you create a cozy handmade pumpkin collection for your home.