
Some of the sweetest things we keep are also the hardest to display: a concert ticket, a tiny baby shoe, a spool from a family sewing basket, or a souvenir from a favorite trip. A shadow box gives those little treasures a place to shine instead of leaving them tucked away in a drawer.
These easy DIY shadow box ideas include personal keepsakes, seasonal scenes, upcycled displays, and simple frame projects. You can start with a ready-made box or customize an inexpensive frame to suit your space.
Below, you will find 20 practical projects, beginner-friendly assembly advice, color combinations, shopping suggestions, and tips for protecting meaningful objects while making your display look beautifully finished.
Affiliate note: This article may contain affiliate links. If you buy through these links, we may earn a small commission at no extra cost to you.
More Affordable Decorating Inspiration
18 Small Apartment Christmas Decor Ideas
Quick List: 20 DIY Shadow Box and Frame Ideas
- Layer paper swallows over a vintage-style map.
- Display favorite sewing notions.
- Arrange service medals and badges.
- Collect ticket stubs in a memory box.
- Create a vintage Halloween tin display.
- Make a colorful miniature shrine.
- Build a playful Halloween scene.
- Decorate a printer tray for Christmas.
- Illuminate a layered paper winter scene.
- Turn a picture frame into a shadow box.
- Repurpose a drawer as a rustic display.
- Frame memories from a favorite trip.
- Preserve baby’s first keepsakes.
- Build a box frame around a mirror.
- Assemble a custom frame without power tools.
- Create a clear acrylic display.
- Make a simple budget wood frame.
- Use scrap timber for natural framing.
- Pair modern wood framing with statement art.
- Refresh a thrifted frame with paint.
How to Make a Shadow Box for Beginners
A shadow box is a deep frame that leaves space between the backing and the front cover. That extra depth lets you display small objects, raised paper shapes, fabric, and other dimensional pieces. Flat framing projects can work for tickets and prints, while thicker keepsakes need a deeper enclosure.
- Choose one theme. Start with a trip, a collection, a holiday, or a person rather than combining unrelated objects.
- Measure your thickest piece. Check the usable interior depth of the frame, leaving clearance so the cover does not press against your objects.
- Prepare the background. Cut cardstock, fabric-covered board, or suitable mounting board to fit the backing.
- Arrange everything before attaching it. Place the largest item first, add smaller supporting pieces, and photograph the layout.
- Use the right attachment method. Foam tabs suit replaceable paper crafts; photo corners suit photographs; stitching or carefully positioned supports can hold fabric keepsakes.
- Close and display the box. Check that nothing shifts, clean the cover, and use hanging hardware rated for the finished weight.
Simple shadow box formula: One background + one main keepsake + three to five supporting details + open space around the arrangement.
For your first project, a ready-made shadow box with a removable back is usually the easiest starting point. Building the frame itself adds measuring, joining, and hardware decisions, so save those projects for when you feel comfortable with basic assembly.
Choose the Right Display for Your Project
| Style or Display | Best Pieces to Use | Why It Works |
|---|---|---|
| Enclosed keepsake box | Baby shoes, medals, souvenirs | Provides depth and helps reduce dust buildup. |
| Shallow layered frame | Paper birds, maps, tickets | Creates dimension without a bulky display. |
| Compartment tray | Tiny ornaments, buttons, miniatures | Separates small objects into an orderly collection. |
| Open drawer display | Sturdy curios and rustic accessories | Offers generous depth and an easy-to-change arrangement. |
| Acrylic sandwich frame | Flat prints, photographs, ticket copies | Gives flat pieces a light, floating appearance. |
20 Easy DIY Shadow Box Ideas to Try
1Layer Flying Swallows Over a Map
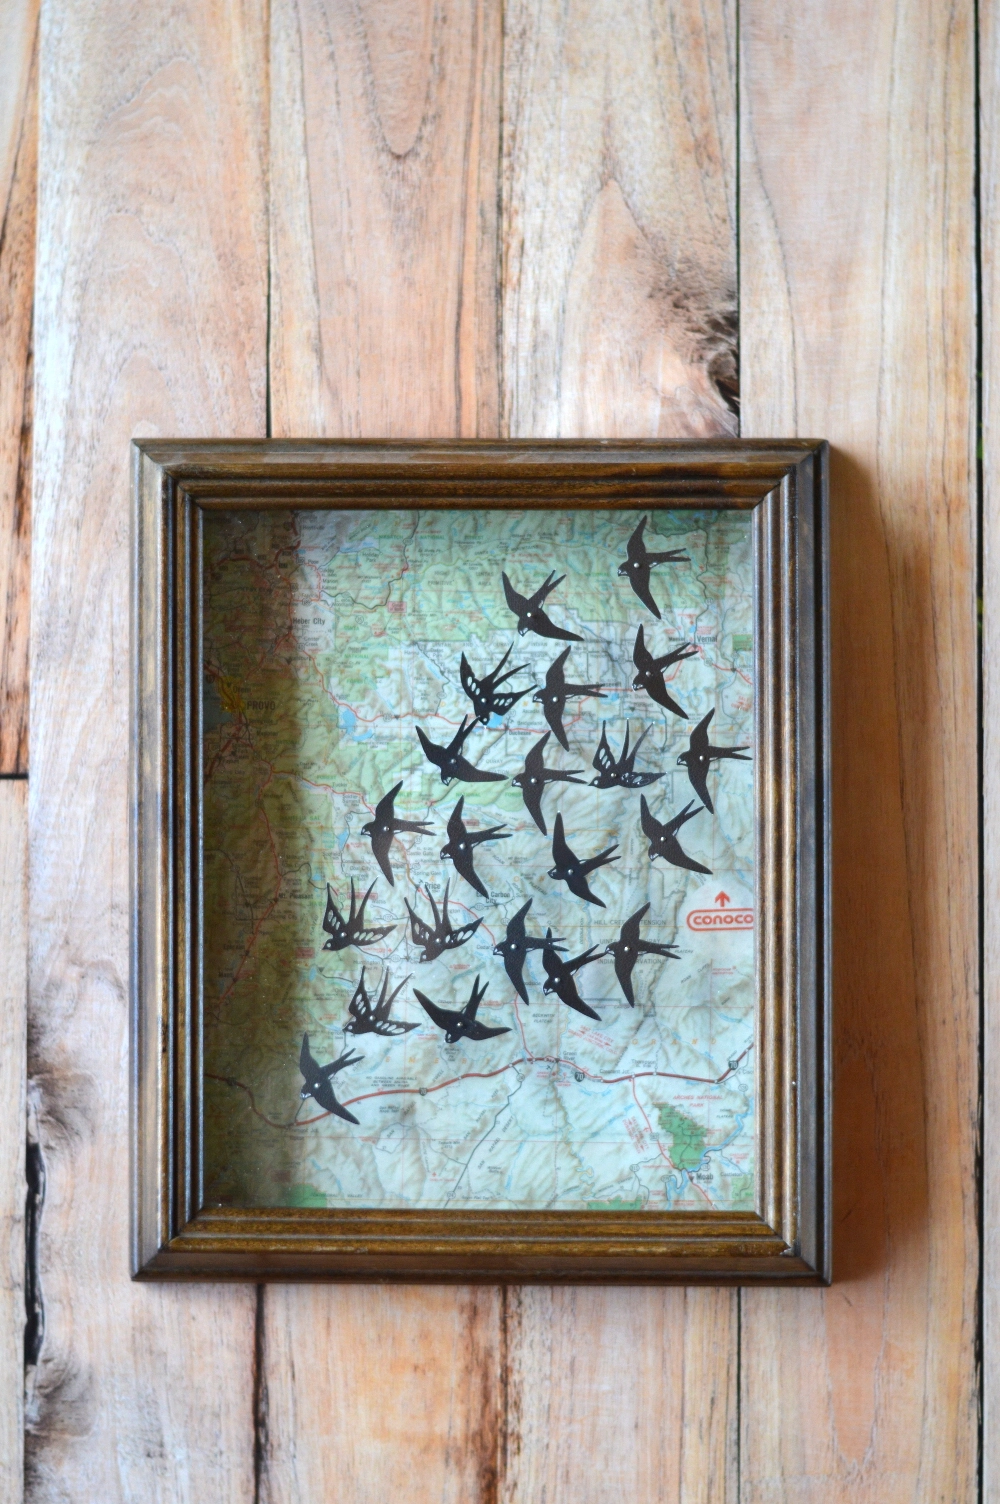
Image credits – whistleandlively.com
Use a vintage-style map as the background for a small flock of paper swallows. Choose a location that means something to you, such as your hometown or a dream destination, and cut the birds from plain navy, charcoal, or cream cardstock.
Lift a few birds with foam tabs and attach others flat to create gentle depth. Let the flock travel diagonally across the map, keeping an important coastline or city visible. A simple wood frame makes this travel-inspired wall art feel warm and understated.
2Showcase Treasured Sewing Notions

Image credits – sumoftheirstories.com
A collection of thread spools, buttons, ribbon scraps, and fabric labels can become a charming sewing shadow box. Cover the backing with linen or cotton, then arrange the pieces in small groups so their shapes and textures are easy to appreciate.
Place a favorite spool or pair of small embroidery scissors near the center and use buttons to fill a few gaps. Stitch suitable objects to a fabric-covered support rather than coating family keepsakes in glue. Display the finished box beside your craft desk or above a sewing cabinet.
Beginner tip: Choose two or three thread colors that repeat throughout the display. A limited palette helps a mixed collection feel coordinated.
3Create a Thoughtful Service Medal Display

Image credits – shadowboxguru.com
Arrange medals, badges, a photograph, and a small name card in a deep frame with a quiet fabric background. Navy, charcoal, or cream can help the objects stand out without distracting from their meaning.
Plan the layout with the person whose service you are honoring, and confirm the order and orientation of awards before mounting them. Use appropriate supports or a professional framer for valuable pieces. The same approach can celebrate sports medals, coaching achievements, or a retirement milestone.
4Gather Ticket Stubs in a Memory Box

Image credits – dwellbeautiful.com
Turn concert tickets, theater stubs, and admission passes into a collection you can enjoy every day. For an organized version, attach selected tickets to the backing with photo corners. For a growing collection, choose a purpose-made ticket box with an insertion slot.
Add a simple background featuring a favorite photograph or the year the collection began. Keep the tickets loosely arranged rather than packed tightly against the cover. If an original ticket is fading, display a copy and store the original away from light.
Amazon find: Ticket memory shadow box
A box with an insertion slot makes it easy to add new tickets without taking the frame apart. Check its interior dimensions before choosing one.
5Make a Vintage Halloween Tin Shadow Box
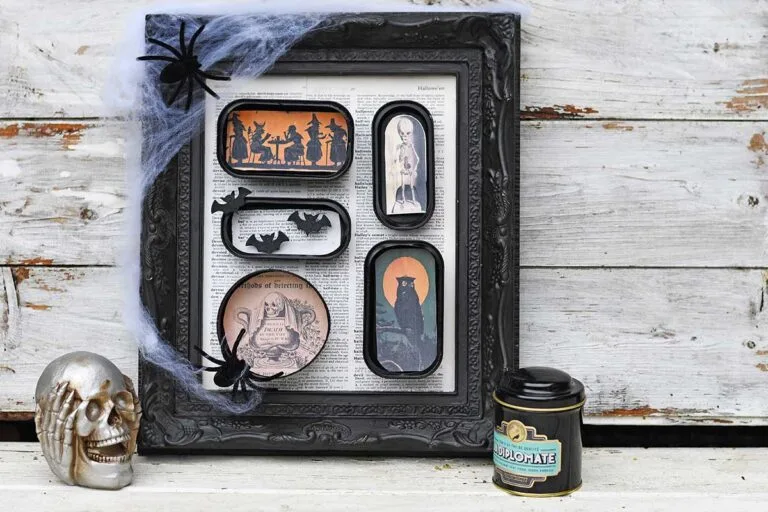
Image credits – pictureboxblue.com
A shallow, smooth-edged tin can become a tiny stage for vintage-style Halloween artwork. Line the inside with dark patterned paper, then add a printed owl, moon, or mysterious portrait raised slightly from the background.
Use a clean container with no exposed sharp edges, and choose craft reproductions rather than delicate original illustrations. A narrow ribbon around the outer rim gives the piece a finished look. Stand it securely on a shelf beside a flameless candle for a small seasonal vignette.
6Craft a Colorful Miniature Shrine
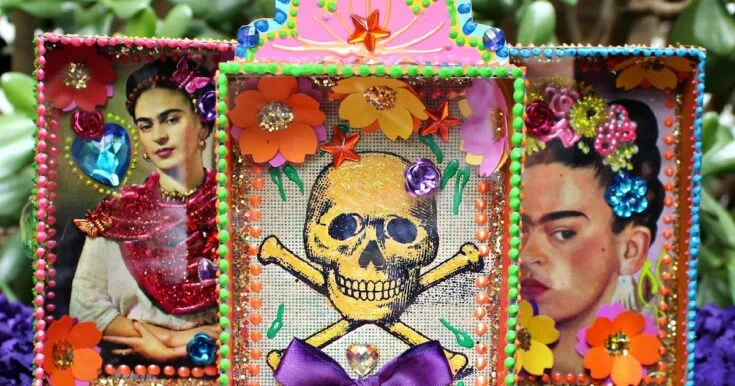
Image credits – markmontano.com
Paint a small unfinished wood box in turquoise, coral, or sunny yellow and create a miniature tribute inside. A Frida Kahlo-inspired art display could combine a portrait reproduction with paper flowers, while a personal remembrance shrine might center on a family photograph.
Keep the central image prominent and use a few meaningful accents around it. If your project draws on Día de los Muertos traditions, approach the imagery with care and respect for its remembrance purpose. A stable tabletop box is an easy alternative to installing wall hardware.
7Build a Playful Halloween Mini Scene
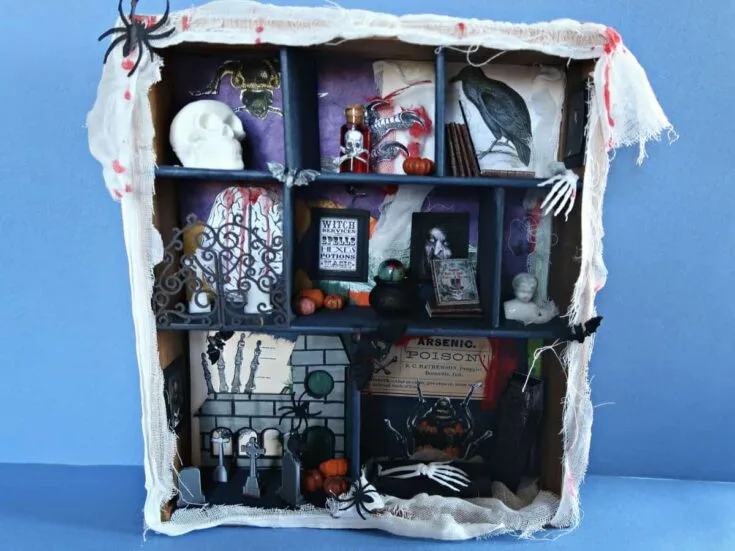
Image credits – craftinvaders.co.uk
For a cheerful Halloween shadow box, arrange miniature pumpkins, a paper ghost, and a small bare tree against a dusky background. Start with one larger shape, then add two or three smaller details so the scene stays readable.
A folded cardstock platform can raise the back row without complicated construction. Use replaceable craft pieces and removable attachments where practical so you can change the scene next fall. This project works especially well on an entry table or bookcase.
Keep it simple: One pumpkin, one ghost, and one tree often look more effective than a crowded box of tiny decorations.
8Fill a Printer Tray With Christmas Treasures
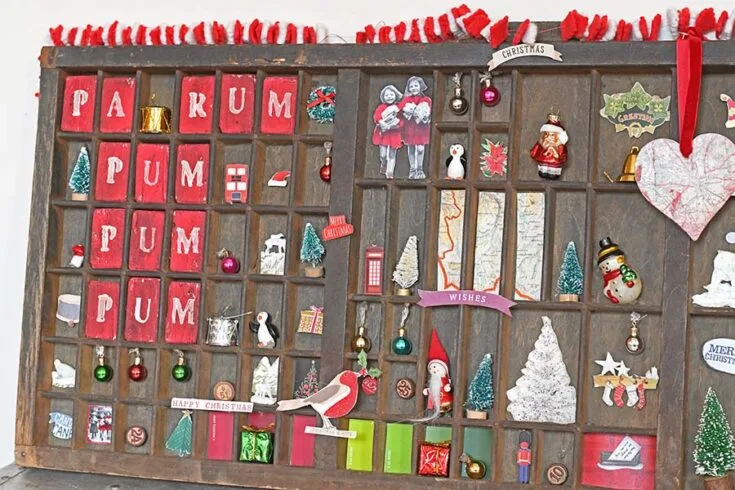
Image credits – pillarboxblue.com
A compartment tray makes an inviting Christmas display for tiny ornaments, bells, wooden stars, and miniature trees. Begin with a clean, sound tray and distribute your largest pieces across different compartments rather than clustering them together.
Repeat one accent color, such as red or muted gold, and leave several compartments empty. Small scraps of patterned paper can line selected sections without covering all the wood. If using a genuine vintage printer tray, avoid sanding unknown old finishes; a new unfinished compartment tray is a straightforward alternative.
9Light Up a Layered Paper Winter Scene
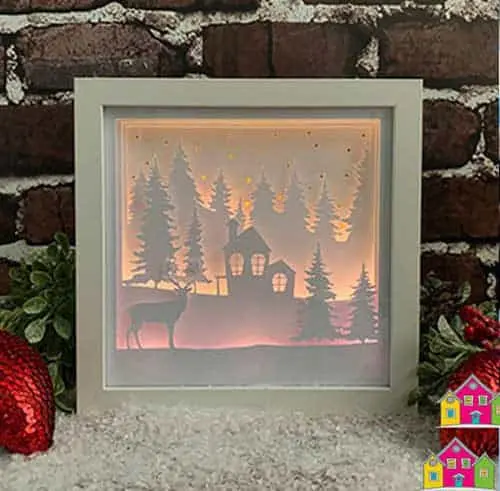
Image credits – burtonavenue.com
Create a snowy landscape from three or four cardstock layers: a distant sky, simple trees, a small house, and a foreground snowbank. Separate the layers with foam spacers inside a deep frame, leaving room behind the scene for suitable low-heat LED lighting.
Start with easy silhouettes you can cut using scissors instead of intricate branches. Follow the lighting manufacturer’s placement instructions and keep the battery pack accessible outside the paper layers. White paper with warm light creates a gentle winter glow on a console or mantel.
Amazon find: Deep shadow box frame
A frame with a removable back and enough usable depth gives paper layers space to stand apart. Measure your planned layers and lighting before buying.
10Add Depth to an Existing Picture Frame
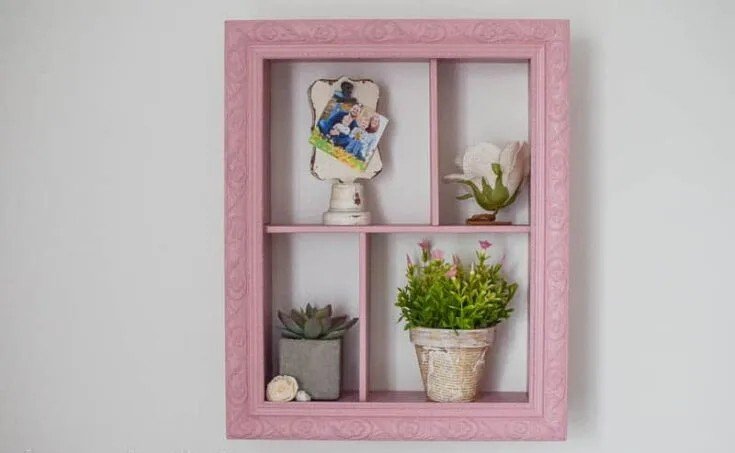
Image credits – makingjoyandprettythings.com
Give a sturdy picture frame a new purpose by adding a shallow wood box behind it. Measure the frame’s rear opening, plan a backing that fits securely, and have the wood cut to size if you are not comfortable making the cuts yourself.
Assemble a square, stable box using joining methods appropriate for the materials, then attach the front frame securely. Keep the original glazing only if it fits safely and can be retained properly. This project suits lightweight paper displays and is a good next step after decorating a ready-made box.
11Turn a Small Drawer Into a Rustic Display
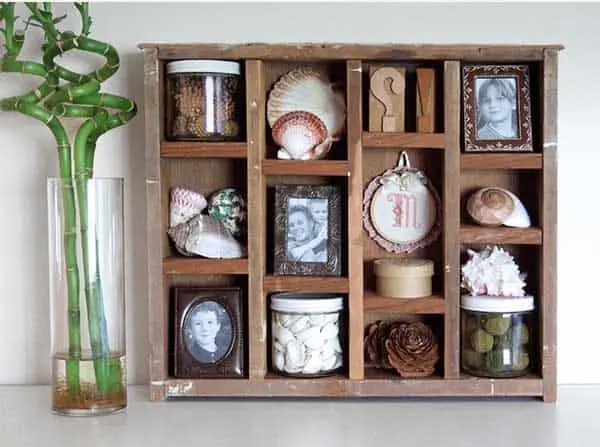
Image credits – craftynest.com
A spare wooden drawer can become an open shadow box with plenty of room for sturdy curios. Clean it thoroughly, check the joints, and line the base with plain paper or fabric before arranging dried botanical pieces, small pottery, or vintage-style objects.
For an easy beginner setup, place the drawer on a stable shelf with its opening facing forward. Add a small internal riser to vary object heights. If you want to hang it, use suitable structural mounting hardware rather than relying on the drawer handle or a decorative ribbon.
12Tell a Travel Story With Souvenirs

Image credits – asacredjourney.net
Build a travel memory shadow box around one favorite photograph and a few small souvenirs. A postcard, transit ticket, folded map section, and lightweight trinket can capture a trip without needing every item you brought home.
Place the photograph slightly off-center and group the supporting pieces nearby. Add a small destination-and-date card so the display remains meaningful years later. For multiple trips, use matching frames with different backgrounds to create a coordinated hallway collection.
Styling tip: Let one souvenir provide the accent color, then repeat that shade in the background paper or caption card.
13Preserve Baby’s First Little Keepsakes
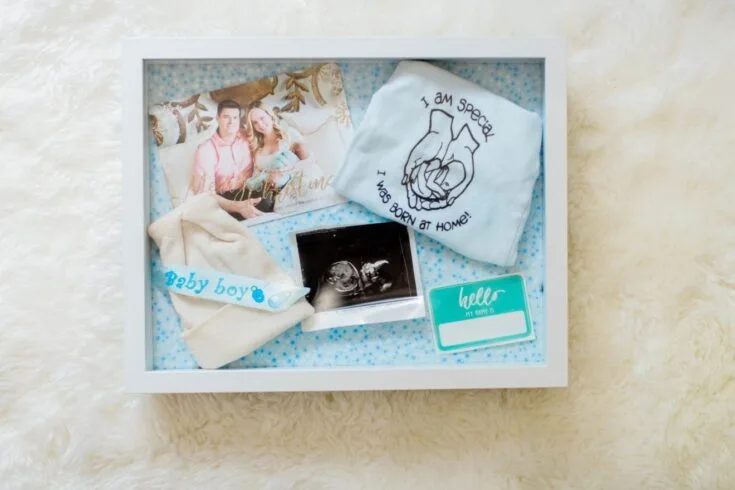
Image credits – baby-chick.com
A pair of first booties, a birth announcement, and a newborn photograph make a sweet baby keepsake display. Choose a box deep enough to hold the shoes without flattening them, and use a soft cream, pale blue, or muted peach background.
Support fabric items with gentle stitching through a suitable backing, keeping attachment points discreet. Store especially fragile originals separately and display copies when needed. Before sharing photographs of the box online, cover personal details on hospital wristbands or documents.
14Build a Box Frame Around a Mirror
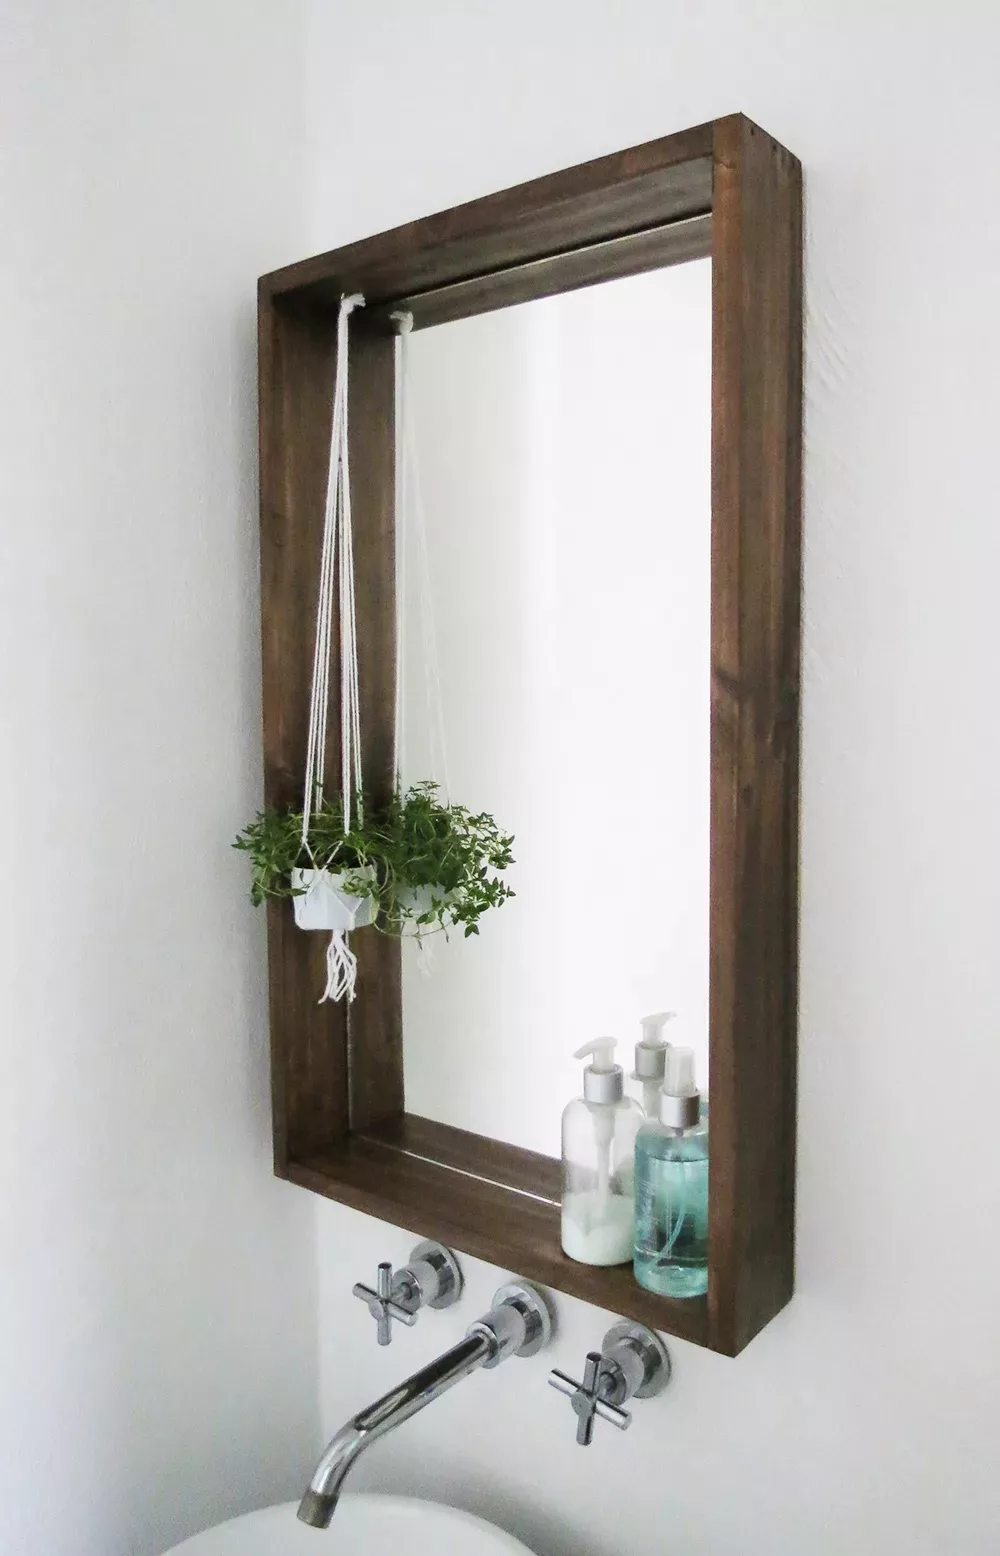
Image credits – Oh Oh Deco
A deep wood surround can turn a plain mirror into an open box-style display. The projecting sides create visual depth, and a properly constructed bottom ledge can hold a small decorative item or lightweight bathroom accessory.
Use measured, pre-cut pieces and a finish suited to the room’s moisture level. Support the mirror with appropriate mirror hardware and secure the surround separately as needed. This project involves more assembly than a paper shadow box, so keep the ledge lightly styled and get help with heavy mirrors.
15Assemble a Custom Frame Without Power Tools
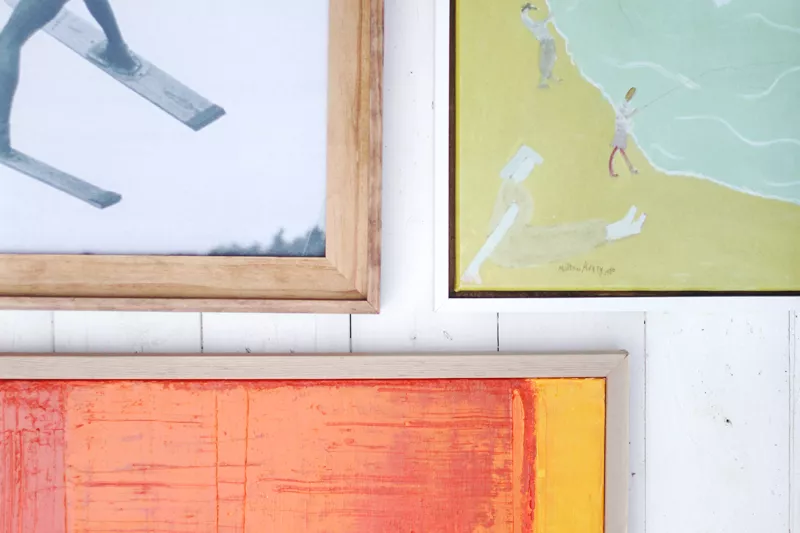
Image credits – A Beautiful Mess
For a small print or paper keepsake, use pre-cut frame pieces or a frame kit designed for simple assembly. Measure the artwork first, including any border you want visible, and follow the kit’s joining and backing instructions.
This creates a custom flat frame; a compatible depth extension is needed if you want a true shadow box. Keep your first project small and lightweight, and use acrylic rather than trying to cut glass yourself. A cream mat around a colorful print can make the result feel neatly finished.
16Create a Clear Acrylic Keepsake Display
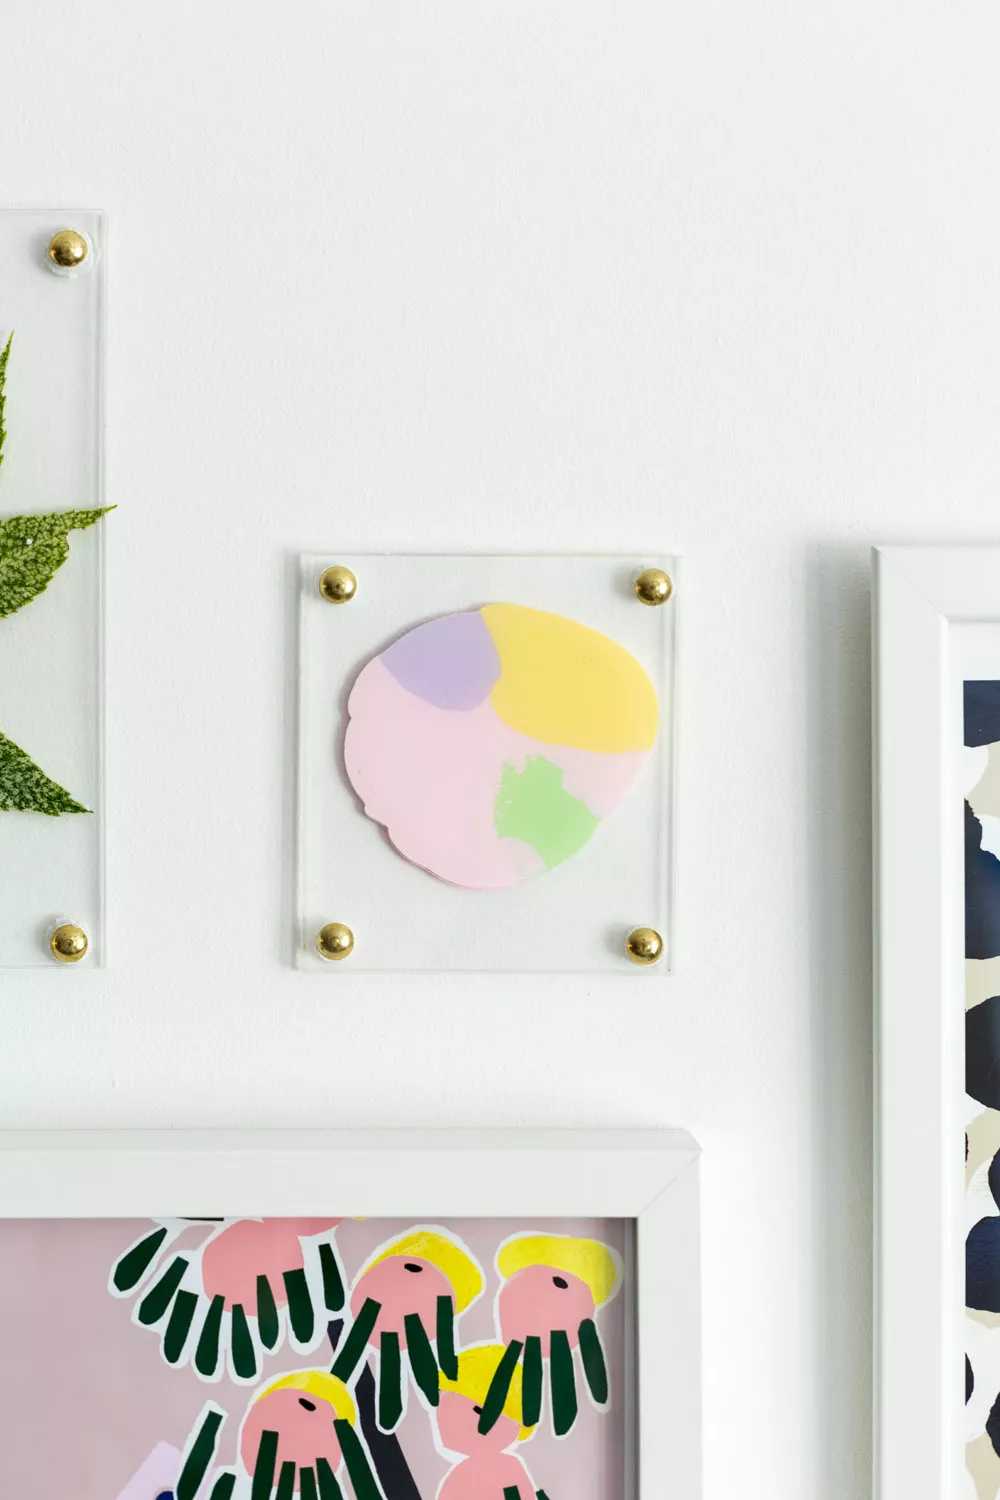
Image credits – Fall for DIY
Place a flat photograph, art print, or ticket copy between two acrylic panels for a floating display. Leave a clear border around the item so the wall color becomes part of the finished design.
Choose a purpose-made acrylic frame with supplied fasteners and mounting instructions for a manageable first project. Standard sandwich frames are best for flat pieces; use a designed spacer system if you need depth. Avoid clamping thick objects between panels or improvising supports for a heavy frame.
Amazon find: Acrylic floating picture frame
A complete frame kit provides matching panels and fasteners for displaying flat artwork with a clear border.
17Make a Simple Budget Wood Frame
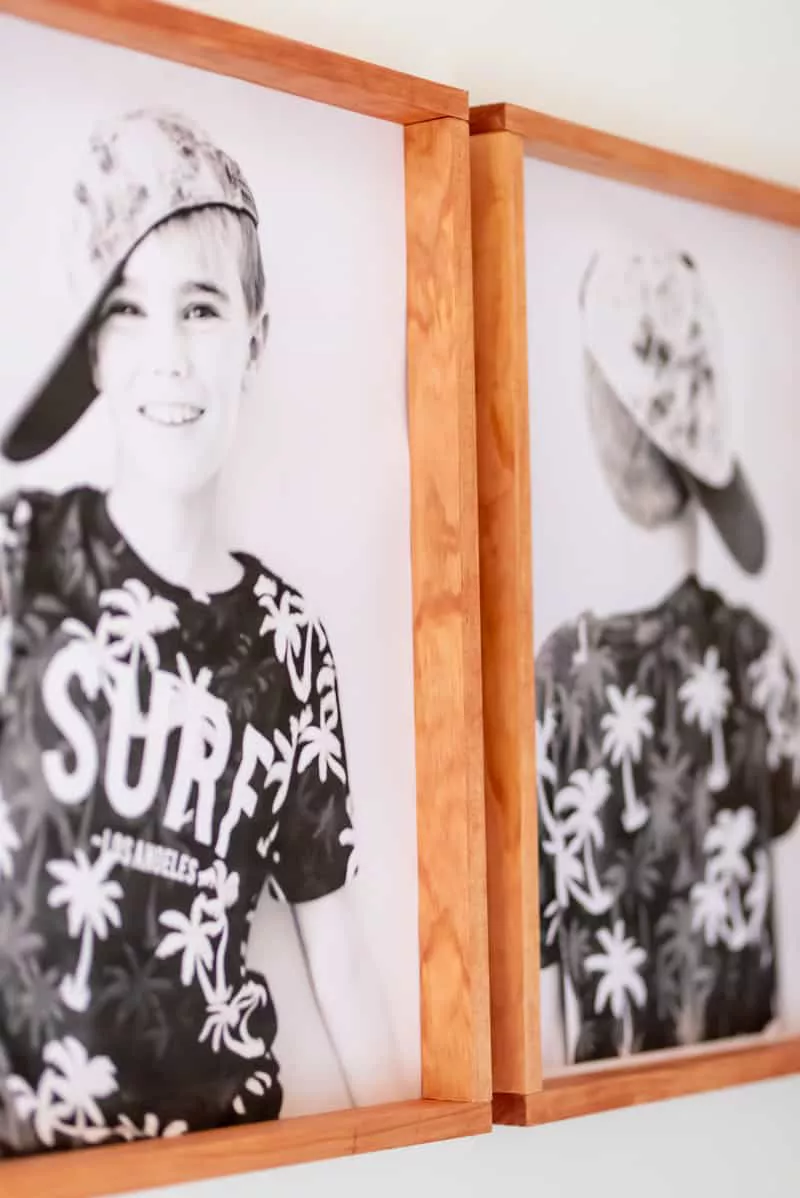
Image credits – Place of My Taste
Use inexpensive wood strips to frame a favorite print or provide a decorative front for a lightweight display box. Straight-cut butt joints are easier to plan than angled corners, making them a practical option for a first small frame.
Calculate the dimensions before buying wood, then compare the total cost of materials with a ready-made frame. Account for backing, fasteners, and hanging hardware as well as the wood itself. Finish with one paint color and a plain background to keep the inexpensive construction looking intentional.
18Use Scrap Timber for Natural Framing

Image credits – Al and Imo Handmade
Clean, dry timber offcuts can give a photograph or keepsake display a warm natural edge. Choose pieces with matching thickness, check for nails and splinters, and avoid wood with unknown coatings or signs of pests.
Let the grain provide most of the decoration, pairing the frame with cream backing and a simple arrangement. If building a deeper box, plan the side panels and front opening together so the parts fit correctly. A clear finish or subtle stain can unify mismatched wood; test it on an offcut first.
19Pair Modern Wood Framing With Statement Art

Image credits – Nadine Stay
A clean-lined wood frame can make a simple piece of artwork feel like a focal point. Try an abstract paper composition, a large photograph, or a minimalist print, leaving enough space around the image for the design to breathe.
For a dimensional version, use a deeper frame and raise selected paper shapes slightly from the backing. Start with a modest size before building oversized wall art, which needs stronger joints and more substantial mounting. Repeat the wood tone in a nearby shelf or lamp base to connect the display to the room.
20Refresh a Thrifted Frame With Paint

Image credits – The Spruce Crafts / Caylin Harris
A sturdy secondhand shadow box can look completely different with a fresh painted finish. Remove the backing and glazing where possible, clean the surface, and choose a primer and paint suitable for the frame material.
Try muted sage for nature collections, charcoal for colorful tickets, or warm ivory for family keepsakes. Let the finish dry and cure according to the product directions before reassembling. If an old painted frame has an unknown finish, avoid sanding it; choose an unfinished or newer frame instead.
Budget tip: Inspect the frame’s depth, joints, backing, and cover before buying. A bargain frame becomes less useful if every structural part needs replacing.
Shopping Checklist for DIY Shadow Boxes
Choose supplies for one project first. You may already have suitable paper, fabric scraps, ribbon, or a spare frame, so there is no need to buy everything on this list.
| Item | Best For | Amazon Search |
|---|---|---|
| Deep shadow box frame | Dimensional keepsakes and paper scenes | Shop on Amazon |
| Acid-free mounting board | Backing for photographs and paper keepsakes | Shop on Amazon |
| Photo corners | Holding flat photos without glue on their surfaces | Shop on Amazon |
| Cardstock and foam spacers | Replaceable layered paper decorations | Shop on Amazon |
| Unfinished compartment tray | Small ornaments and miniature collections | Shop on Amazon |
| Battery-powered LED craft lights | Illuminated scenes with suitable clearance | Shop on Amazon |
Frequently Asked Questions
What is the easiest shadow box project for a beginner?
A ready-made frame filled with a photograph, paper background, and a few flat keepsakes is a simple first project. A map with raised paper birds is another approachable option because the materials are lightweight and easy to arrange.
Can I turn a regular picture frame into a shadow box?
Yes, if the frame is sturdy enough to attach securely to a purpose-built rear box or compatible depth extension. A regular shallow frame alone will not hold thick objects. For your first dimensional display, buying a ready-made shadow box may be simpler.
How do I attach items inside a shadow box?
Match the method to the object. Use photo corners for flat photographs, foam tabs for replaceable paper layers, and suitable stitching or supports for textiles. Heavy objects need secure mechanical support. Avoid permanent adhesives on meaningful originals.
How deep should a shadow box be?
It should be deep enough for your thickest item, its mounting support, and clearance behind the front cover. Measure those together before shopping. Paper layers need less room than baby shoes, miniature scenes, or bulky souvenirs.
How can I make a shadow box look polished on a budget?
Use one background color, choose a clear focal point, and leave some empty space. A clean cover, neatly cut backing, and coordinated frame finish make a bigger difference than adding more decorations. Reuse supplies you already own before buying extras.
Final Thoughts
The most memorable DIY shadow boxes begin with something personal: a favorite place, a family collection, a special milestone, or a season you love. You do not need many objects to create a display with meaning.
Start with one manageable project, arrange the pieces before attaching them, and choose a frame that gives everything enough room. Whether you make a ticket collection, a paper winter scene, or a baby keepsake box, a thoughtful layout can turn everyday treasures into lovely decor.
2 thoughts on “20 Easy DIY Shadow Box Ideas for Beginners”