Halloween is the perfect excuse to pull out your craft supplies and create something wonderfully spooky. From elegant wreaths and glowing ghosts to potion bottles and handmade garlands, there are plenty of projects adults can enjoy.
These easy Halloween crafts for adults include budget-friendly decorations for mantels, tables, walls, front doors, and Halloween parties. Many of them can be made with dollar-store supplies, thrifted finds, or materials you may already have at home.
Choose one project for a relaxing craft night or combine several ideas to create a coordinated Halloween display.
Affiliate note: This article may contain affiliate links. If you buy through these links, we may earn a small commission at no extra cost to you.
More Halloween Decorating Inspiration
Quick List: Easy Halloween Crafts for Adults
|
|
How to Make Halloween Crafts Look More Expensive
Start with a limited color palette instead of using every traditional Halloween color at once. Black, cream, muted orange, and antique gold can look sophisticated, while purple, green, and black work beautifully for a witchy theme. Mix textures to give simple projects more depth. Pair smooth painted wood with moss, gauze, velvet ribbon, dried branches, metal accents, or distressed glass. Small details such as an aged finish or coordinated ribbon can make inexpensive supplies feel intentional. Before buying new materials, check your recycling bin, craft drawer, and local thrift store. Glass jars, old frames, candle holders, fabric scraps, and unfinished wood pieces can all become Halloween decorations.
Choose a Halloween Craft for Your Space
| Area or Style | Best Crafts to Make | Why It Works |
|---|---|---|
| Front door | Skull wreath, black rose wreath, or pumpkin sign | Creates an eye-catching seasonal welcome |
| Fireplace mantel | Mop ghosts, garlands, and potion bottles | Provides height, texture, and a soft glow |
| Party table | Candy bowl, glasses, and candle holders | Combines useful serving pieces with festive decor |
| Craft night | Painted rocks, wands, jewelry, or felt decor | Offers small projects guests can personalize |
| Small home | Embroidery, wall signs, and hanging garlands | Adds seasonal style without using floor space |
21 Creative DIY Halloween Craft Ideas for Adults
1
Colorful Halloween Cat Garland
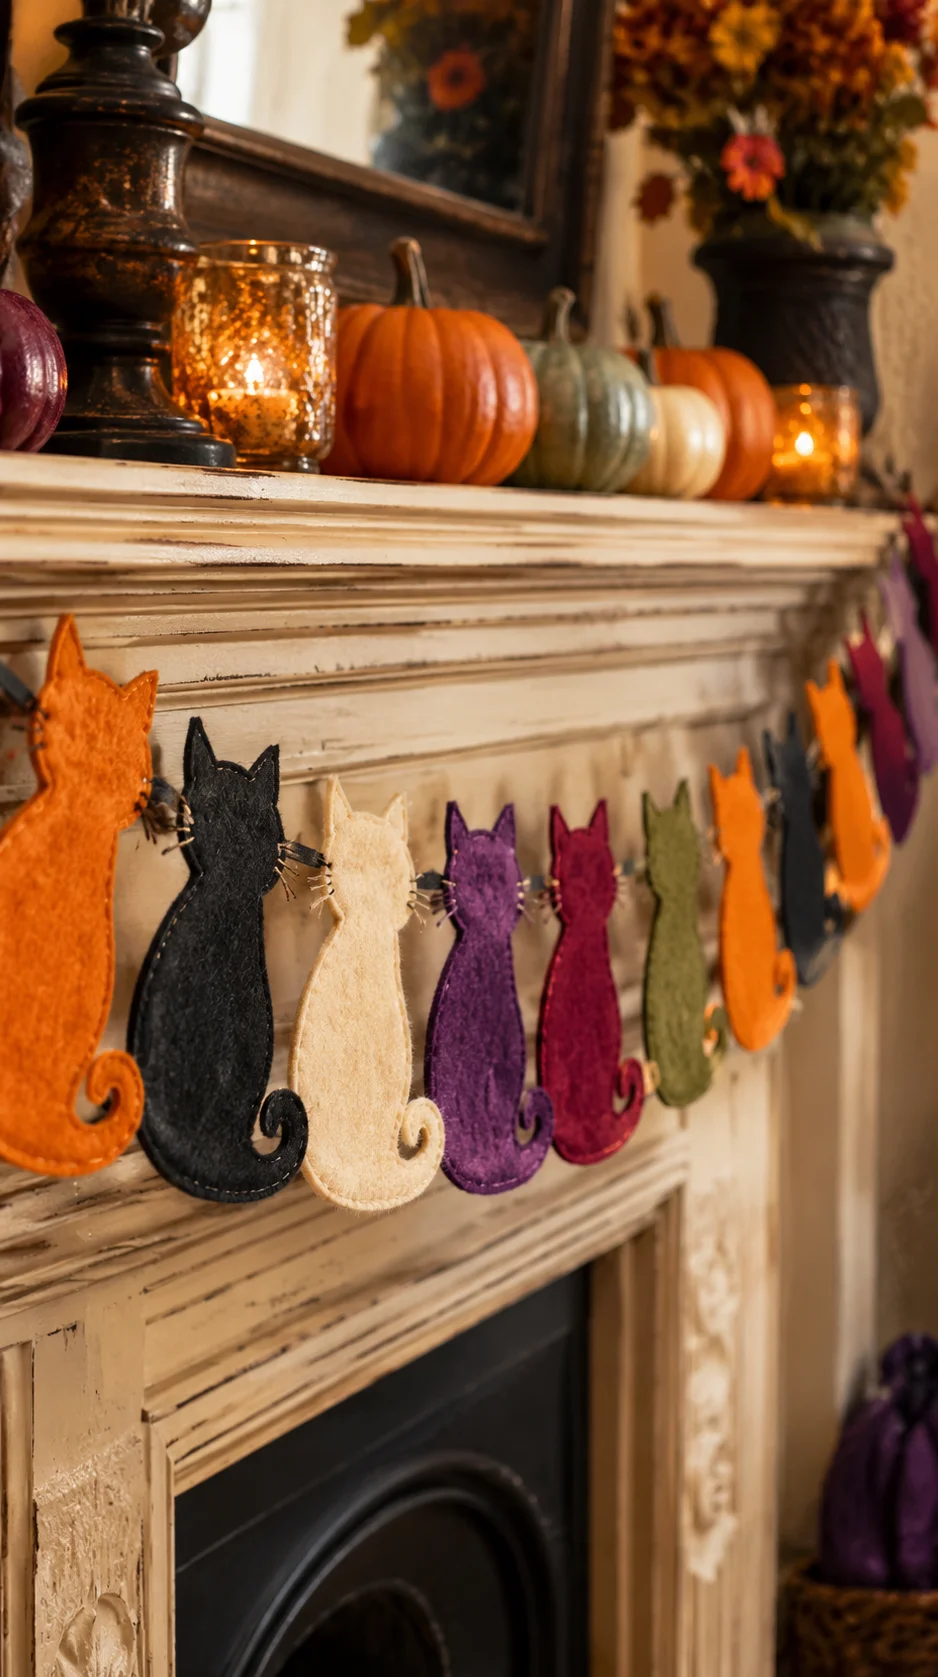 Cut cat faces from black cardstock, felt, or thin craft foam. Give each cat bright eyes, tiny paper hats, or collars in purple, orange, and lime green before attaching the pieces to sturdy twine. Hang the finished garland across a mantel, mirror, doorway, or party table. Keep the shapes similar but vary the small details so the garland feels playful and handmade.
2
Moss-Covered Skull Wreath
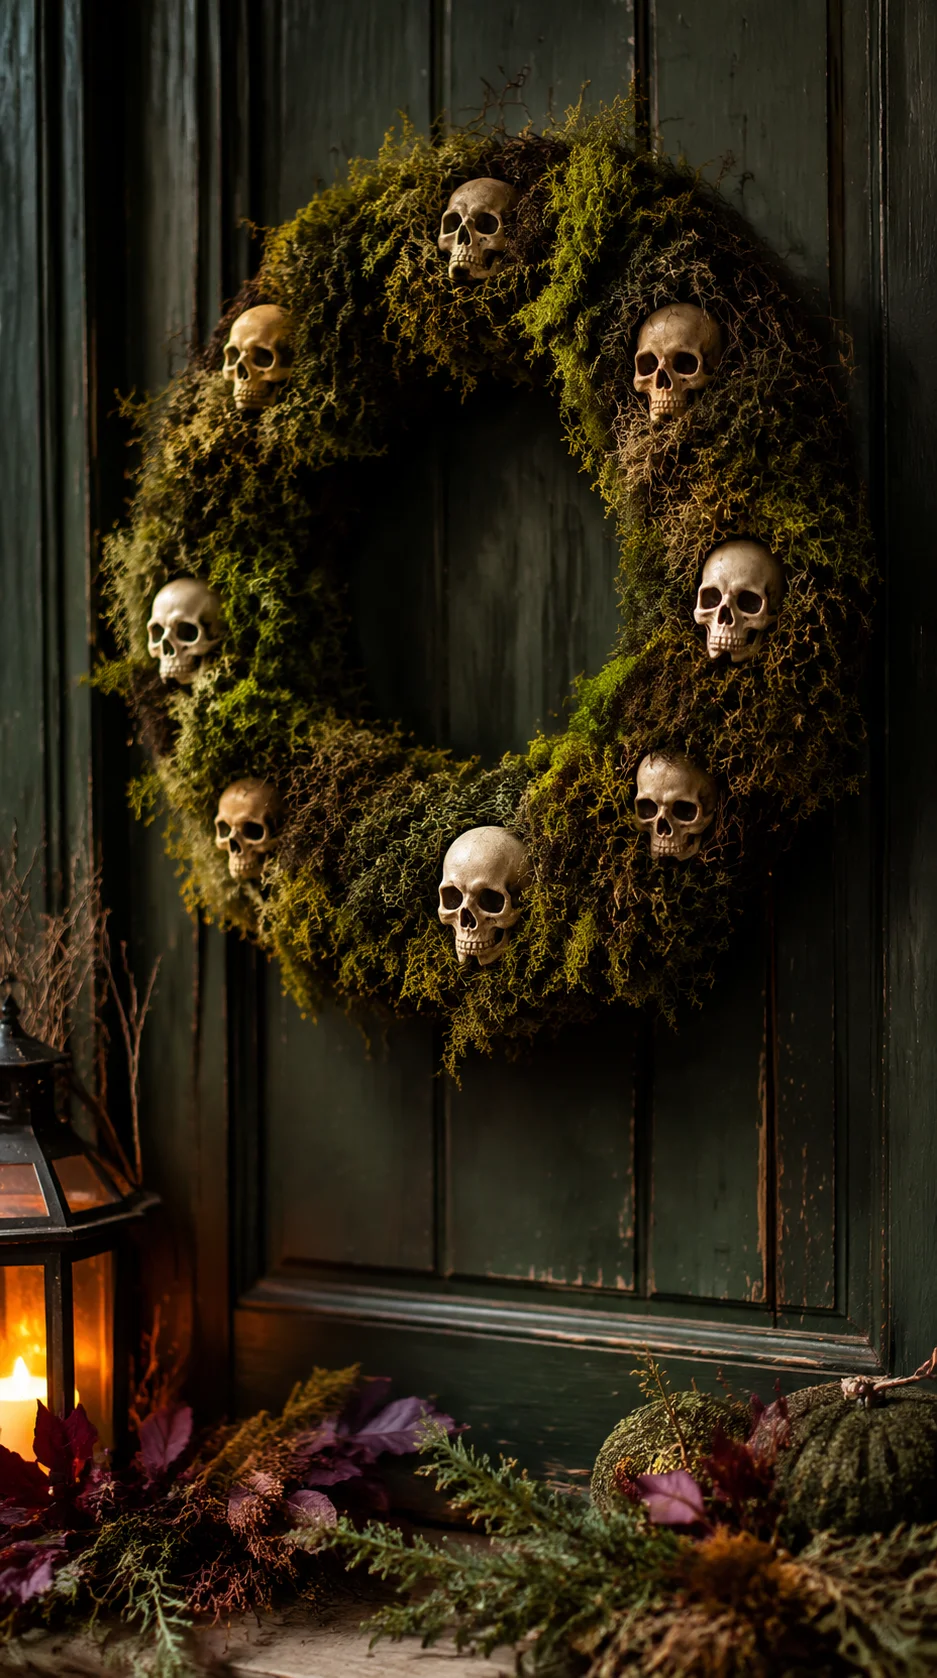 Cover a grapevine or foam wreath form with preserved moss, leaving a few sections of the base visible. Add lightweight skulls, small mushrooms, dark leaves, and black ribbon for a mysterious woodland look. Arrange the skulls slightly off-center instead of spacing them evenly. This gives the wreath a more natural appearance and creates one strong focal point for the front door.
Supplies for this project:
Preserved craft moss makes it easy to cover wreath forms and create an aged, overgrown finish.
3
Skeleton Hand Candy Bowl
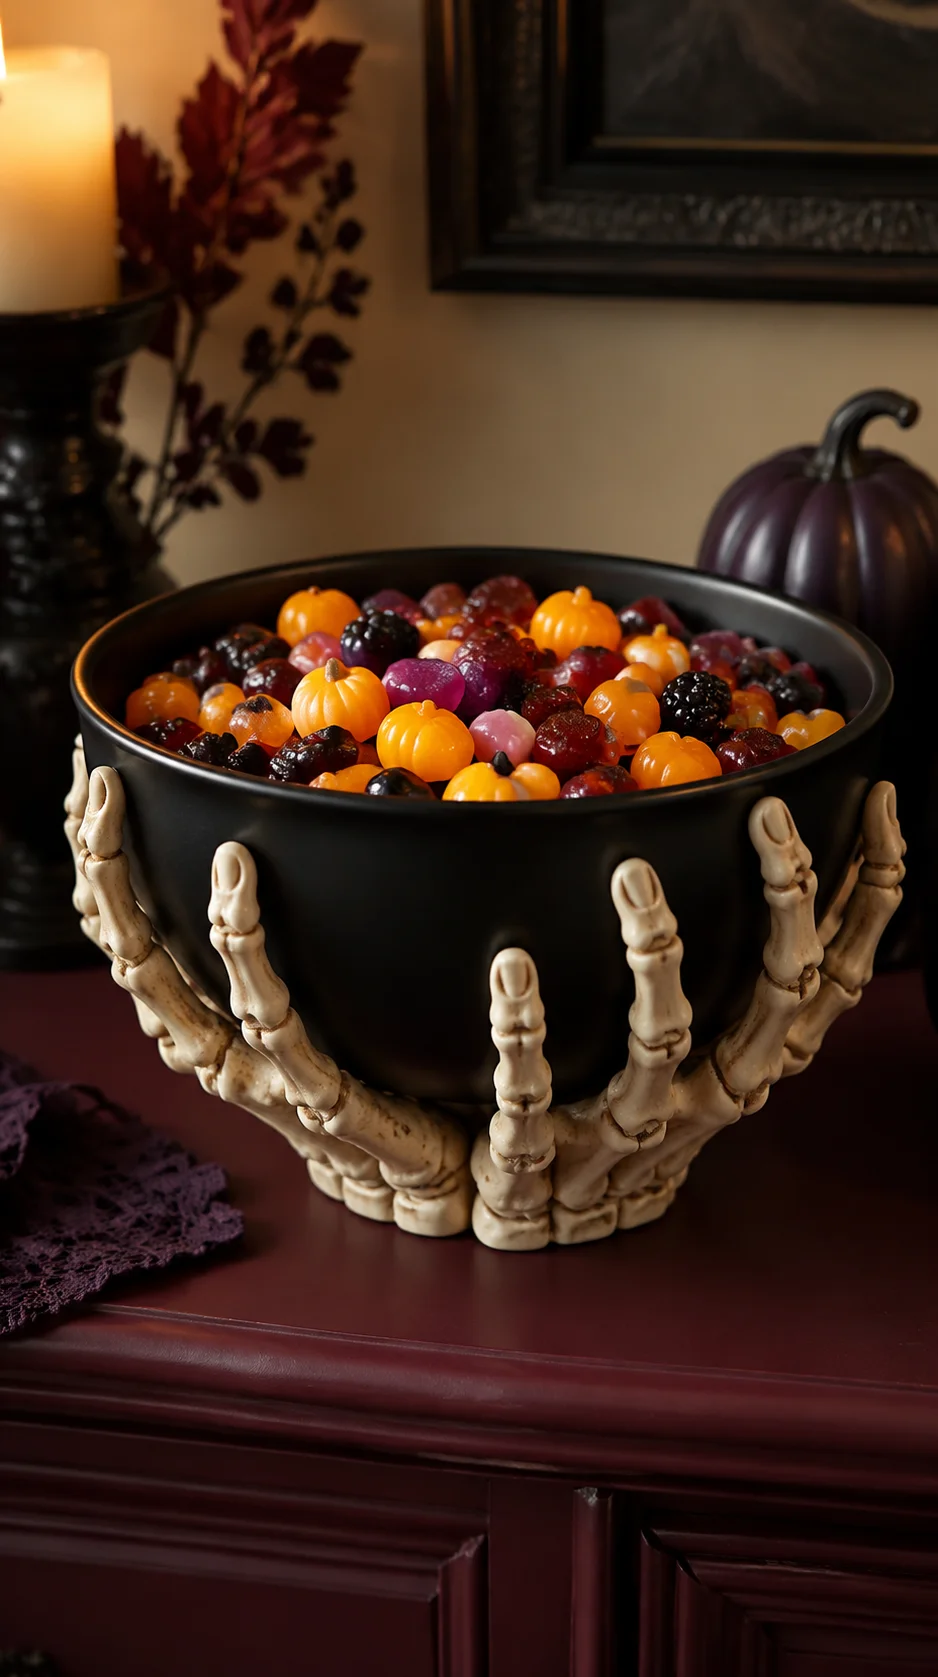 Give an inexpensive serving bowl a spooky makeover by attaching lightweight skeleton hands around the outside. Paint the bowl matte black and brush a little silver or gray over the raised details for an aged finish. Use it to serve wrapped candy at a party or fill it with decorative mini pumpkins for a Halloween centerpiece. Make sure any glue and paint remain on the outside and away from food.
4
Black Rose and Skull Wreath
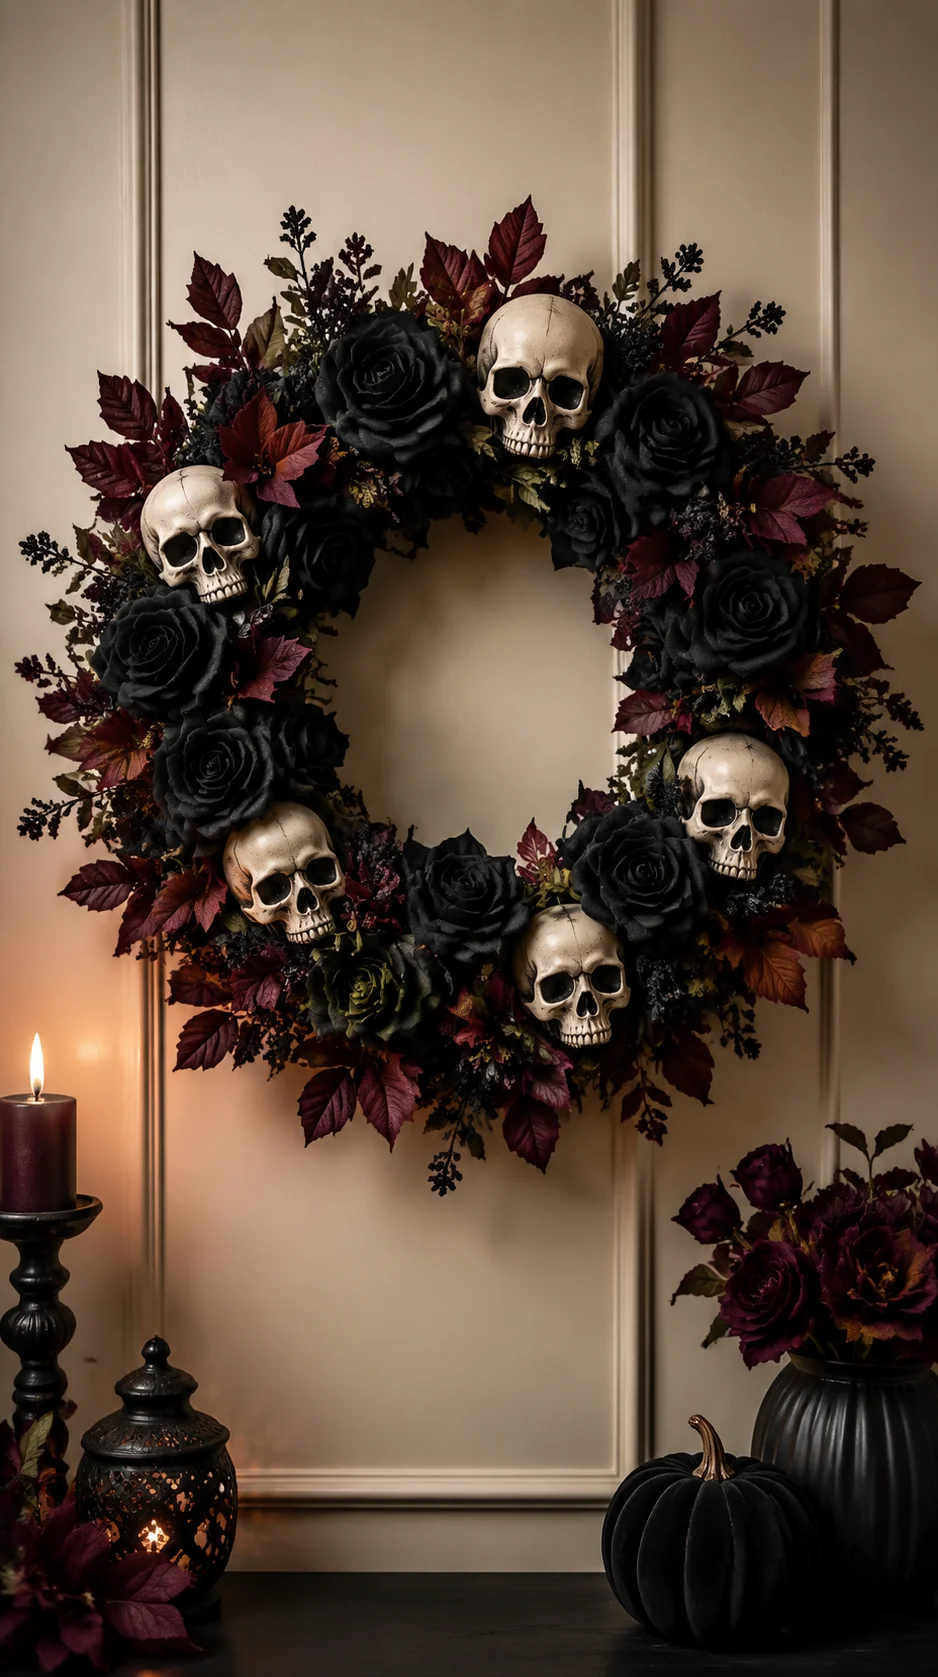 Attach black faux roses to a grapevine wreath and tuck miniature skulls between the flowers. Deep burgundy flowers, velvet ribbon, or dark greenery can add dimension without softening the gothic mood. Concentrate most of the flowers on one side of the wreath for a modern asymmetrical design. Hang it above a mantel or on a covered front door where the dark colors will remain rich.
5
Rustic Wooden Ghost Family
 Turn leftover fence pickets or scrap wood into a charming family of ghosts. Cut or round the tops, sand rough edges, and paint each board white before adding simple black faces. Make the ghosts in different heights and lean them together near a fireplace, entry table, or covered porch. Distress the white paint lightly if you prefer a rustic farmhouse look.
Helpful tool:
Acrylic paint pens make it easier to add clean faces, names, and small decorative details.
6
Vintage Halloween Potion Bottles
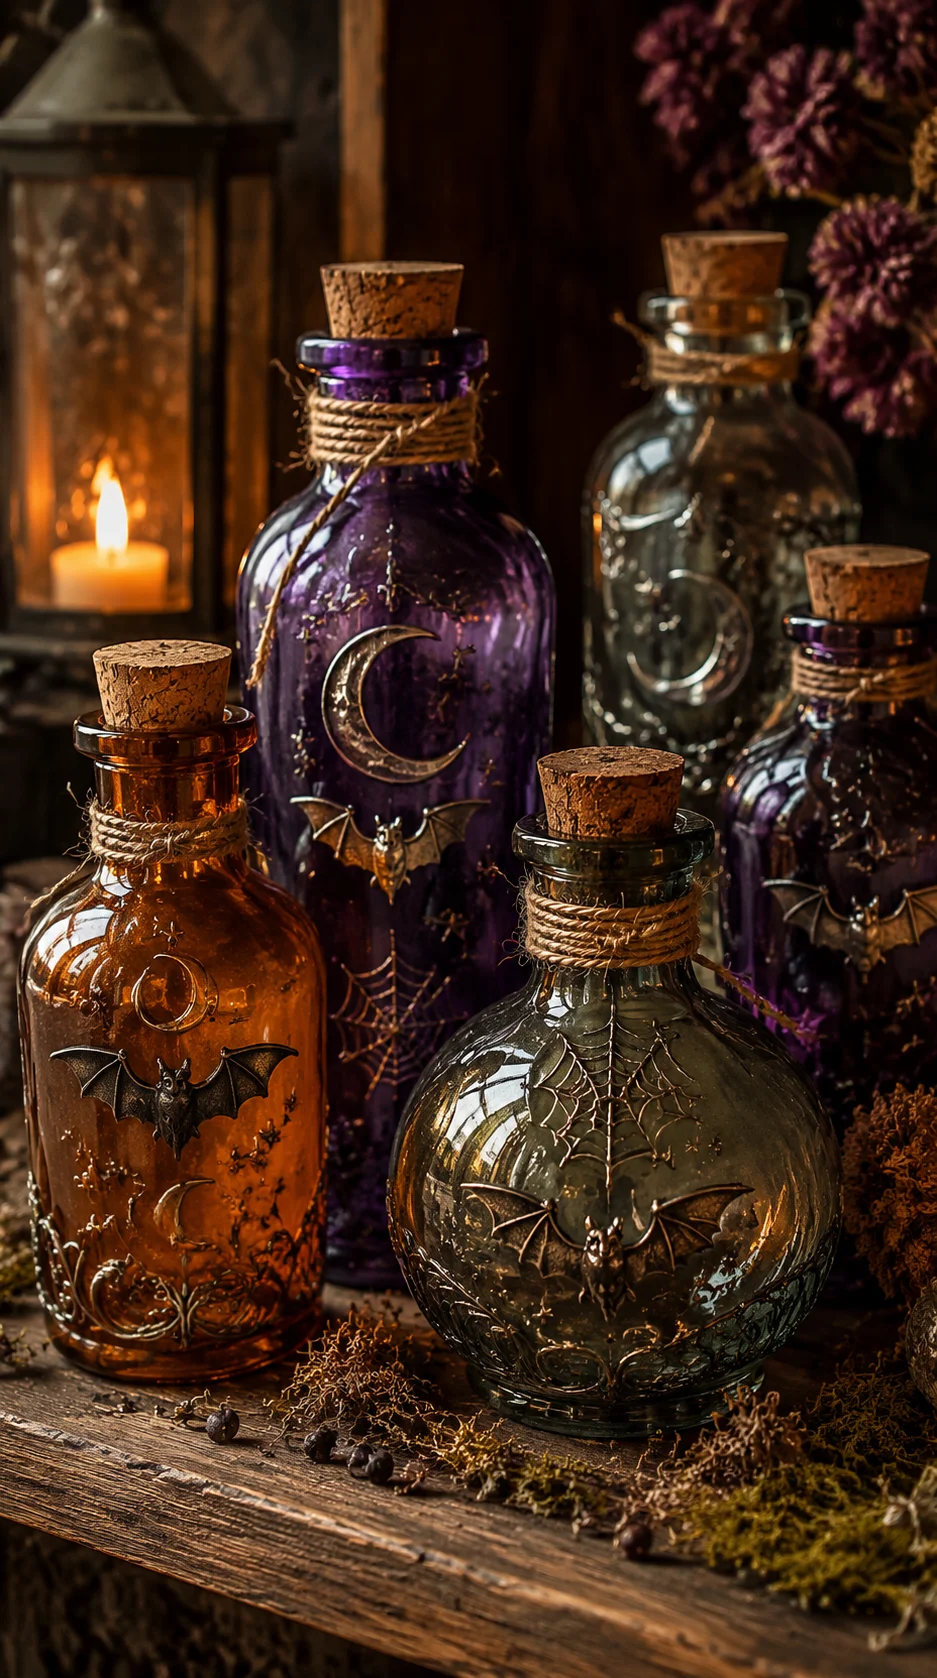 Collect small jars and interesting glass bottles, then add printable labels with names such as Moon Dust, Spider Venom, or Witch’s Elixir. Tint the bottles with watered-down paint or fill them with colored water for display. Group bottles on a tray with an old book, a candle, and a small cauldron. Varying their heights and shapes will make the arrangement look like a mysterious potion cabinet.
7
Halloween Acrylic-Pour Rocks
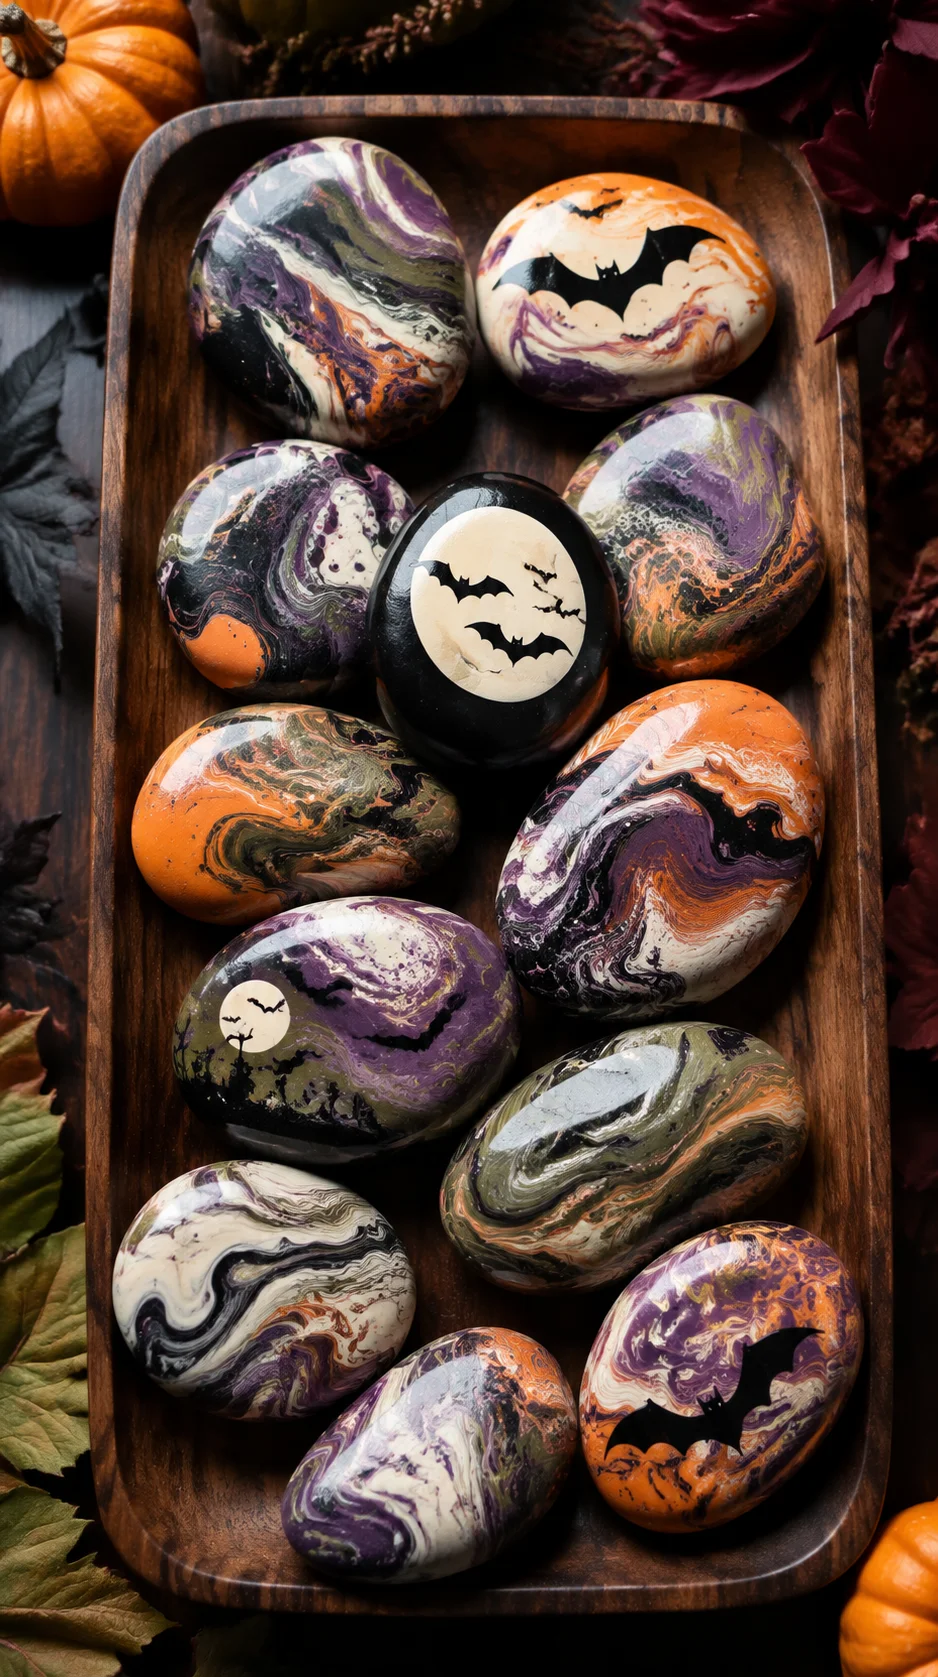 Use black, orange, white, purple, and green acrylic paint to create swirling patterns on smooth rocks. Once dry, add small bats, spiderwebs, eyes, or ghost faces with a paint pen. Display the rocks in a shallow bowl, around planters, or beside flameless candles. Apply a clear craft sealer if you plan to place them outdoors.
8
Handmade Wizard Wands
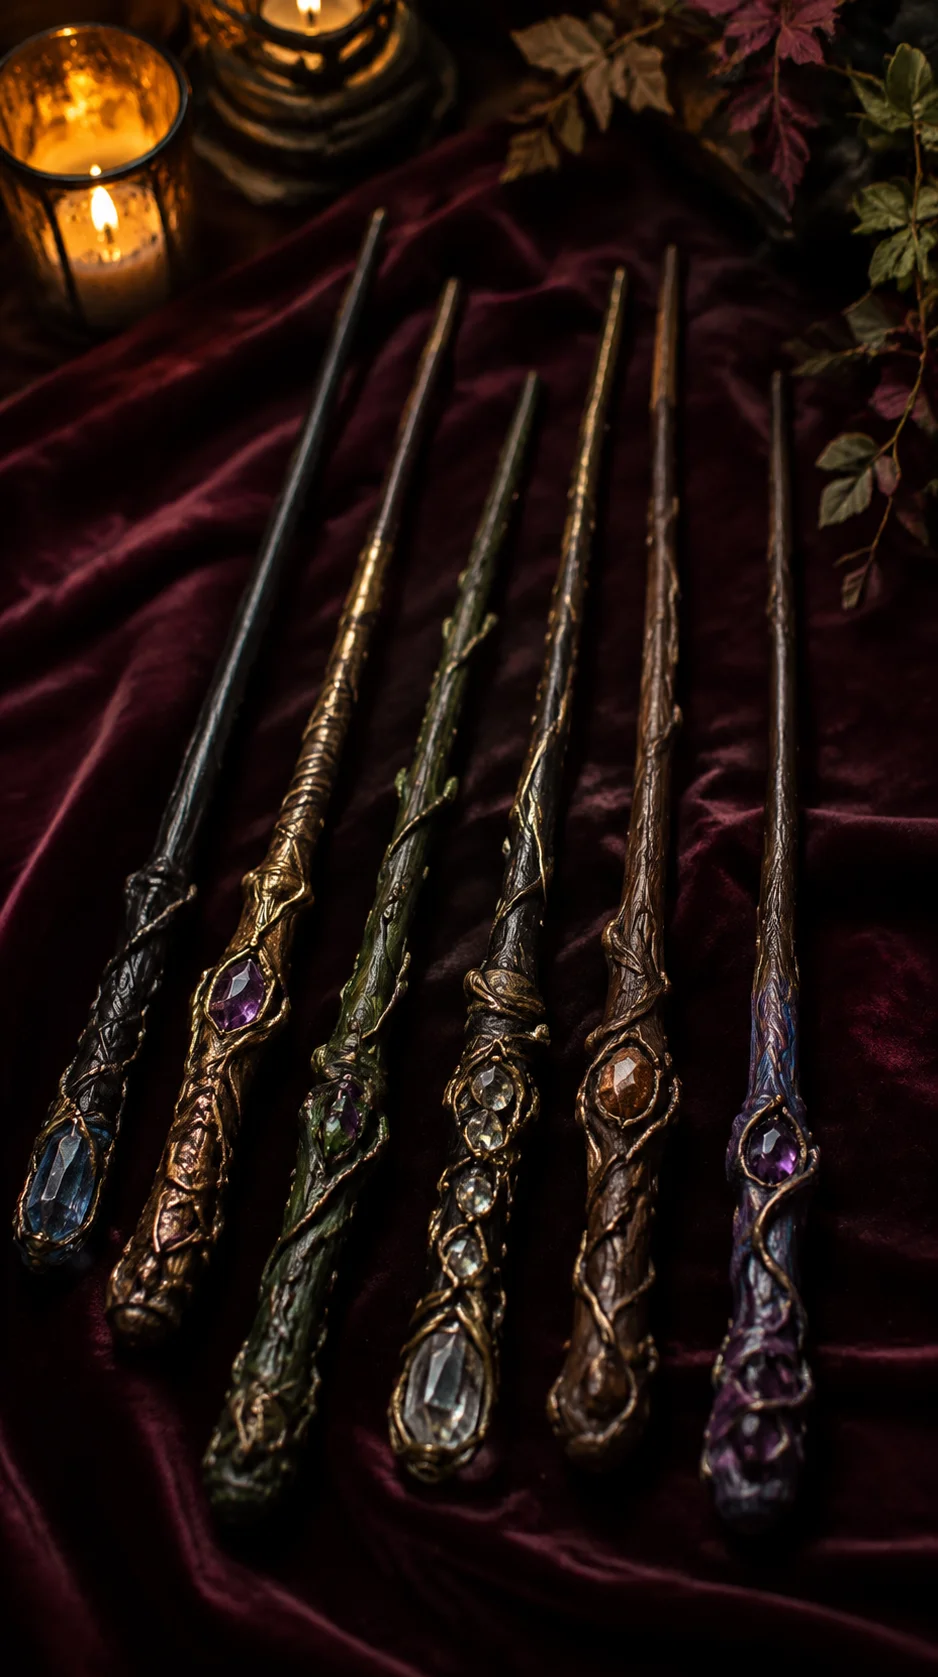 Transform wooden dowels or sturdy chopsticks into decorative wizard wands. Build texture with hot glue, allow it to cool completely, and cover the wand with layers of brown, black, bronze, or silver paint. Highlight the raised details with a lighter metallic color so the texture stands out. Use the finished wands for costumes, party favors, place settings, or a magical Halloween display.
Craft-night essential:
A low-temperature glue gun is useful for adding raised details to small craft projects.
9
Home Sweet Haunted Home Embroidery
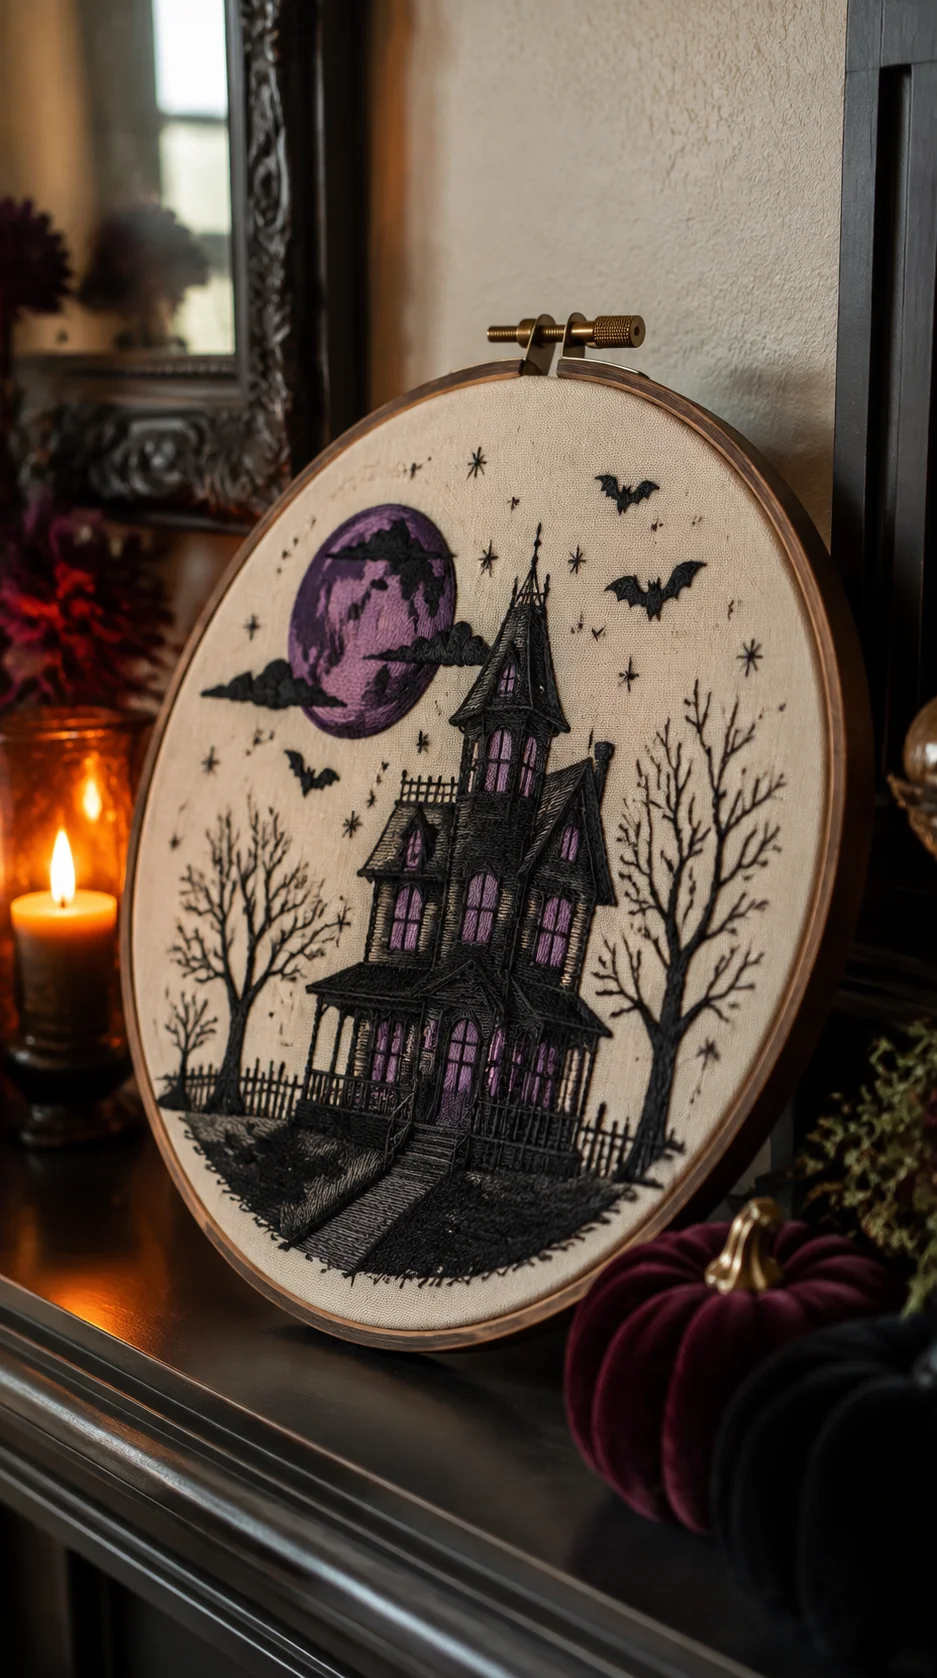 Create a small embroidered wall decoration featuring a haunted house, crescent moon, bats, or the phrase “Home Sweet Haunted Home.” Black fabric paired with white, orange, and metallic thread creates a striking contrast. Leave the finished design inside its embroidery hoop and add a ribbon for hanging. It is an easy way to introduce handmade Halloween decor without using shelf or table space.
10
Easy Halloween Mummy Gnome
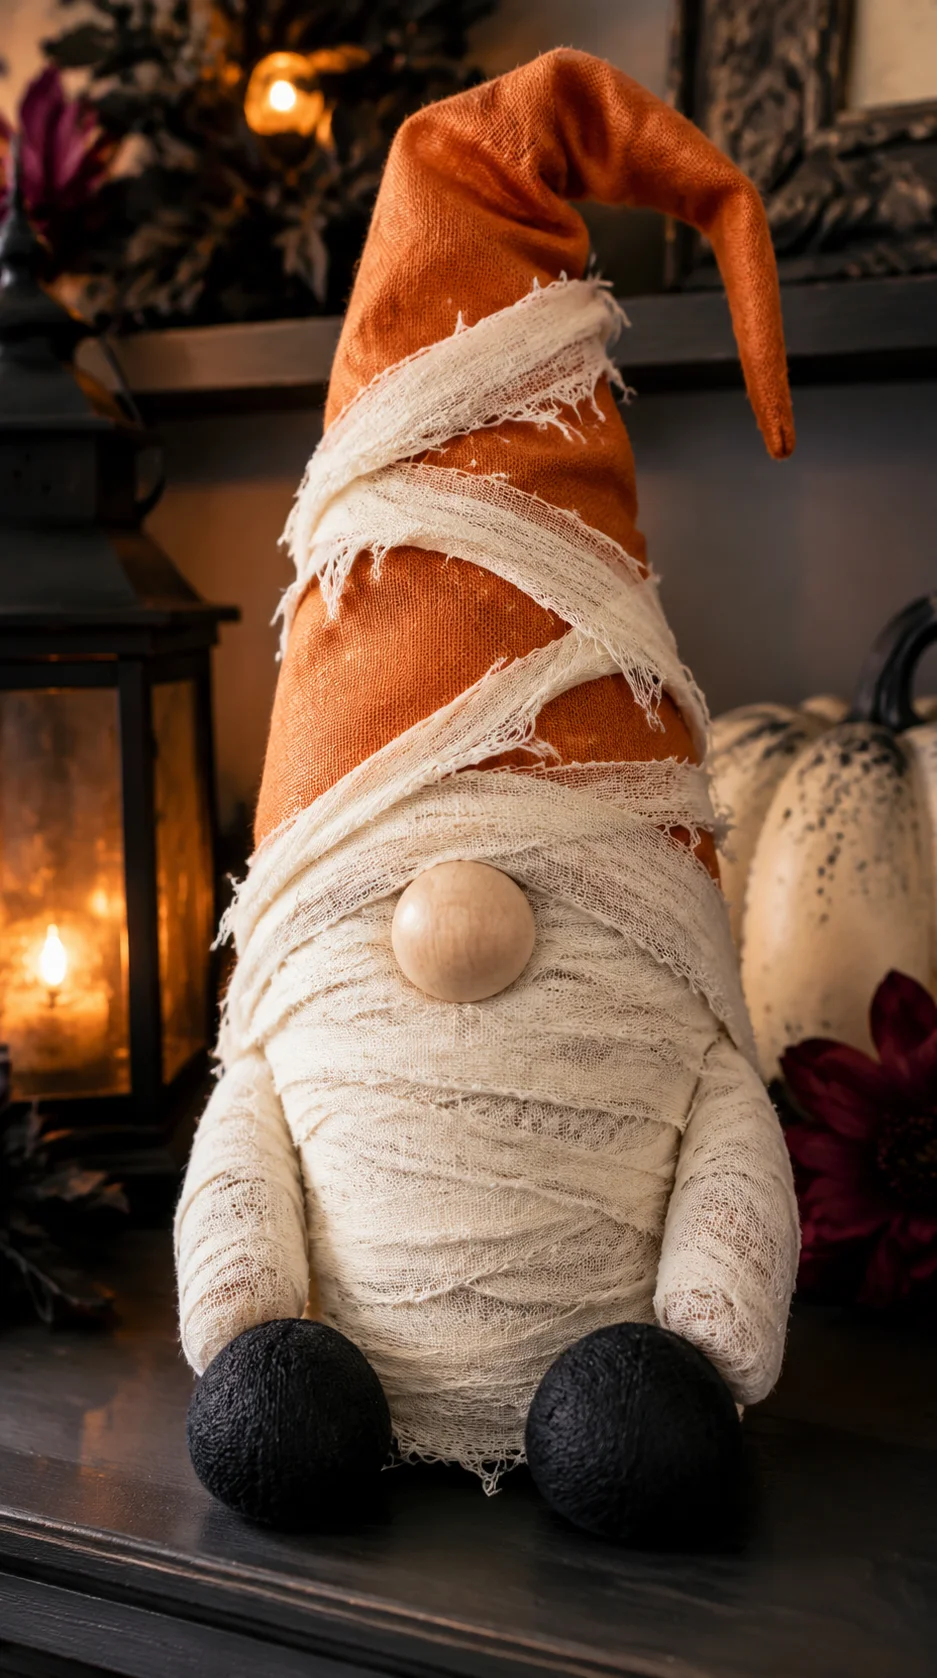 Make a soft Halloween gnome using a fabric-covered body, a faux-fur beard, a round wooden nose, and strips of white gauze. Wrap the pointed hat loosely so it resembles an old mummy covering. Place the finished gnome on a tiered tray, bookshelf, or mantel. Add a miniature pumpkin or tiny sign to its hands for another layer of personality.
11
Rustic Pumpkin Wood Sign
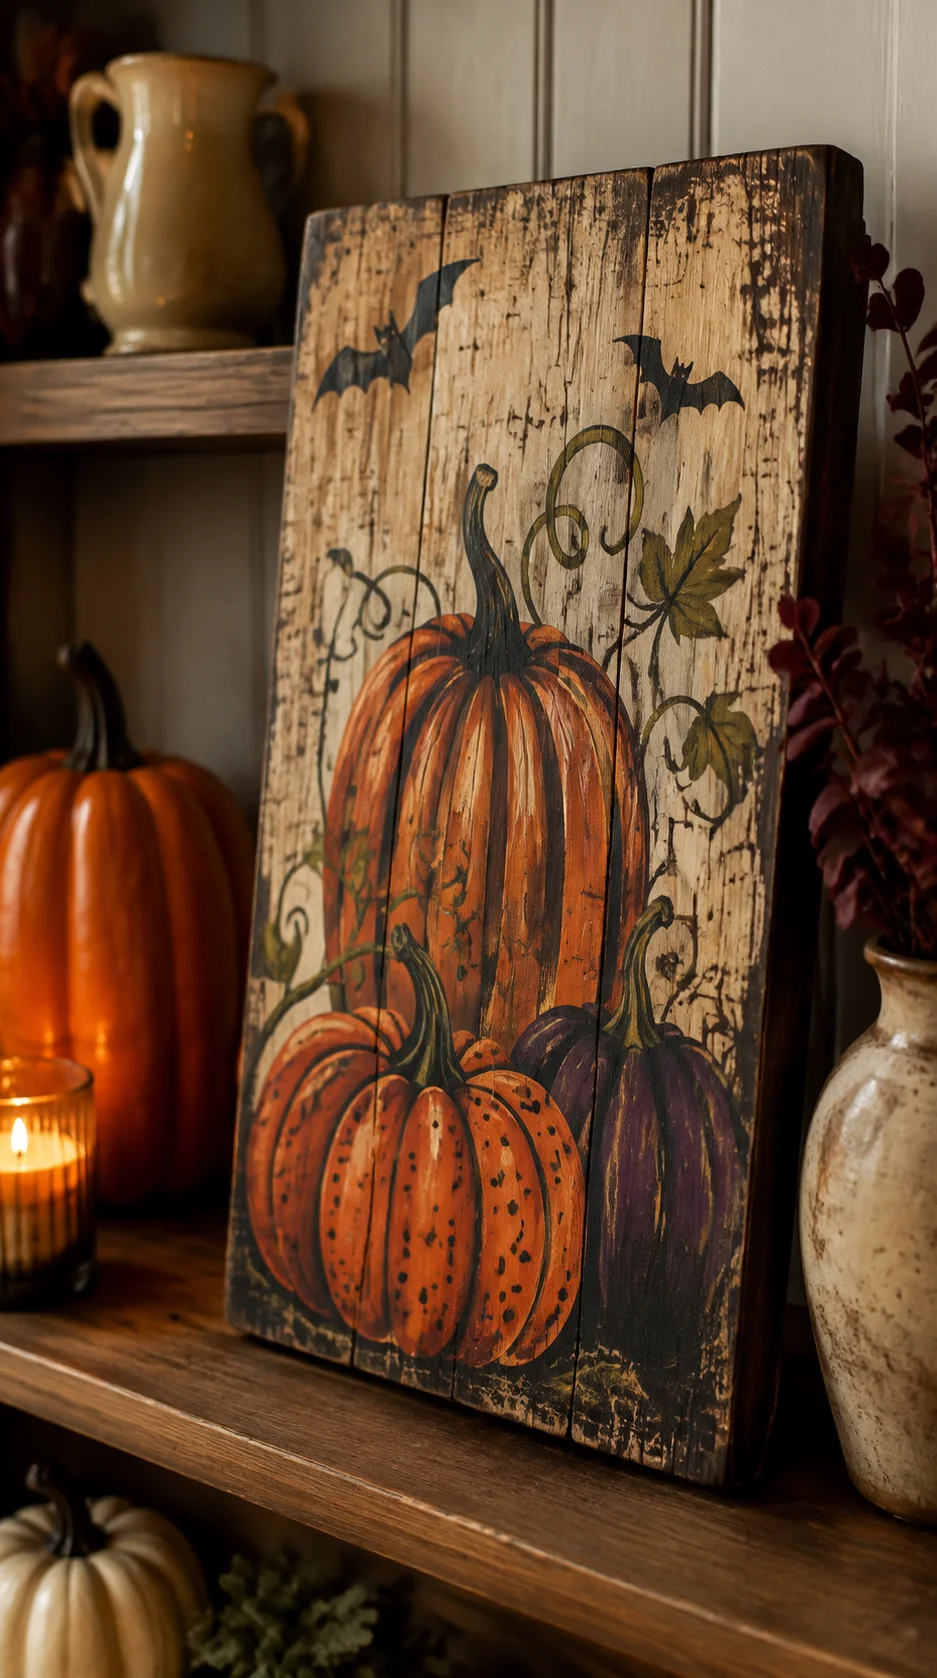 Paint an unfinished wood cutout or scrap board in muted orange, white, or black. Add a pumpkin outline, simple Halloween message, or patterned vinyl design to the front. Finish the sign with a raffia bow, gingham ribbon, or small faux leaves. Seal it with an outdoor-rated clear finish if it will be displayed on a covered porch.
Easy lettering option:
Reusable alphabet stencils help create clean lettering without a cutting machine.
12
Pumpkin-Style Party Glasses
 Decorate the outside of inexpensive drinking glasses with pumpkin faces using paint made for glass. Choose several different expressions so every guest can identify their glass during a Halloween party. Keep the design below the rim and follow the paint manufacturer’s curing instructions. These festive glasses can also hold wrapped treats, flowers, or battery-powered candles.
13
Old-Fashioned Apple-Head Witches
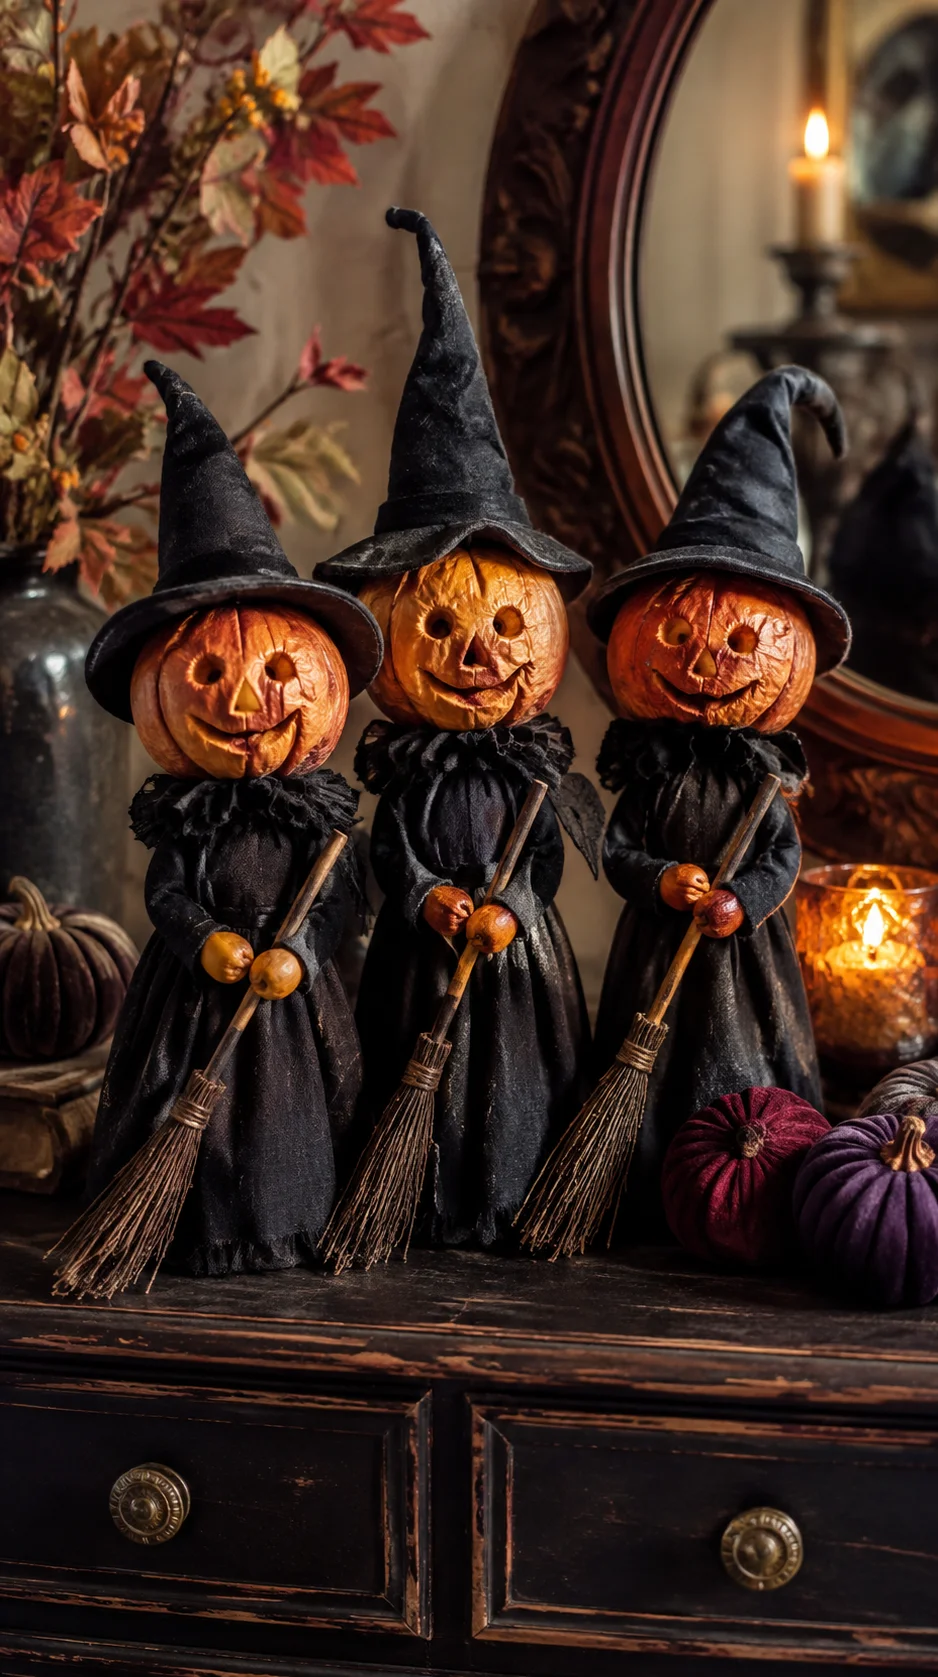 Carve simple faces into peeled apples and allow them to dry and wrinkle naturally. Once completely dried, add yarn hair, tiny hats, and fabric clothing to turn each face into an old-fashioned witch. Display the finished witches in small chairs, beside potion bottles, or around a miniature cauldron. Their imperfect expressions give every figure its own wonderfully strange personality.
14
DIY Halloween Resin Jewelry
 Create seasonal pendants or earrings with jewelry resin molds and tiny decorative pieces. Miniature bats, glitter, dried flowers, moons, and black-and-orange color combinations all work beautifully. Add a chain or earring hardware after the resin has cured fully. Handmade Halloween jewelry also makes a thoughtful party favor or seasonal gift for a friend.
Jewelry-making supplies:
Halloween silicone molds are available in small shapes suitable for pendants and earrings.
15
Black-and-White Striped Painted Rocks
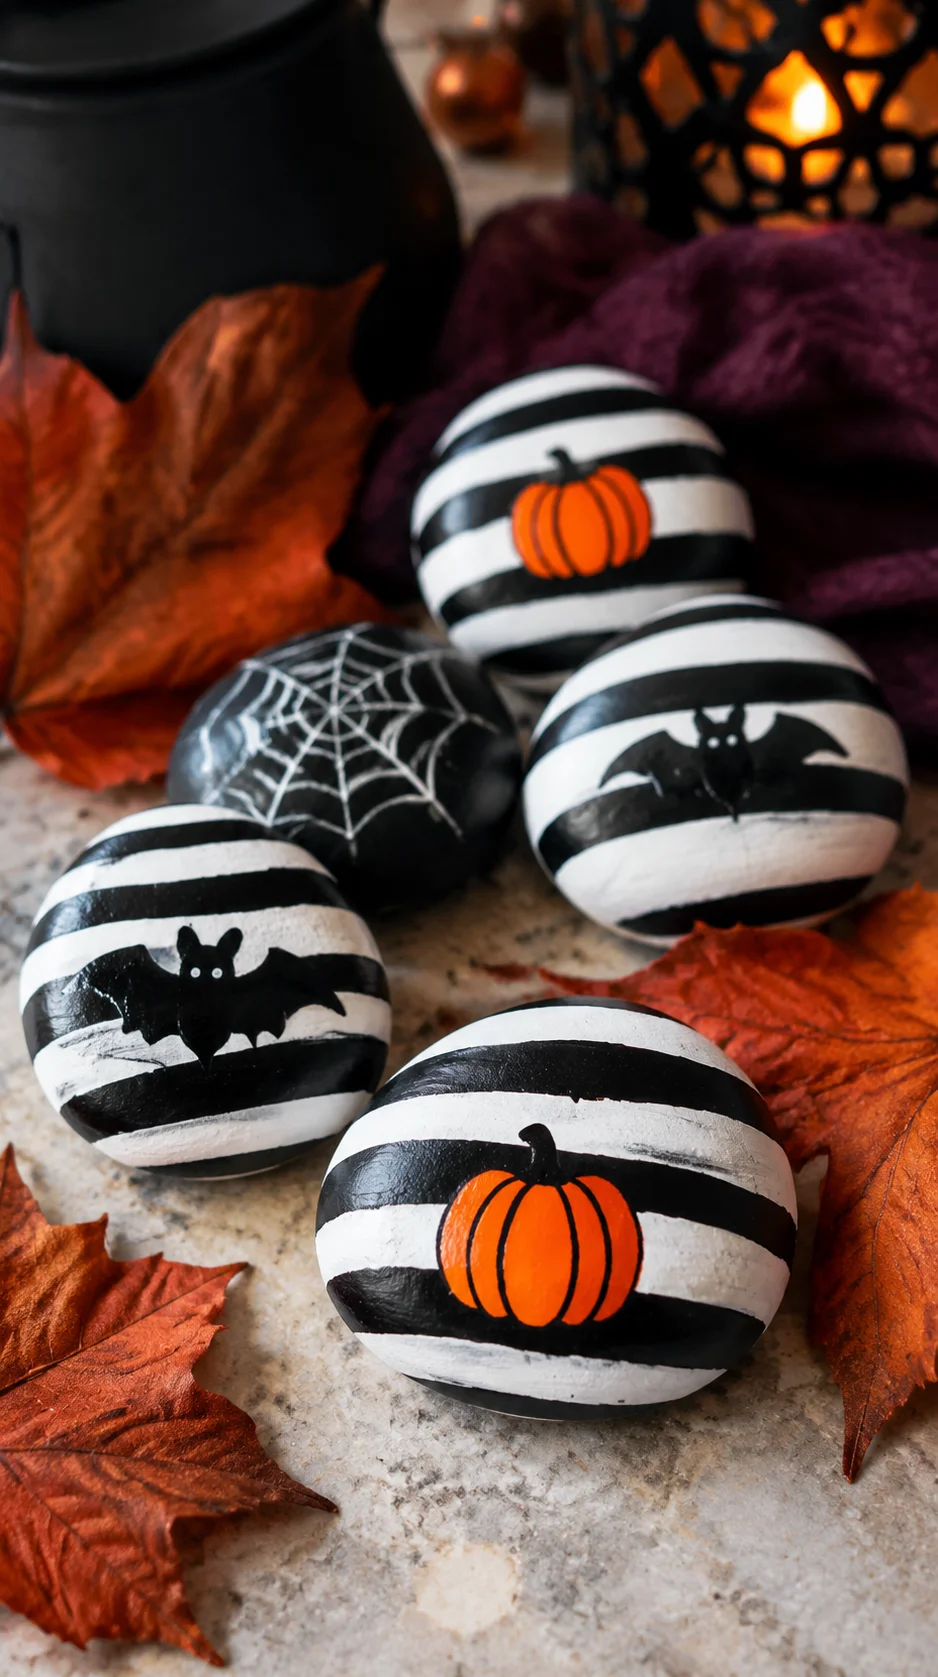 Paint smooth rocks with bold black-and-white stripes, checkerboard patterns, and neon green accents. Add cartoon eyes or abstract swirls for a quirky Halloween look. Use the rocks as paperweights, vase filler, party-table accents, or additions to indoor planters. Seal the paint when it is dry to protect the design from scratches.
16
Light-Up Mop-Head Ghosts
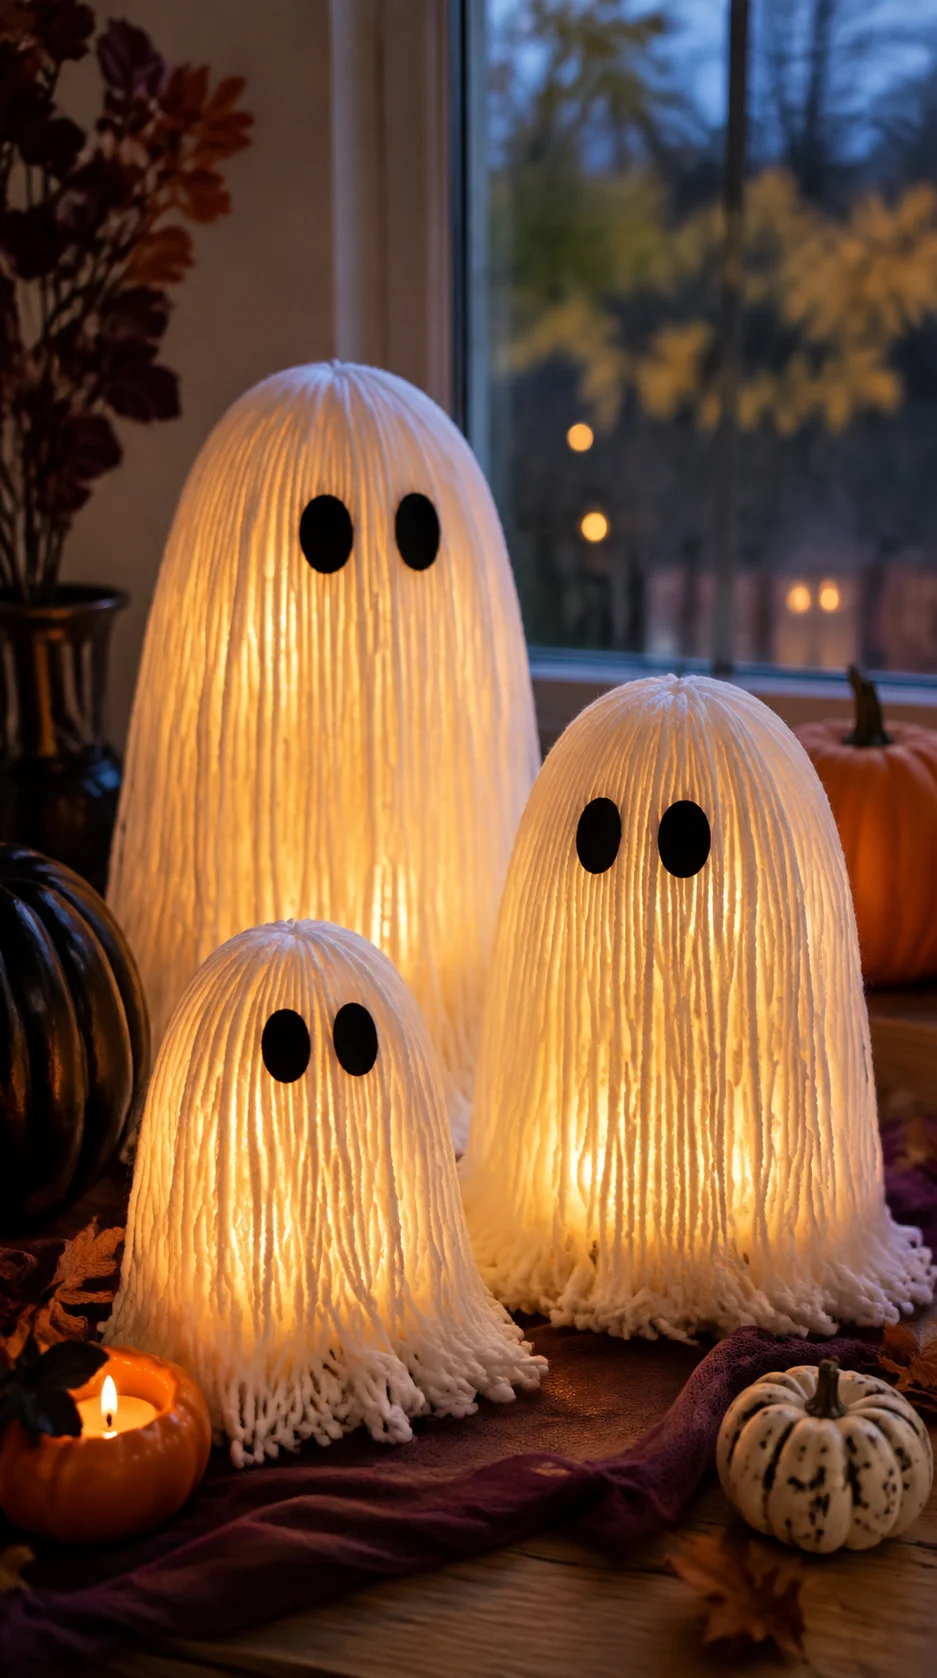 Turn clean white mop heads into soft, fluffy ghosts by arranging them over a foam form or lightweight base. Add a simple hat, felt eyes, and a small nose to give each ghost its own expression. Place battery-operated lights underneath or around the base for a gentle glow. A pair of different-sized ghosts looks especially charming on a mantel, shelf, or entry table.
17
Candy Corn Candle Holder
 Give an old glass candle holder a candy-corn makeover with bands of white, orange, and yellow paint. Frosted paint or a lightly textured finish can help the colors look softer when illuminated. Place a flameless candle inside and use the holder on a mantel, dining table, or kitchen counter. Create a set of three in different heights for a more substantial centerpiece.
Safer candlelight:
Flameless candles create a warm glow without placing a flame near paint, fabric, or paper decorations.
18
Scandinavian Felt Halloween Decor
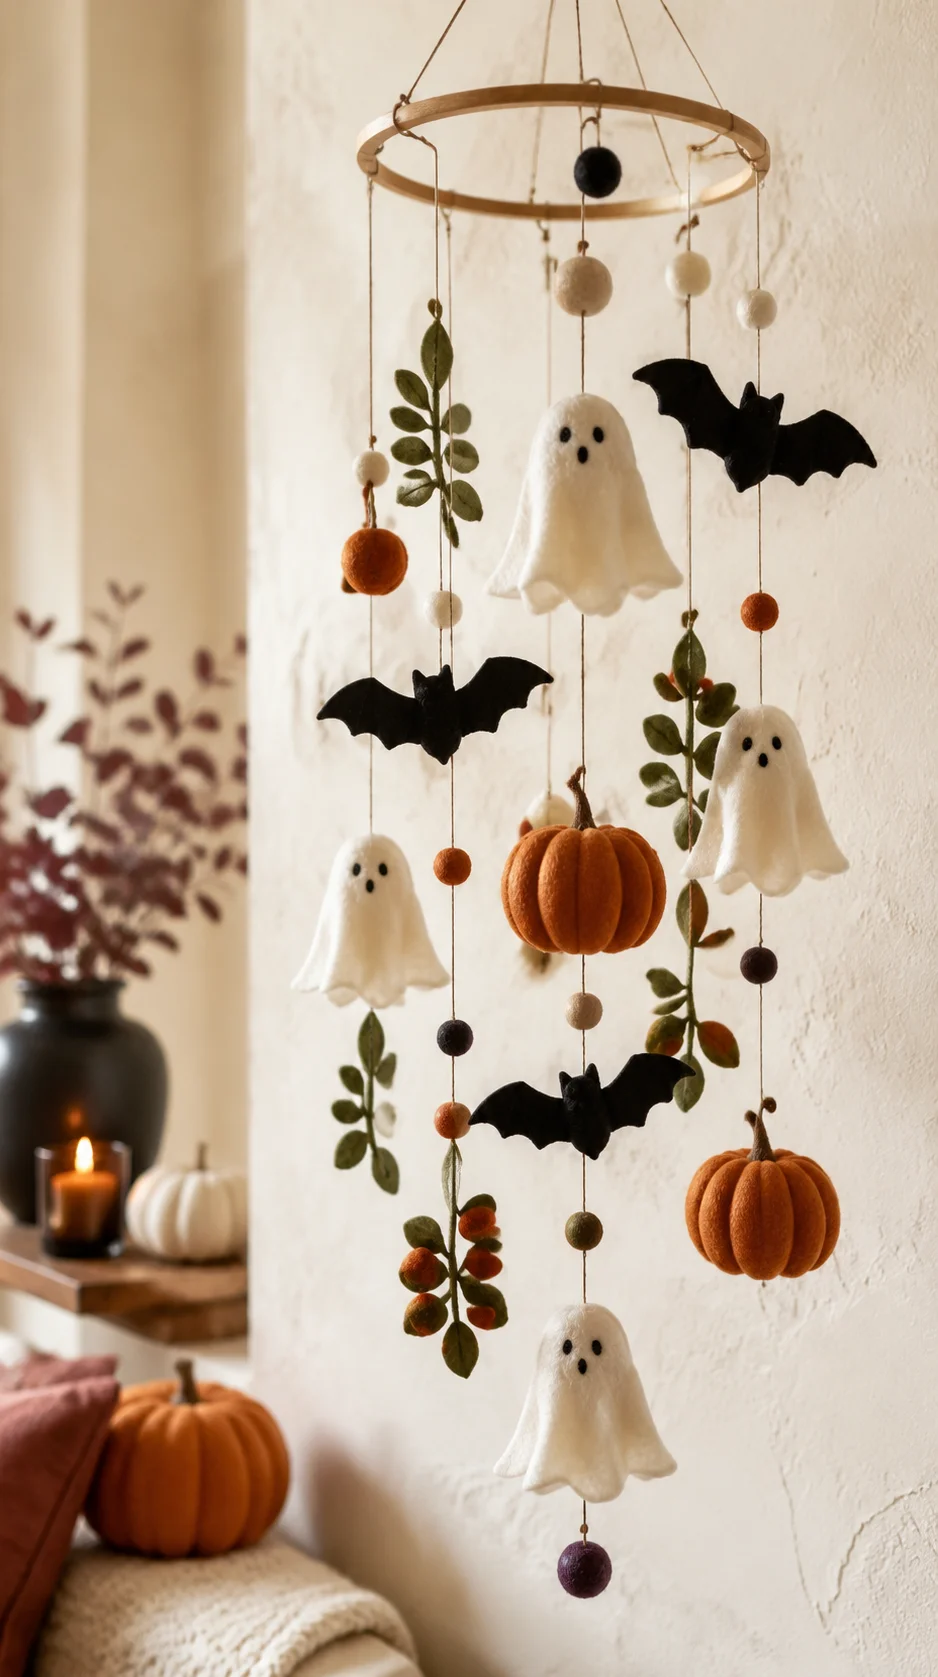 Cut simple skulls, ghosts, pumpkins, moons, or cats from wool-blend felt. Decorate them with basic embroidery stitches in white, black, rust, and mustard thread. Turn the finished shapes into a garland, hanging ornaments, coasters, or small stuffed decorations. The clean forms and muted colors offer a softer alternative to bright plastic Halloween decor.
19
Halloween Vinyl Candy Bowl
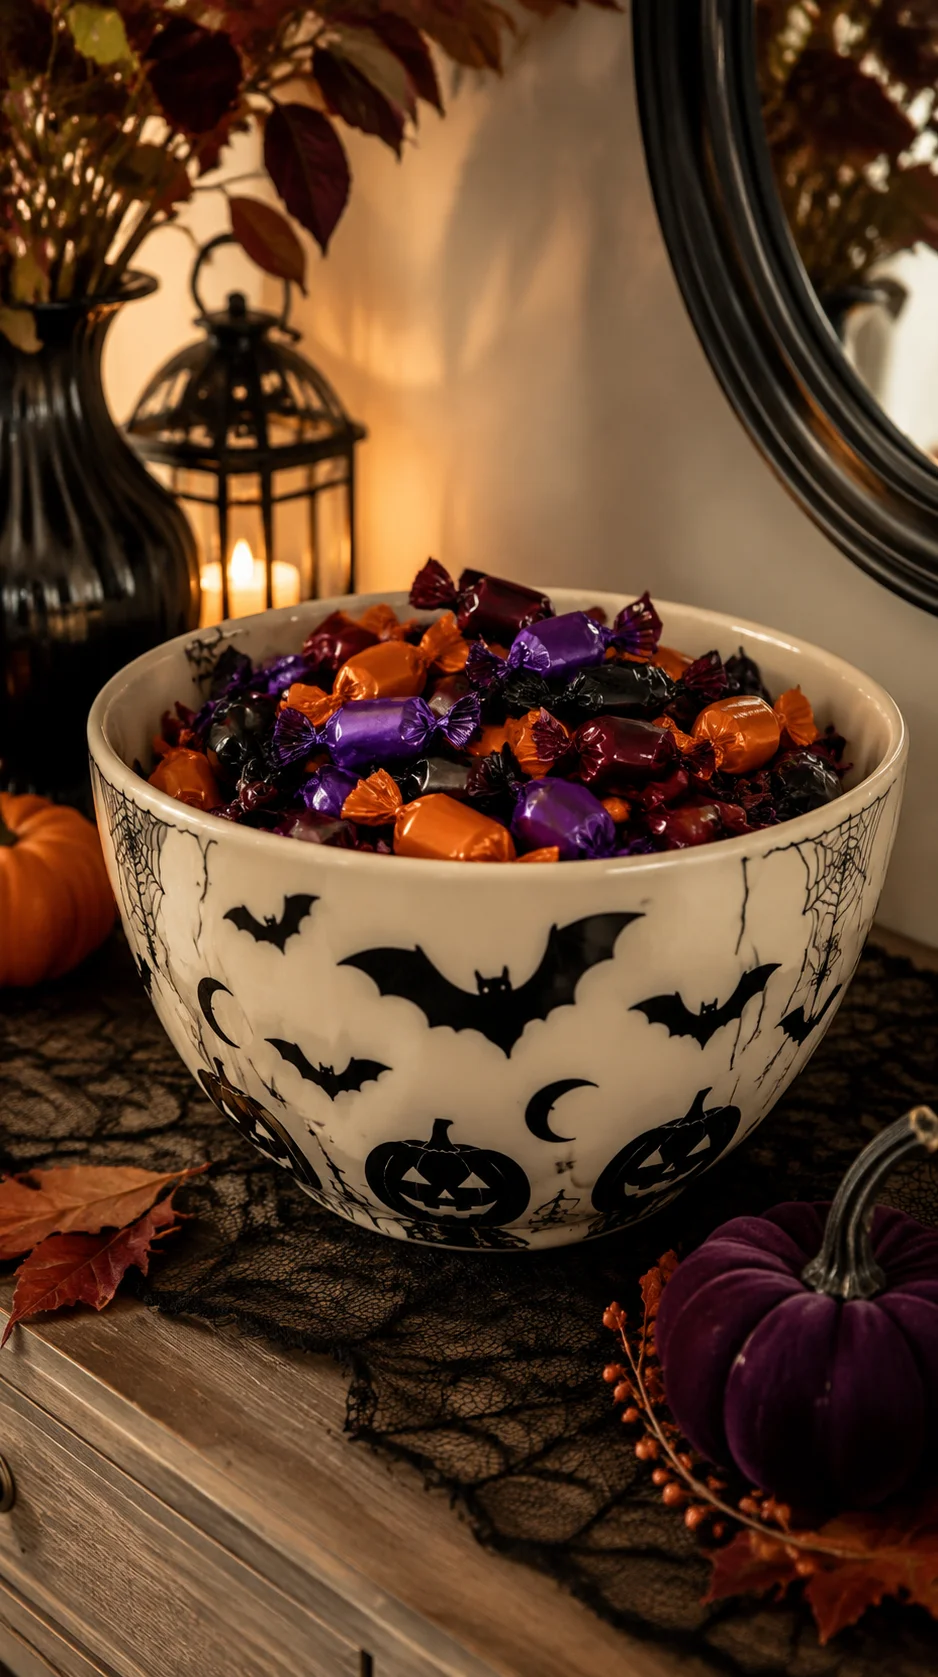 Apply a Halloween vinyl design to a plain bowl, bucket, or container. Bats, pumpkins, ghosts, and short seasonal phrases are easy to cut and arrange on a smooth surface. Fill the finished bowl with wrapped candy or use it to hold small craft supplies during a Halloween party. Choose removable vinyl if you want to reuse the container after the season.
20
Spiderweb Punch-Needle Art
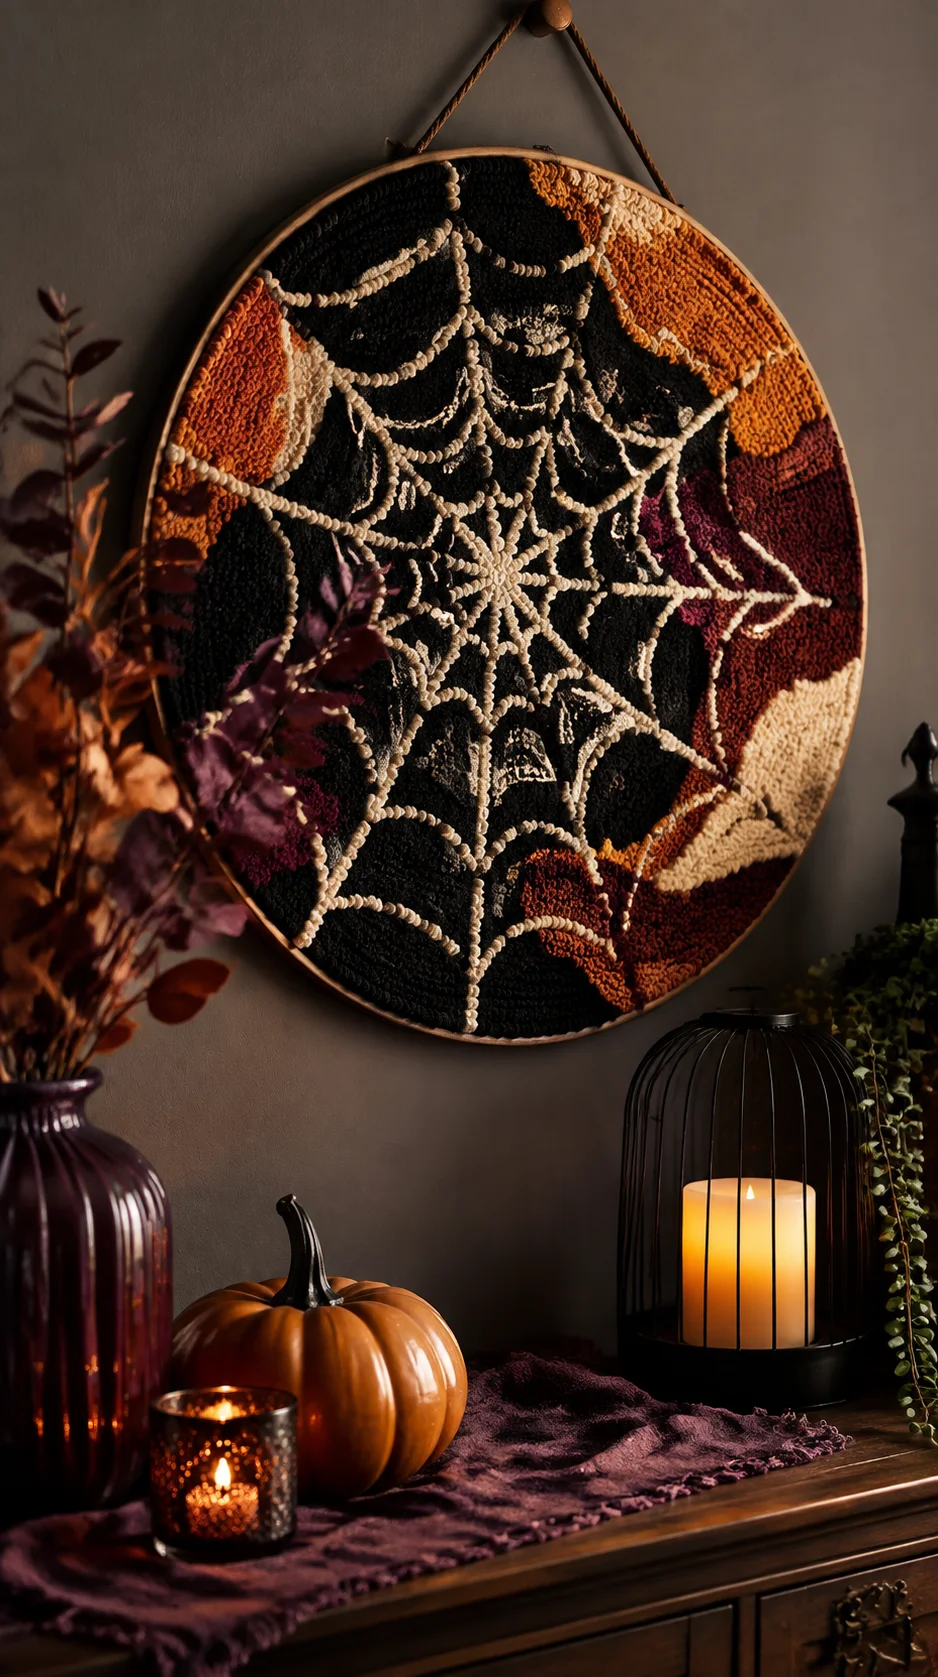 Create a soft spiderweb design with punch-needle fabric and thick black-and-white yarn. Work the design inside a round frame so the finished piece can be displayed as wall art. You can also turn the design into a decorative mat for a covered surface. Add a small orange or purple spider to introduce a playful pop of color.
Try this textile craft:
A beginner punch-needle kit can provide the basic tool, fabric, and frame needed to practice.
21
DIY Yarn Ghost Garland
 Wrap white yarn around a small piece of cardboard, tie the bundle at the top, and cut the loops at the bottom. Add black felt eyes and arrange several ghosts along a length of twine. Hang the garland across a mantel, window, mirror, or party backdrop. Mix in wooden beads or small orange tassels if you want to introduce more color.
Halloween Craft Shopping Checklist
| Item | Best For | Amazon Search |
|---|---|---|
| Acrylic craft paint | Wood, rocks, signs, and containers | Shop on Amazon |
| Hot glue gun | Wreaths, garlands, and fabric crafts | Shop on Amazon |
| Felt sheets | Garlands, ornaments, and small figures | Shop on Amazon |
| Grapevine wreath forms | Skull and black rose wreaths | Shop on Amazon |
| Flameless lights | Ghosts, jars, and candle holders | Shop on Amazon |
| Clear craft sealer | Protecting painted projects | Shop on Amazon |
Best Color Palettes for Adult Halloween Crafts
Classic Halloween
Pumpkin orange, black, cream, and a small amount of purple.
Witchy Jewel Tones
Deep purple, emerald green, black, and antique gold.
Neutral Haunted House
Aged white, charcoal, weathered brown, and faded black.
Vintage Halloween
Burnt orange, mustard yellow, ivory, and muted red.
Elegant Gothic
Matte black, burgundy, dark green, and brushed gold.
Common Crafting Mistakes and Safety Tips
- Skipping preparation: Clean glass, sand rough wood, and protect the work surface before beginning.
- Using too many colors: Limit most projects to three or four coordinating colors for a more polished result.
- Rushing drying time: Allow paint, glue, sealer, and resin to cure according to the product instructions.
- Using the wrong glue: Choose an adhesive suitable for the materials and the project’s indoor or outdoor location.
- Working without ventilation: Use paint, resin, spray sealer, and strong adhesive in a properly ventilated area.
- Leaving hot tools unattended: Place glue guns and heated tools on safe stands and unplug them after use.
- Using open flames: Choose flameless candles when decorating with yarn, paper, felt, gauze, moss, or dried materials.
Recommended Finds on Amazon
Halloween craft supply kit
Build a useful collection of seasonal materials for several small projects.
Miniature Halloween decorations
Add small skulls, bats, pumpkins, and spiders to wreaths and arrangements.
Halloween ribbon assortment
Finish wreaths, signs, garlands, and jars with coordinated patterns.
Battery-operated fairy lights
Bring a safe glow to ghosts, jars, wreaths, and tabletop crafts.
Frequently Asked Questions
What are the easiest Halloween crafts for beginners?
Yarn ghost garlands, painted rocks, potion bottles, wooden signs, and felt decorations are excellent beginner projects. They require basic supplies and allow plenty of room for personalization.
Where can I find inexpensive Halloween craft supplies?
Check dollar stores, thrift shops, clearance aisles, recycling bins, and your existing craft collection. Glass jars, scrap wood, old frames, fabric, and basic serving pieces can all be repurposed.
How early should I begin making Halloween crafts?
Beginning in late August or September gives you plenty of time to complete several projects. Crafts that require drying, curing, or detailed stitching should be started earlier.
How can I protect handmade Halloween decorations?
Use a compatible clear sealer on painted pieces, store decorations in labeled containers, and wrap fragile items individually. Keep paper, felt, and yarn projects in dry indoor locations.
What Halloween crafts are good for an adult craft night?
Painted rocks, potion bottles, wizard wands, felt ornaments, simple wreaths, and decorated glasses work well for groups. Prepare basic supplies in advance and allow each person to choose their own colors and details.
Final Thoughts
Halloween crafting is an enjoyable way to decorate your home while creating pieces that feel more personal than store-bought decorations. Even simple materials can become impressive decor with a coordinated palette and a few thoughtful details.
Begin with an easy project such as painted rocks, yarn ghosts, or potion bottles. Once you feel inspired, try a larger project like a mossy wreath, wooden ghost family, or punch-needle wall decoration.
Save your favorite leftover materials after each project. They can be mixed and matched to create even more easy Halloween crafts for adults next year.